Dear Reader,
Welcome dear Paper Wings Productions peeps! It is a pleasure to have you join me here today for the first ever Paper Wings Production design team blog hop. If you arrived from the fantastic Norma Gomez, you are in exactly the right place. Haven't you been inspired by the fabulous new Paper Wings Production design team?
If you stumbled upon this post, I recommend heading over to the The Aviary for all the details on how to win some *blog candy*. Make sure to leave some love along the way as you hop.
The theme for this blog hop is friendship to celebrate the launch of new design team. I decided to go with an idea that has been knocking around in my head for a while, has been popularized by Heidi Swapp (she calls hers memory files and they are pretty cool) and also uses up something that is now piling up at the office as we go digital: file folders.
I began with a plain white file folder, picked out the woodgrain patterned paper (a favorite of mine by Crate Paper), an older chevron paper from Basic Grey (from the Porcelain collection) along with a few papers from Dear Lizzy (mostly Neopolitan and a piece from 5th & Frolic) that I felt worked together. From there I picked out an assortment of stamps to decorate my file folder and a few simple cards to stash in the folder as a little present for a friend (adding crafting supplies like stamps and/or a gift certificate/gift card would also be a lovely addition).
The cover is quite a mix of stamping, pieces of patterned paper plus a few other elements like silver glitter fabric tape, washi tape, half a doily, embroidery thread, white spray mist and a button.
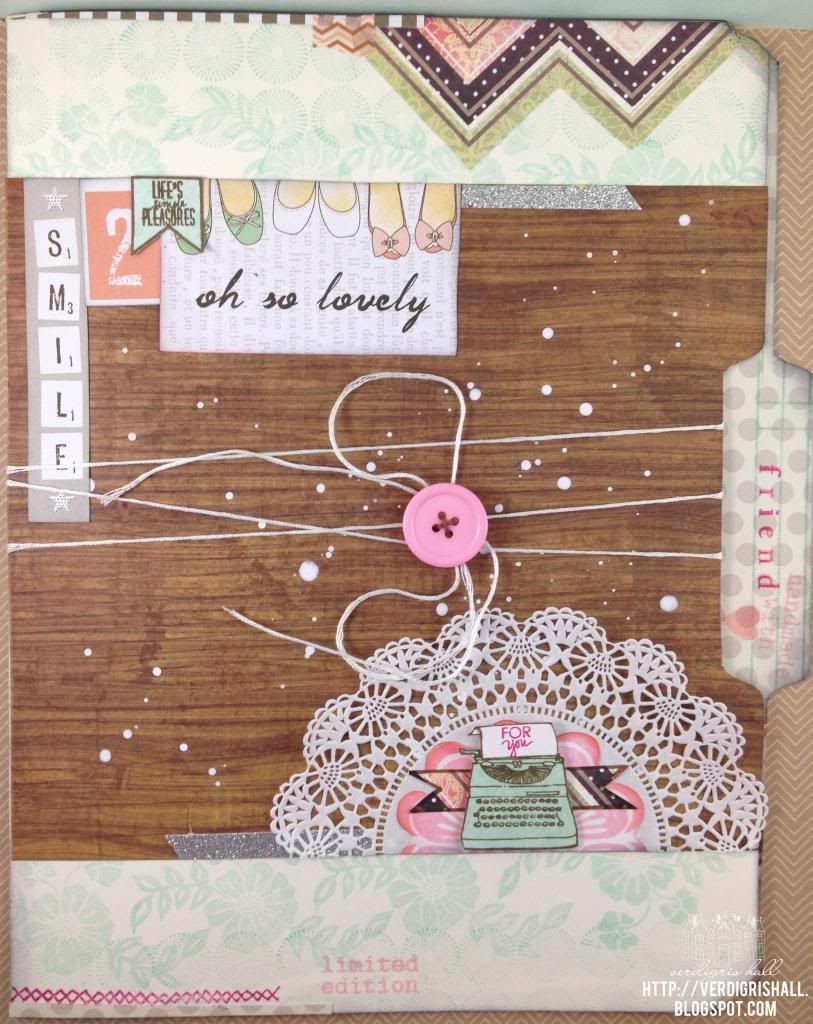
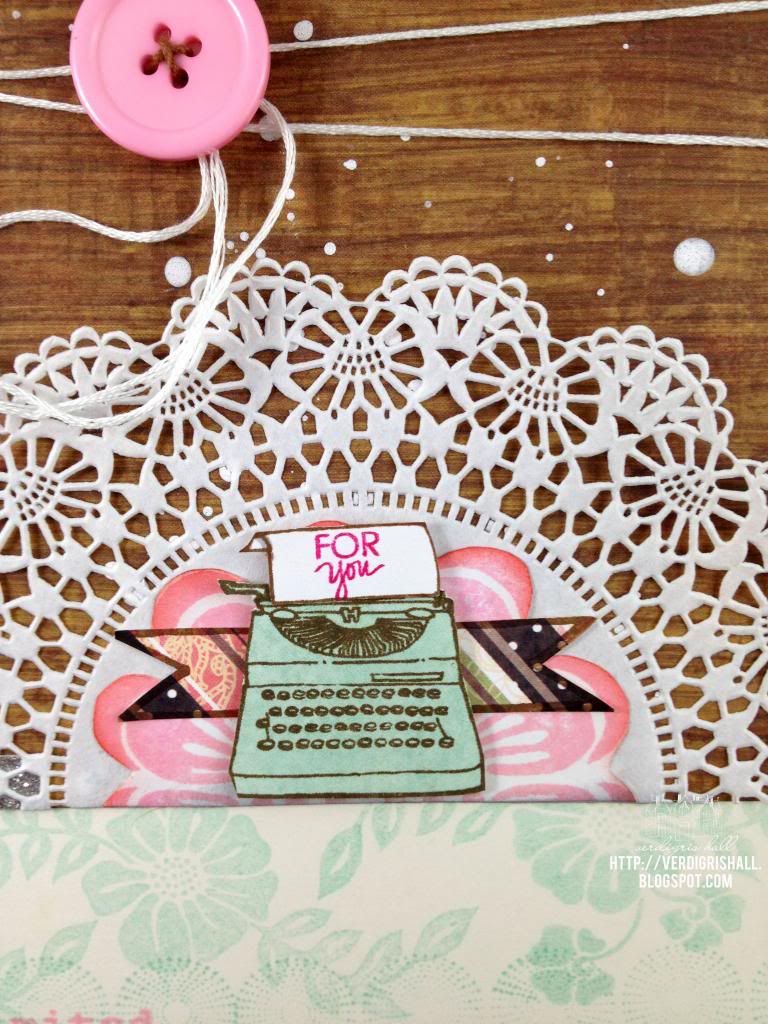
The little typewriter came from the awesome Vintage Technology and really helped to convey the correspondence and vintage look for this project. I stamped the "for you" from Sophie onto the little sheet of paper...so cute! Under the typewriter are two other stamped images. The two ended banner from Tabs and Banners which I stamped on the chevron paper and then the large half flower from Flower Power or Half Flower.
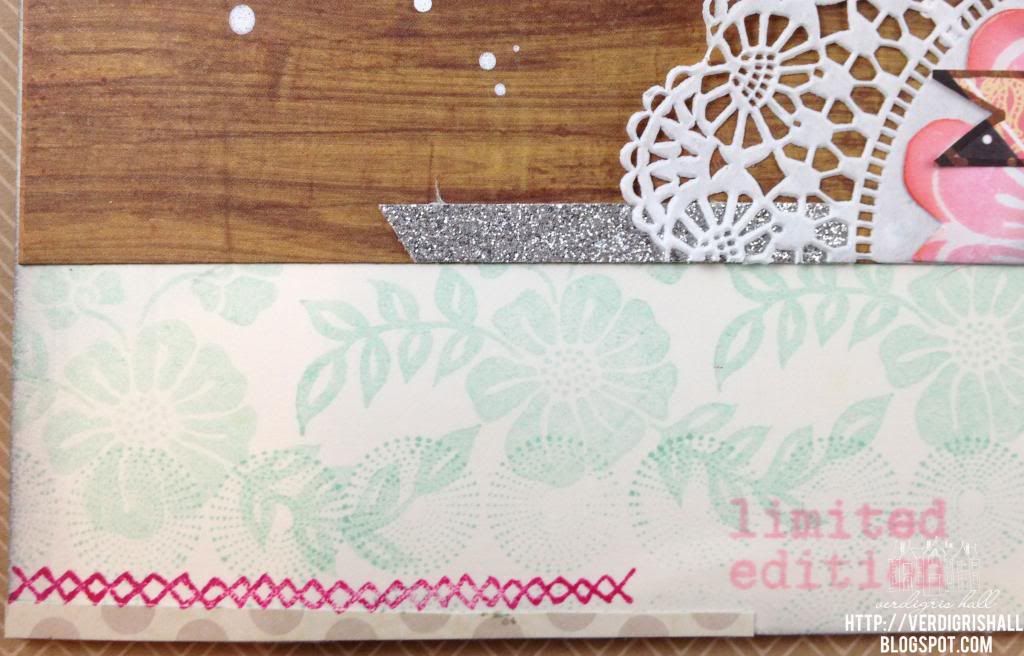
Directly on the file folder I stamped the flower from Flower Power and over stamped with the circle background from Backgrounds or Circles in the same ink color. Over that I stamped "limited edition" from Limited Edition and the border from Details Framer.
The top of the file folder was also stamped with the flower from Flower Power and over stamped with the circle background from Backgrounds or Circles in the same ink color. I created another little banner using Tabs and Banners on a piece of patterned paper and the sentiment is from Marcel.

I stamped the tab of the file folder first with Ledger Journaling Lines in aqua ink, stamped friend using Perfect Alphabet in fuschia ink and "handmade with" heart from the Handmade stamp set in pale pink ink. I chose the outline heart and colored it in with a Copic marker.

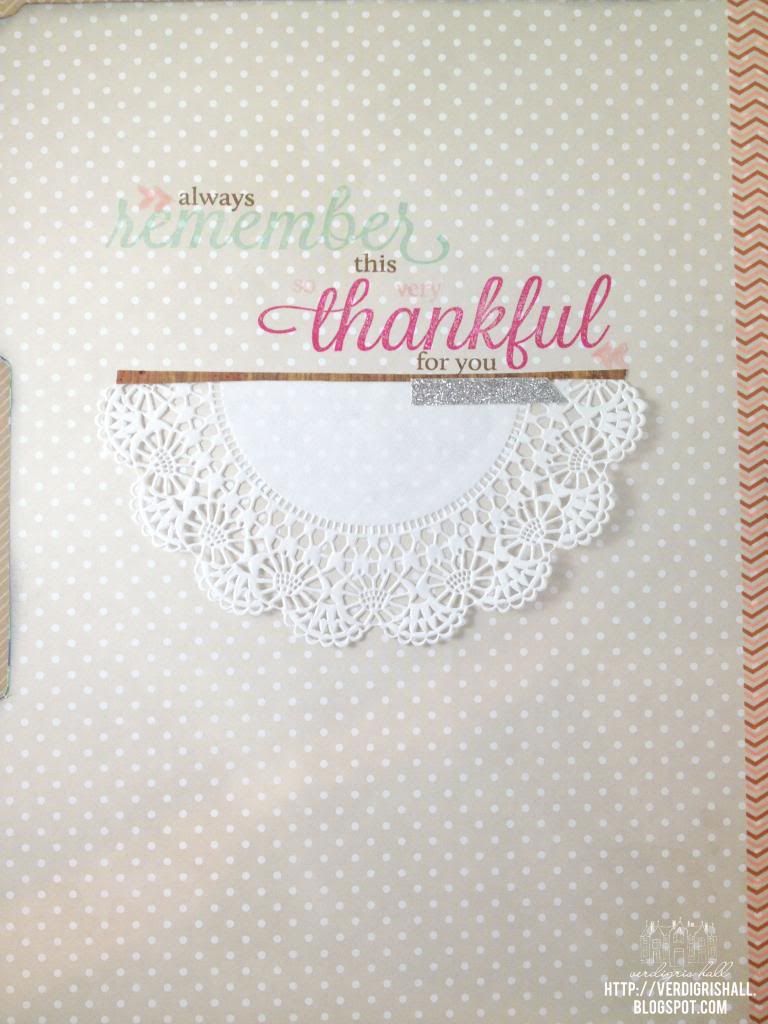
For the inside of the file folder I had a lot of fun building a message to my friend using the Remember and Thankful stamp sets (I love these!), arrows from Evidence and I emphasized the sentiment with the second half of the doily and a sliver of the woodgrain paper and a little bit of silver glitter fabric tape.
On the right hand side of the inside of the file folder I added a pocket made from patterned paper. Inside I placed the little cards made to coordinate with the file folder. I ran washi tape up the inside seam of the file folder. For a final touch I inked all the edges of the file folder.
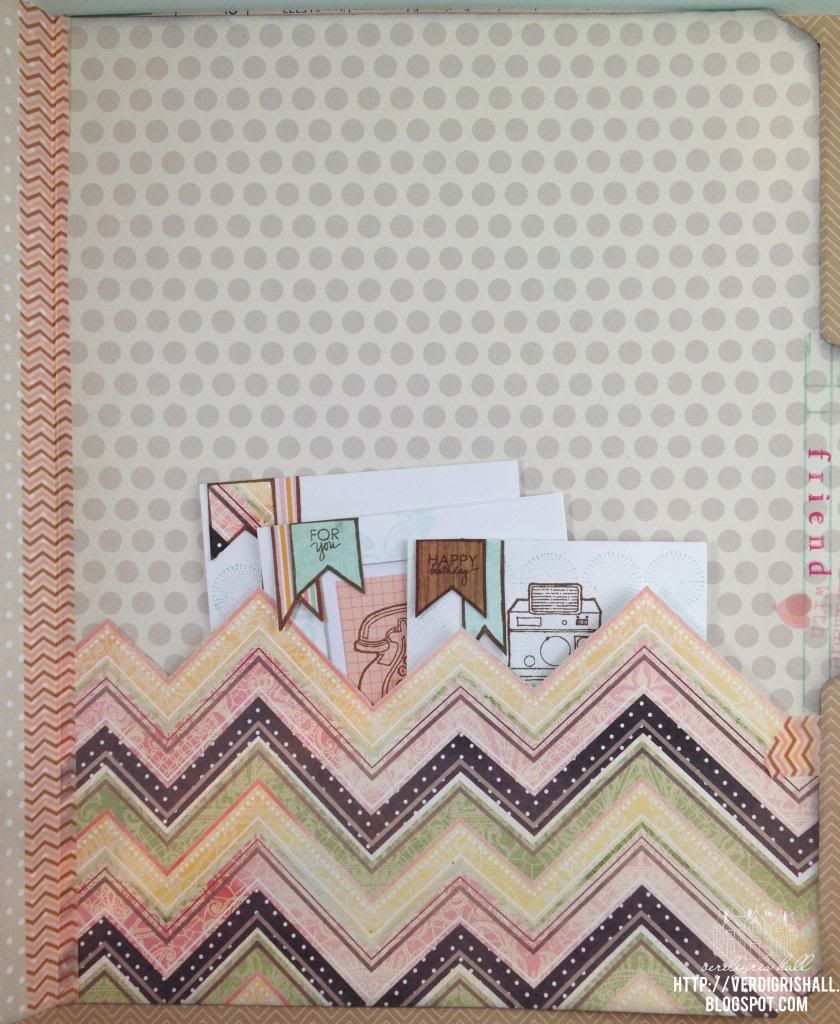
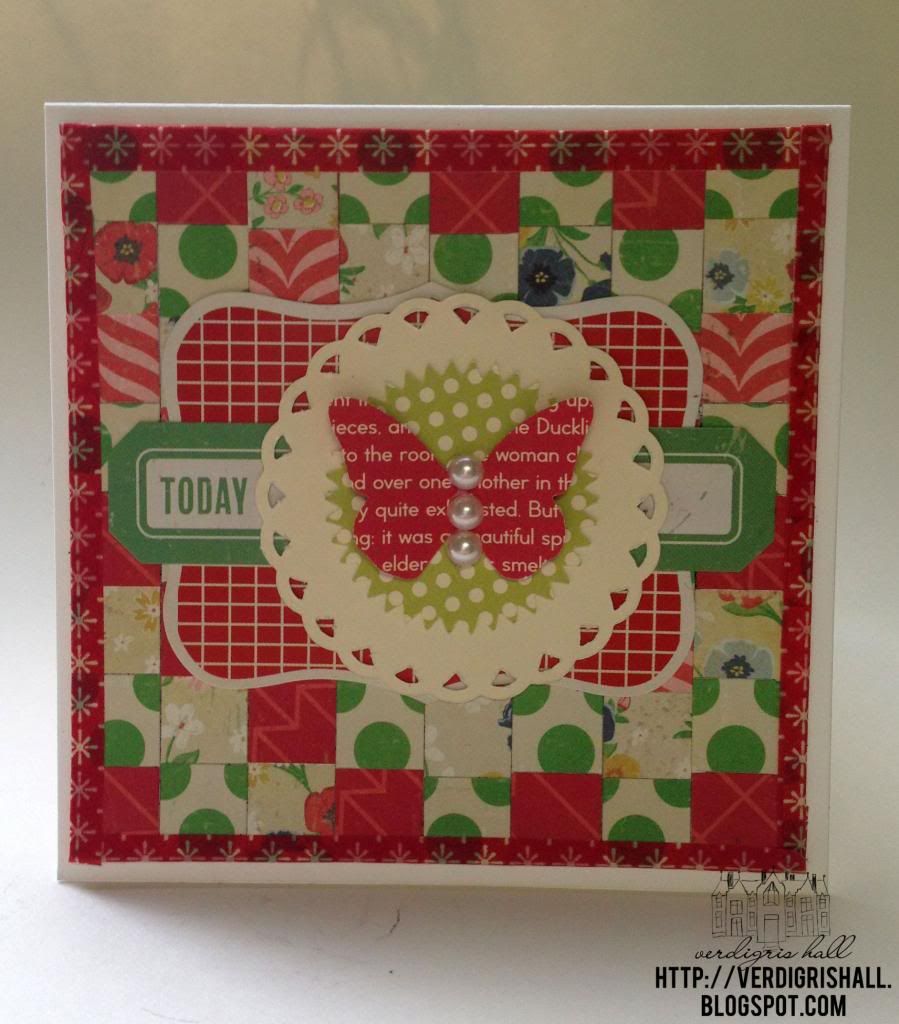
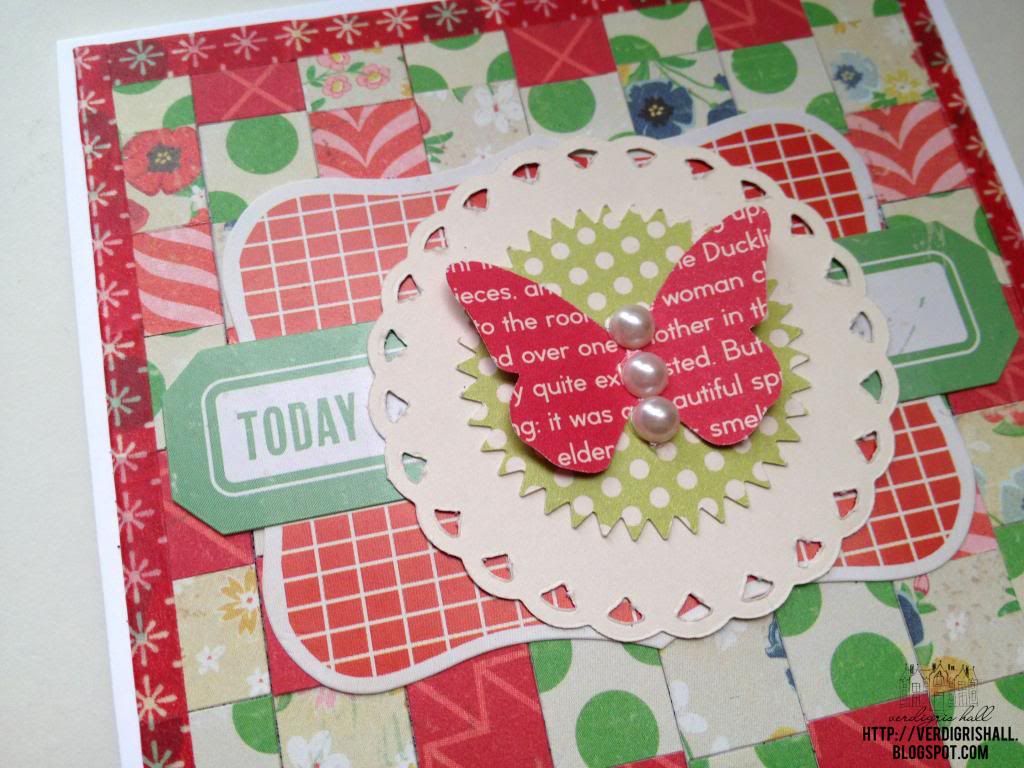
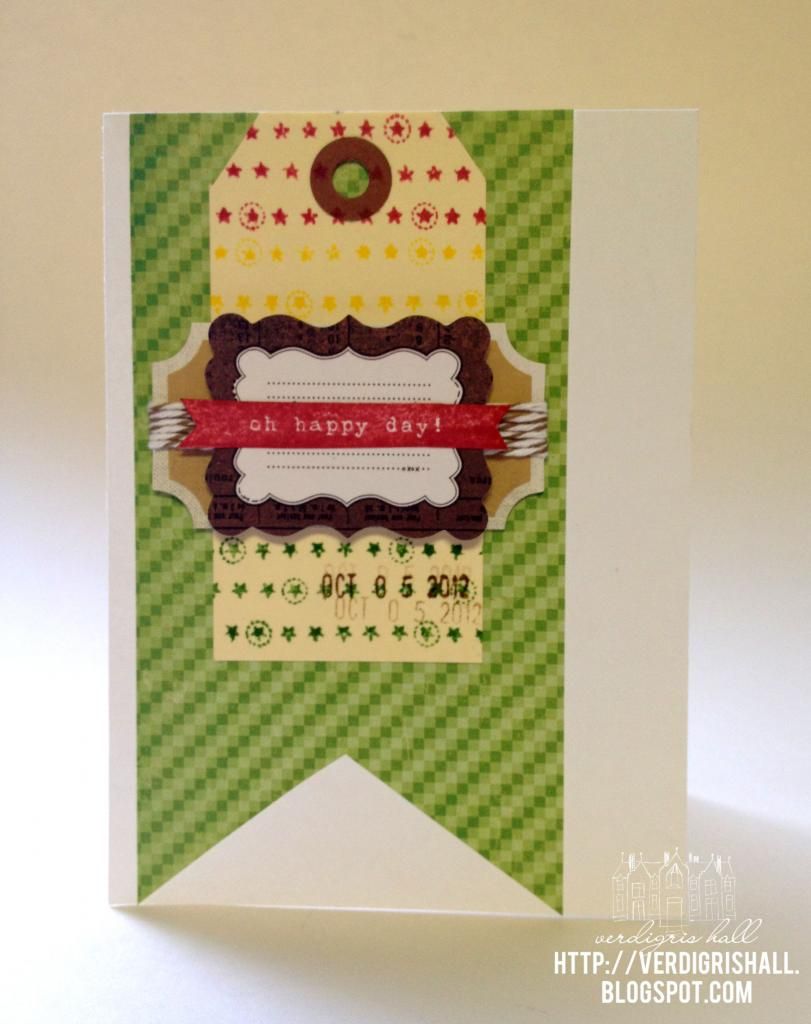
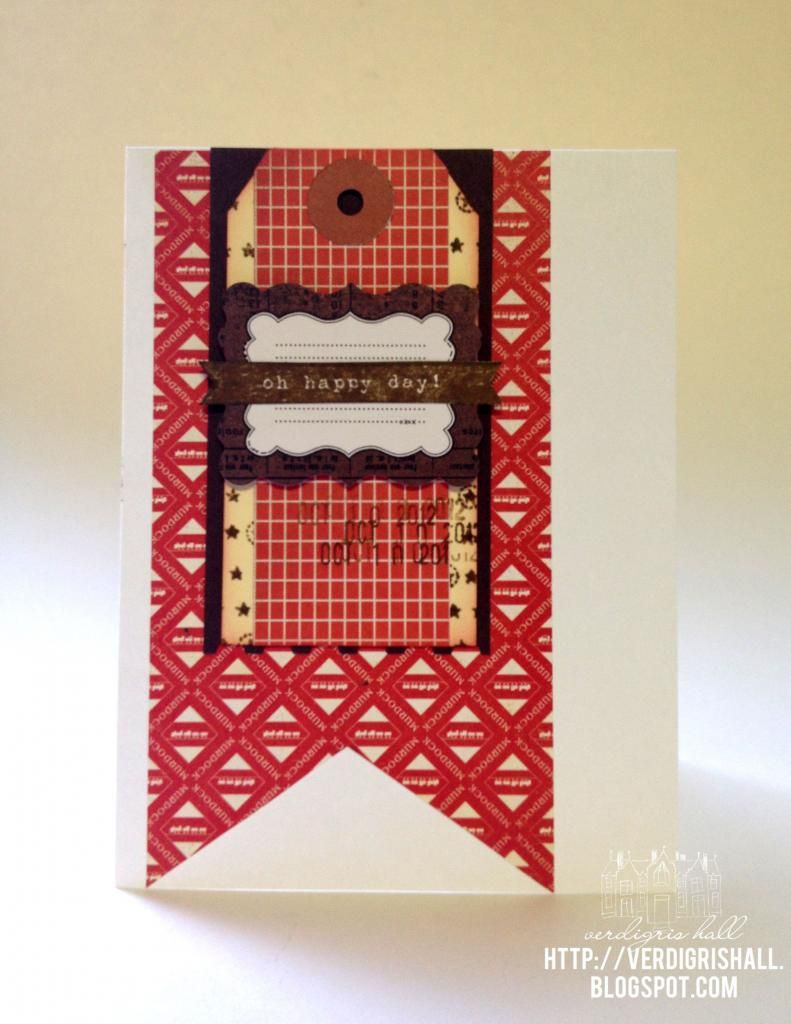
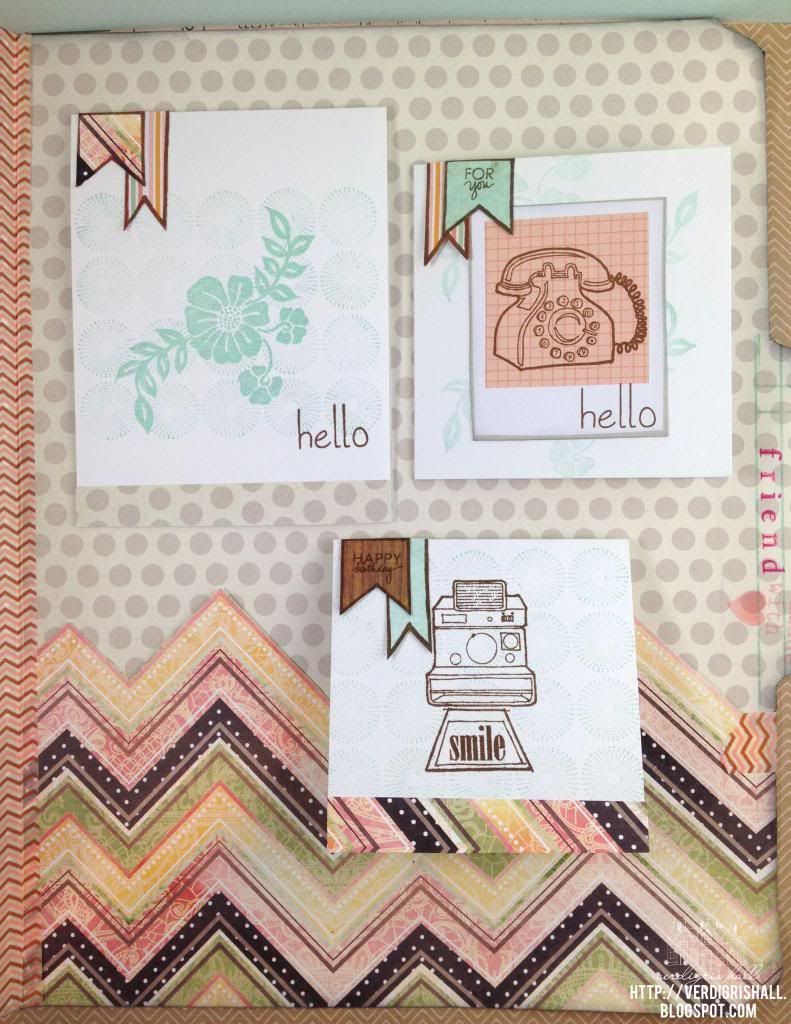
A better view of the little cards. Lately I have been really thrilled with the clean and fresh look of a white cardstock base with some pretty stamping and embellishments. I love that when you choose a few pieces of paper for this project you can use little scraps to add a lot of interest to these little cards. I used those little banners from Tabs and Banners nearly everywhere as they add the cutest punch of color and the little sentiments found in the Paperie Family sets fit nicely in them. For mine on the cards I used Sophie. To repeat the images used previously I used the circle background from Backgrounds or Circles, the flower from Flower Power and more images from Vintage Technology. These cards could of course be dressed up more with jewels, brads, buttons, pearls, glitter, sequins, ribbon, twine, washi tape or any number of pretty items. In fact adding a few items in the pocket would be a great way for your friend to customize the cards.
Now on to your next stop with Dana Tatar: http://datatar.blogspot.com/
If you lose your way on the blog hop, here is the list:
Amber Rasmussen - http://sew-ink.blogspot.com/
Tara Chaussee - http://
Carrie Avery - http://www.carrieavery.com/
Norma Gomez - http://
Shay - http://
Dana Tatar - http://datatar.blogspot.com/
Dana Tatar - http://datatar.blogspot.com/
And remember to return to The Aviary, become a follower and leave a comment.
Happy blog hopping,
Shay.
Supplies: