Showing posts with label Soleil. Show all posts

June 21, 2013

Dear Mama Elephant

Dear Mama Elephant:

How do you do it?  How do you make such cleverly designed stamp sets that are nearly impossible not to covet?  My bank account does not thank you one bit.  I do though.  How could I not?  You have an adorable typewriter that works for men and women which I used to make a simple birthday card for my younger (don't ask by how much) cousin who plans on becoming a writer.  Perfect?  Yes, indeed Type It was.  You can even just stamp it right on your cardstock with the little separate sheet of paper without losing one iota of its beauty.  I also love the little typed sentiments...happy b-day. and to you. are just right.   Let us not forget the ever useful, Trifecta because I certainly have not!  I reach for that baby when I want some filler without it being fussy and still trendy.

Any success of my card I contribute to your designs:


I am looking forward to inking up more of your stamps and adding to my growing collection (again angering my bank account).  Should you like to give me special sneaks of upcoming releases for a very biased reaction, don't hesitate to ask.  I am on it!

A fan,
Shay.

Supplies:
Stamps: Type It and Trifecetta, Mama Elephant
Ink: weather vane, Jenni Bowlin for Ranger; raspberry fizz, Papertrey Ink
Cardstock: white, Georgia Pacific; raspberry fizz, Papertrey Ink
Patterned paper: Soleil 6x6 paper pad, Basic Grey
Other: sequins, Studio Calico; pearls, The Paper Studio; doily

June 8, 2013

Dear Sassafras

Dear sassafras aka Tim and Beck:

How I love your unique designs full of vintage touches, quirkiness, humor and flamboyant color combinations.  I find your products beautiful, intriguing and fun to use (I don't like to play favorites, but Sunshine Broadcast is one of my all time most beloved collections *ever*).  Case in point, Soleil which you designed in collaboration with Basic Grey last year (it happens to be on 
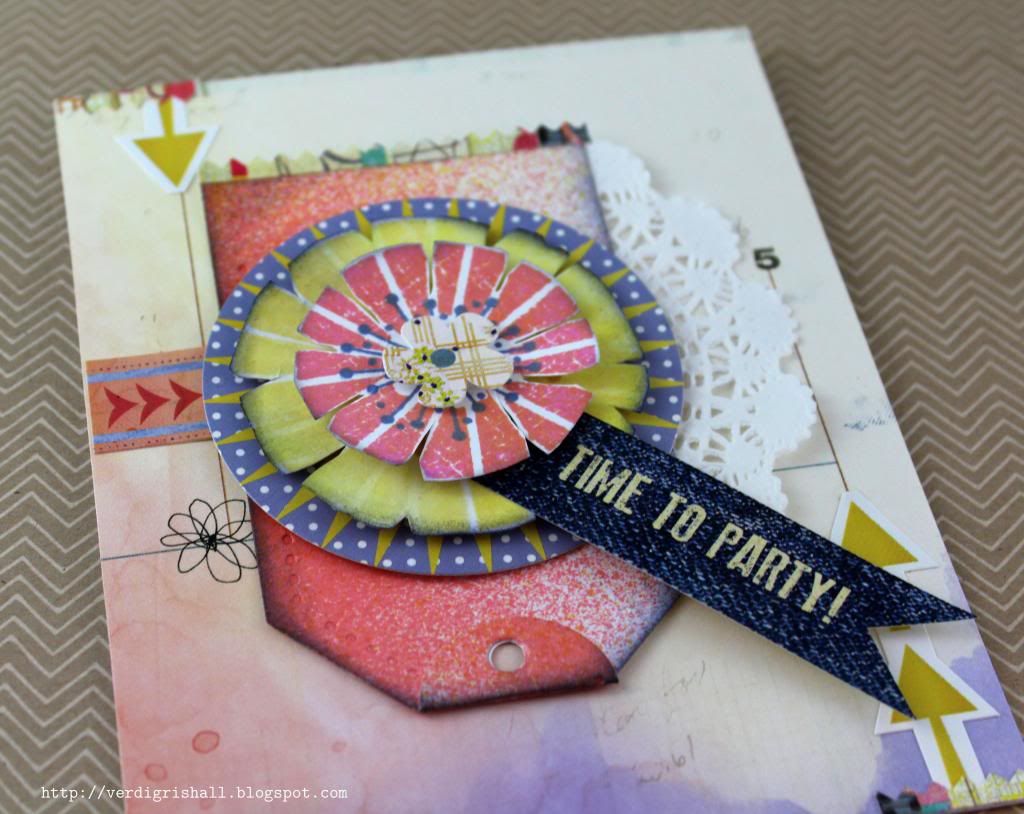
sale on Basic Grey's website right now).  I love it.  I love it even more today than I did when I first saw it displayed on my computed screen on Basic Grey's blog when they unveiled their Summer CHA 2012 collections.  And I love that I can mix in a stamped flower I had sitting on my work table from a previous doomed card to create something wholly new for my friend's birthday.  I decided to let myself be free as your designs foster creative adventures.

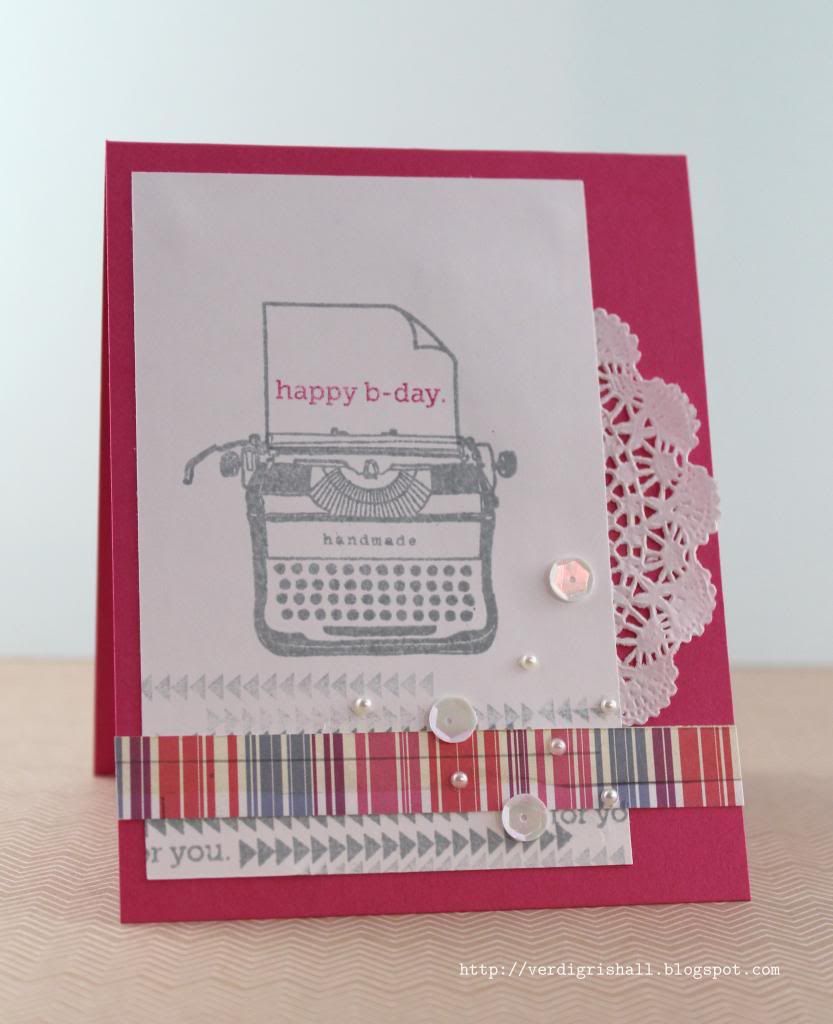
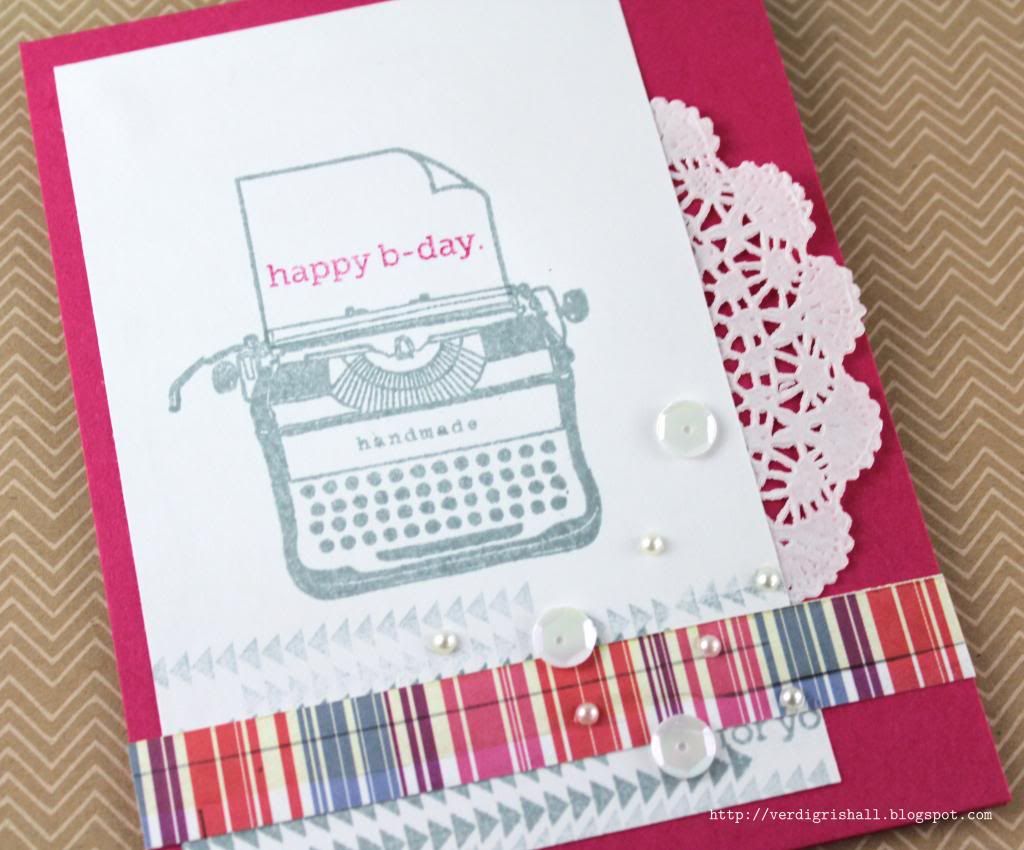
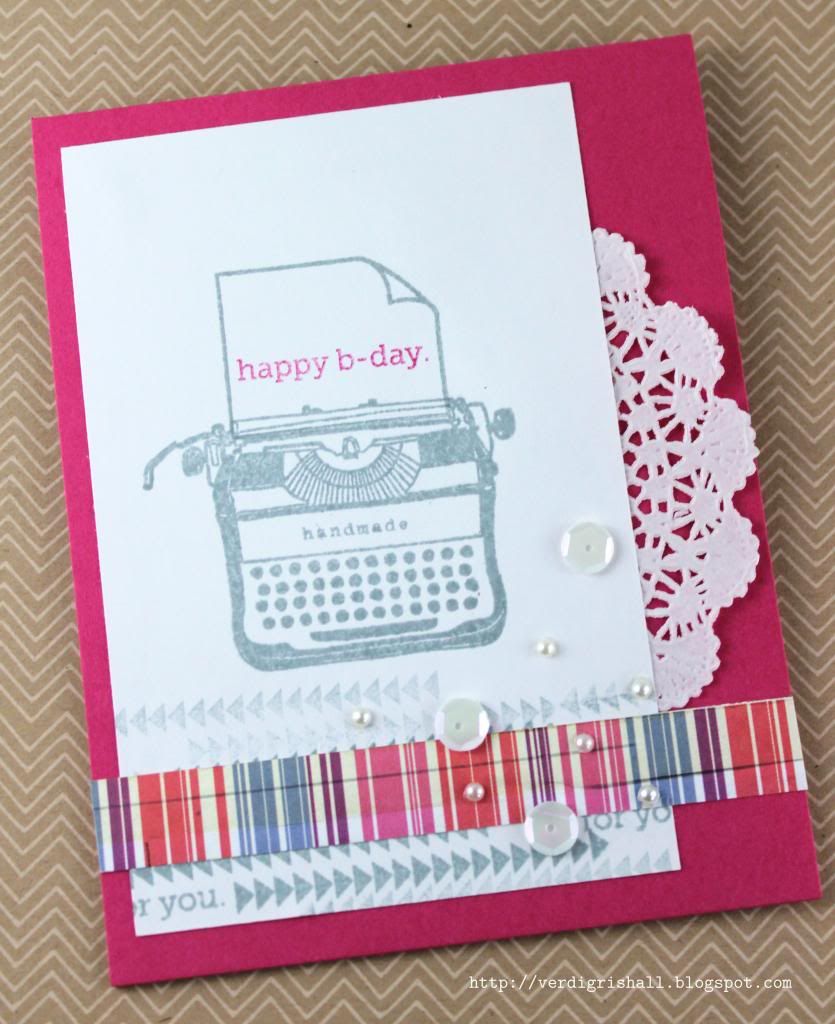
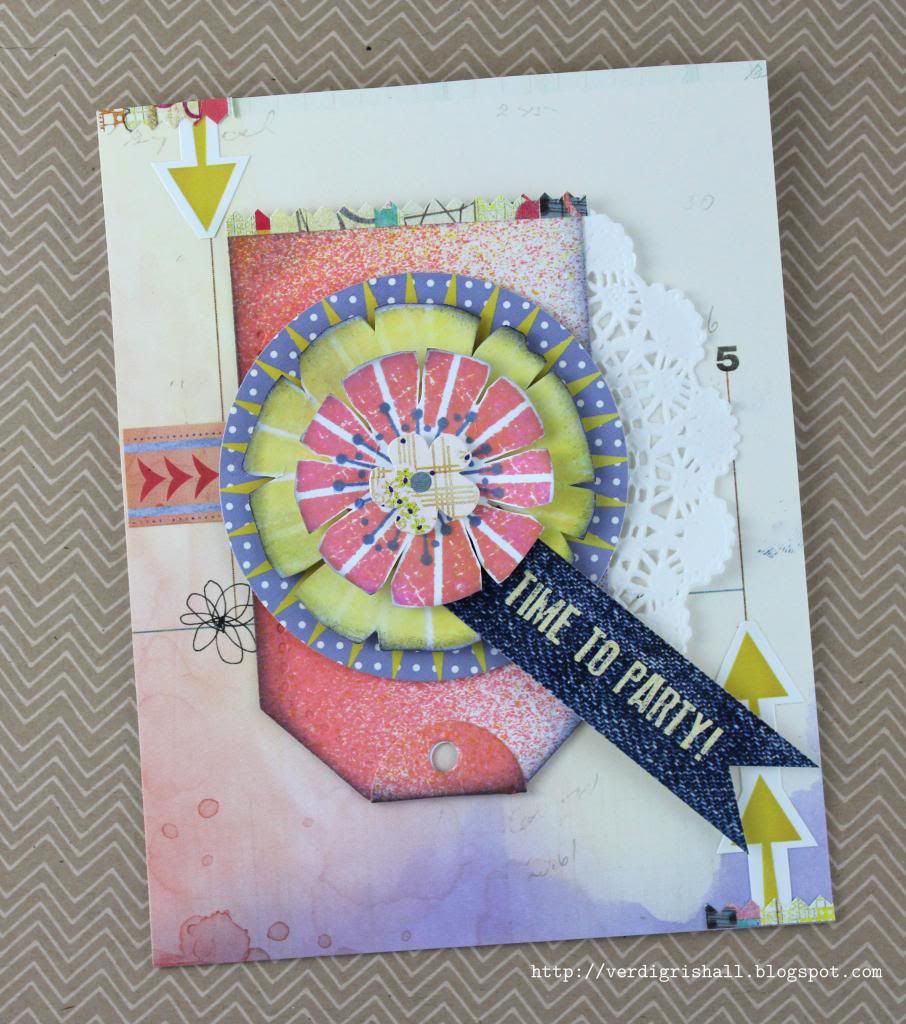
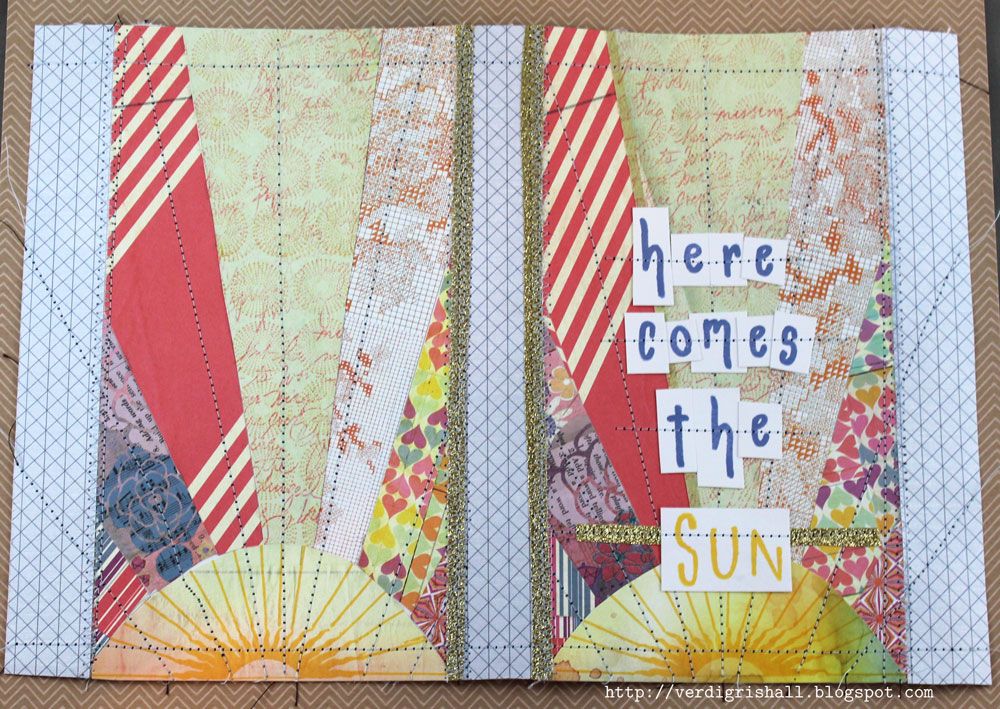
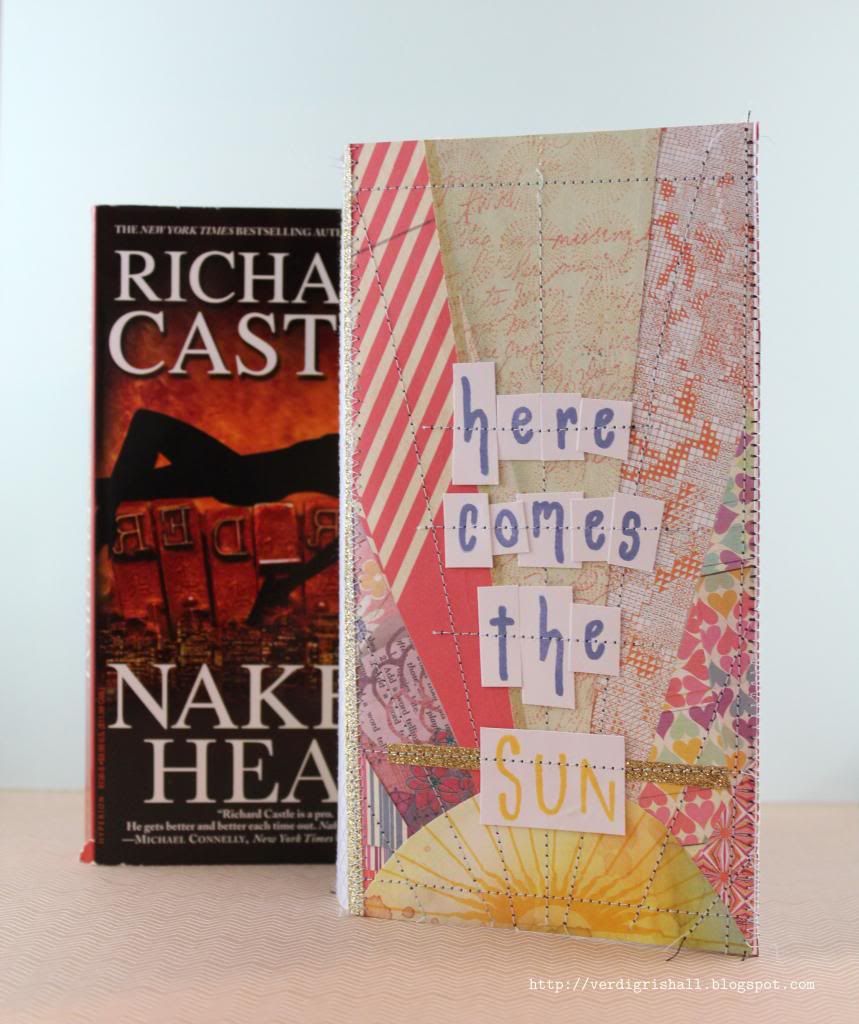
Here's my card which was delightful to make, although I am not sure it does your designs justice:


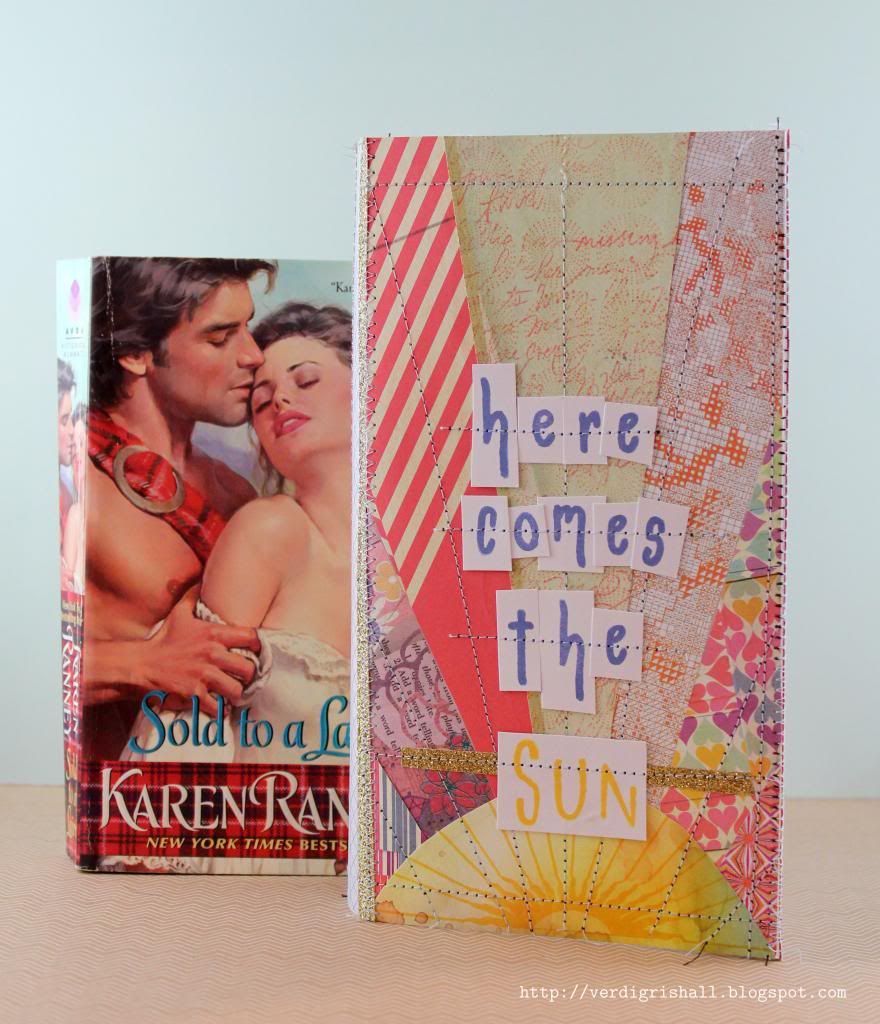
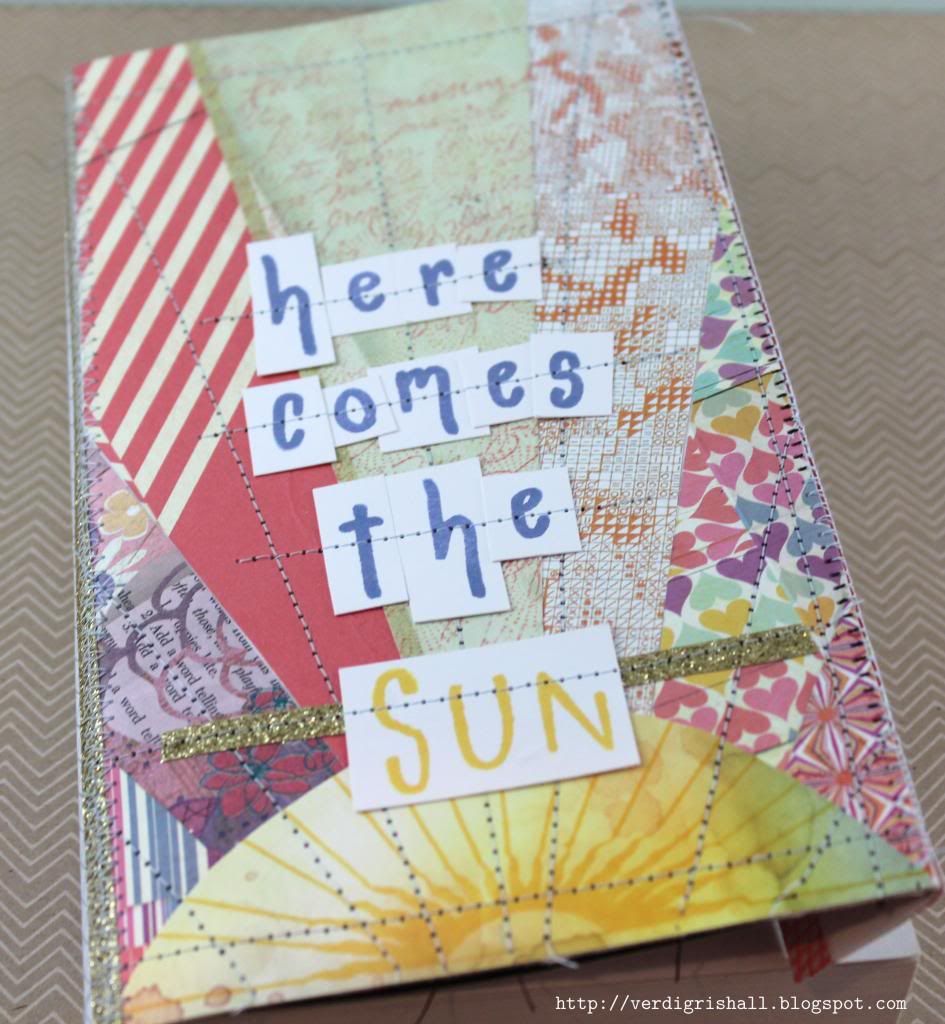
I plan to use Soleil all over the place and if I could I would wallpaper my room in your paper.  That isn't much of a hyperbole....as I type it I am considering whether I could wallpaper a wall of my room with your paper, but I hate to wallpaper...the preparation, the glue that doesn't quite work or works too well, the air bubbles, arms raised for long moments above the head and most of all the thought of in the future when I may want to/have to change things removing said wallpaper.  Will you be disappointed if I don't wallpaper my room with your paper?  Instead I may just place your papers in frames to hang on the wall.

You are awesome.  I hope to see many more of your designs in the future (please!!!!), but until then I will be (not at all like a crazy person) fervently admiring (soon in frames) and occasionally even using my vintage sassafras stash.

A fan,
Shay.

By the way, if you want a chance to win some free art products including stamps this weekend, check out my Paper Wings Productions' Design Team Blog Hop post HERE.

Supplies:
Stamp: Funky Florals (limited edition), Papertrey Ink
Ink: harvest gold, Papertrey Ink; bubble gum, orange soda, stone wash, Hero Arts Shadow Ink
Cardstock: white, Georgia Pacific; piece of cardstock previously sprayed with mists
Patterned paper: Soleil 6x6 paper pad, Basic Grey
Other: tag sale #3 die collection, Papertrey Ink; Cuttlebug, Provo Craft; element stickers and title stickers from Soleil collection, Basic Grey; doily; dimensional adhesive; Inkssentials ink blending tool, Ranger

June 7, 2013

Paper Wings Productions' June Design Team Blog Hop


WELCOME to the “Summer Fun” Paper Wing Production's Design Team Blog Hop & Giveaway!  If you've arrived here from The Aviary, then you're in the right place.  If you’re just stopping by for a visit, I’d love for you to check out our hop...you will not be disappointed!  I am honored to be the first stop for this blog hop!

This month we’re sharing some “summer fun” themed projects.  So sit back, grab yourself something cold to drink or better yet some ice cream or frozen yogurt and enjoy a little Paper Wings Productions summer inspiration!  Oh and let’s not forget about the blog candy!!  This month we’re giving away a gift certificate to the Paper Wings Production’s online store AND there will be some blog candy along the way!!  
For a chance to win, all you need to do is:
  • be a follower of the Paper Wings Productions blog, The Aviary
  • visit each of the participating designer's blogs and leave them some love. Then go back to The Aviary and leave a comment letting them you completed the hop. 
  • to increase your chances of winning, like the Paper Wings Productions Facebook page and/or invite your friends to the hop. 
  • then just come back and let us know! Be sure to leave a separate comment for each of the additional entries. 
The winner will be announced on Tuesday, June 11th, 2013 on The Aviary.

When I was brainstorming ideas for Summer Fun, I hit upon one of my favorite ways to spend hours upon hours: reading.  I thought why not create a book cover to disguise those steamy paperbacks that are so much fun to read?  I know there are ebooks, but sometimes a good old fashioned book is just the thing poolside, on the beach, in a car, on the plane or sitting in the cool air conditioning.  


I started with Claudine Hellmuth's 8.5" x 11" sticky-back canvas thinking I would do some image transferring.  In the end though I used the sticky-back canvas like a big fabric sticker.

Here is what I did (big surprise this is pretty wordy):

I freehand drew a sun ray pattern on a cardstock panel which measured 8.5 inches high by 4.25 inches wide (in the end the project ended up being 8 inches high as I didn't need as much height).  I numbered each of the parts and then cut them out (I cut each shape out twice as I made two panels for the front and back).  I used those pieces as patterns to trace onto pieces of patterned paper from the Basic Grey|Sassafras Soleil collection.  


I stamped the sun from Earth and Sky or Sunrise and a line from Window using yellow ink onto the half circle shape.  The largest center ray piece I stamped over with the Backgrounds or Circles background and Writing Backgrounds or Writing stamps.  I adhered (using some liquid glue) each sun and its ray to a piece of cardstock measuring 8.5 x 4.25 inches using the numbers from the pattern pieces as guides.  Don't worry if things aren't perfect because you are looking for a handmade mismatched look anyway.    

On the piece of sticky back canvas, I measured 0.5 inches on each of the right and left sides to be folded over as flaps to fold into the book to keep the book cover over the book.  I actually cut two one inch wide strips from patterned paper for these sections.  I measured for center and decided to create an inch wide spine that I then cut out from patterned paper.  Removing the backing to the sticky-back canvas and with the sticky side up, I placed the center strip at 5 inches (it will then take up the place of 5 inches to 6 inches on the canvas).  The panel I wanted as the front cover I placed on the right side butting up next to the center/spine 1 inch strip of patterned paper. I placed a one inch strip to the right side of the front panel.  Next I placed the back panel to the left of the center strip and finished off by adding the last one inch strip to the left of the back panel.  I lined up the panels to the bottom of the sticky-back canvas as any cutting I would be doing would be to the top of the canvas.  Happy with the placement, I used a bone folder to burnish the paper onto the canvas.  I cut any overhang of paper from the canvas and added some strips of brown sugar glitter tape on the spine for more interest. 

Then I actually got out the sewing machine.  This should garner a response of shock and awe as the sewing machine and I have a very peppered past.  Anyone aware of my sewing abilities knows I have a much better relationship with the seam ripper.  I want to assure you that I was very pleasantly surprised by how easy it was to sew on this project. If I can do it, ANYONE can do it!  I went to town sewing all over the canvas.  Have fun trying different color thread, different stitches, free style stitching as this is the perfect type of project to play with the sewing machine or if you are able and willing hand stitching.  


Next I stamped "here comes the" from Funky Lower Case Alphabet with blue/purple ink on white cardstock.  I cut out each letter as little blocks not worrying about size or straight lines.  Then I stamped "sun" using Funky Alphabet (the uppercase version) in yellow ink and cut out the entire word as one block.  I used a little liquid glue to adhere each letter to the front panel.  I placed a strip of brown sugar glitter tape down under the sun block.  I then sewed across each word.


At this point you can add more stamping, sewing, painting, doodling, embellishments or not.  When you are happy with it, I recommend for more durability painting on a few layers of modge podge or soft gel medium to seal the piece. 


This book cover will fit those odd long paperbacks or a paperback of around 350 pages.  I think that if you used a 12x12 inch piece of sticky-back canvas or used more than one 8.5 x 11 inch sheet you could make a wider book cover for thicker books or even one that fit trade paperbacks and/or hardcover books.  This would be fun to make again and the possibilities are endless on how you could decorate it! 


Now you can hide that guilty pleasure of a book (Fabio-like men hidden from prying eyes) behind your artsy book cover or give one to a friend with a book or books and/or gift card as a considerate gift.  If you try out this idea, please let know because I would *love* to see it!

Now, make sure you check out each and every stop on the hop starting with the very talented lady that makes all things Paper Wings Productions possible, Carrie Avery.

***Here is the complete line up just in case you get lost along the way***

It has been an absolute delight to have you visit me today and I hope this helps kick start an amazingly creative and fun summer!

Happy creating,
Shay.

Supplies:
Stamps:

Ink: squeezed lemonade, scattered straw, wild honey, dried marigold and worn lipstick, Tim Holtz Distress Ink by Ranger; butter bar and stone wash, Hero Arts Shadow Ink
Cardstock: stamper's select white, Papertrey Ink
Patterned Paper: 6x6 Soleil paper pad, summer daisy and mermaid from Soleil collection, Basic Grey
Other: sticky-back canvas, Claudine Hellmuth Studio by Ranger; sewing machine; brown sugar glitter tape, American Crafts; Quick-Dry Adhesive, Scotch


LinkWithin

Related Posts with Thumbnails