I am currently enrolled in the Clean & Simple Card Making class at Online Card Classes. Last night when I should have been going to sleep (in fact I put the dogs to bed and they happily slept without me), I went into the studio to catch up on the videos for the class and try my hand at the lessons. I was really inspired by Julie Ebersole's (I really loved her video and I hope she does more videos in which she talks as she has such great energy and an infectious laugh) one layer cards so I tried my hand at that first.
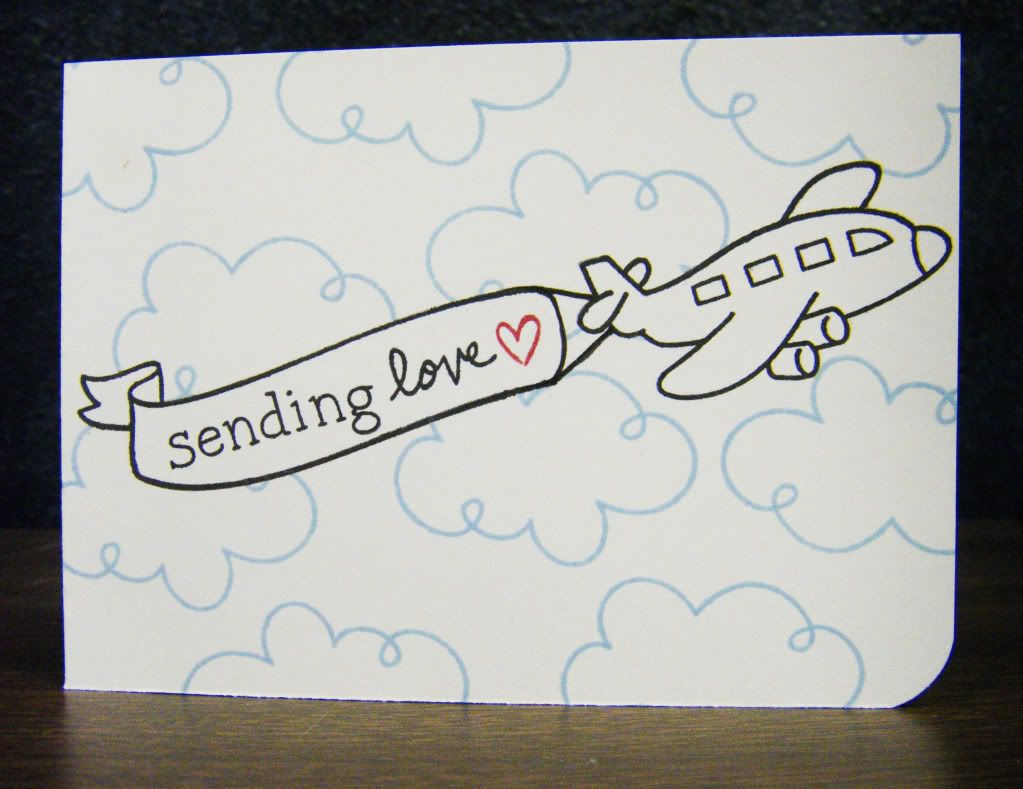
This card should have been a breeze and once I figured out exactly what I wanted to do, it was. With full disclosure, I ended up making it 3 times. The first time I used too heavy of a hand with the background and hearts. The second time it turned out well with a simpler background and only one heart, but I didn't like the size of the card. The last time was the charm.
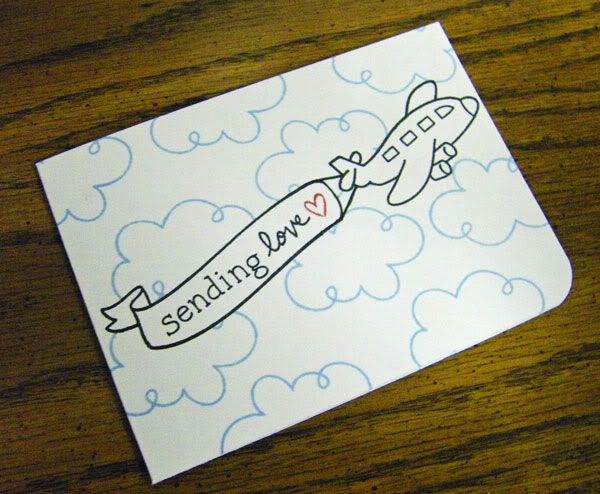
I wanted to create a Valentine's card with the cute plane from Bon Voyage by Lawn Fawn and have a banner sign being pulled by it with a customized sentiment. I love all of the abcs by Lawn Fawn as they are designed to make it easy to stamp any word or sentiment you desire. I wanted to stamp "sending" so I used my Smitty's ABCs and paired that with the sweet "love" from Sophie's Sentiments (suggestion: if you are new to Lawn Fawn start with Sophie's Sentiments along with whatever other stamp sets catch your fancy) and then added a little heart from Cruising Through Life in red for a little interest and drama (in the future I may fill in the heart with stickles or just a marker or emboss it, but I wanted this card to be a simple stamp and ink card). The banner is a two sided ribbon banner from Bannerific, but I wanted one side to be plain so I simply removed the ink from one edge of the inked up stamp and once stamped filled in the area with a marker as I wanted it and added the attachment to the plane. I stamped the banner and plane first, then masked them off before stamping the cloud background. Lastly, I rounded the bottom right corner.
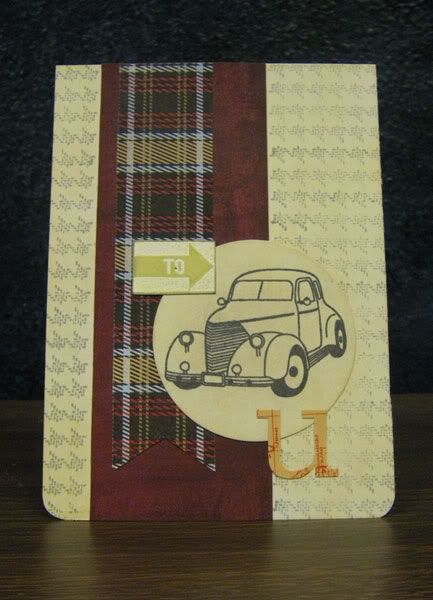
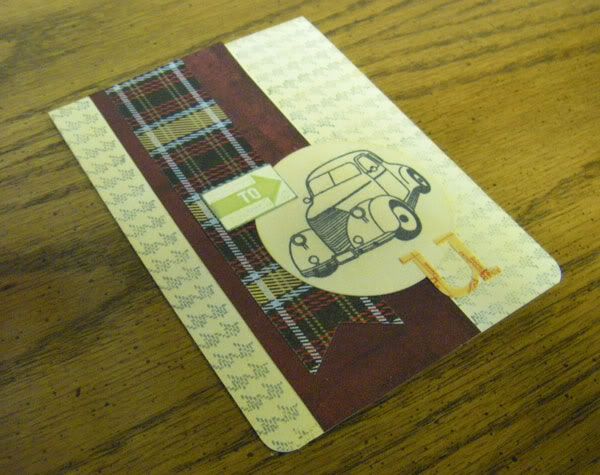
The second card I made uses one of the simple sketches by Kristina Werner. I needed a masculine birthday card so I grabbed my Oxford 6x6 patterned paper pad by Basic Grey. Stuck in there was a strip of the claret colored paper I had left over from a previous card so that was my jumping off point. I began with a white card and stamped the Dash Pattern background stamp by Basic Grey/Hero Arts, but after adding the plaid strip of paper over the claret the white wasn't right so I colored all the white cardstock using my Antique Linen Distress Ink. As my card is for a relative that has an interest in cars I used the vintage car from the Going stamp set by Hero Arts on a circle cut using a Spellbinders' die and also decided to also use the "to arrow" image in the set for further interest and to begin a sentiment. I embossed the "to arrow" stamp and filled in the unembossed section with Shabby Shutters Distress Ink with white embossing powder, but since I changed the color scheme away from bright white I colored over the white embossed image with some Copic markers. Usually I would have used some dimensional adhesive on a card, but I wanted to go away from my usual modus operandi (can you tell I have been reading some mystery novels?) on this card. I added a "u" sticker from Studio Calico and rounded the bottom corners of the card.
Thanks for stopping by!
Happy creating,
Shay.
{sending love card}
stamps: (sending)smitty's abcs, (plane&cloud)bon voyage, (heart)cruising through life, (love)sophie's sentiments; banner(bannerific), Lawn Fawn
ink: tuxedo black, Memento; soap powder & cough syrup, Jenni Bowlin for Ranger
cardstock: white, Georgia Pacific
marker: soft black memory marker, American Crafts
other: crop-a-dile corner chomper, We R Memory Keepers
{to u card}
stamps: (to arrow&car)going, Hero Arts; dash pattern, Basic Grey/Hero Arts
ink: tuxedo black, Memento; shabby shutter, antique linen & black soot, Tim Holtz Distress Ink by Ranger; weather vane, Jenni Bowlin for Ranger; versamark, Tsukineko
embossing powder: opaque white, Judi Kins
cardstock: white, Georgia Pacific
patterned paper: oxford 6x6 paper pad, Basic Grey
markers: Copic
die: from nesties classic & standard circles nestabilities set, Spellbinders
die: from nesties classic & standard circles nestabilities set, Spellbinders
stickers: u from documentary collection alphabet stickers, Studio Calico
other: crop-a-dile corner chomper, We R Memory Keepers; cuttlebug, Provo Craft
