Showing posts with label embossing. Show all posts

June 30, 2013

Avery Elle's June AEI♥U Challenge Part No. 2


Happy Sunday!  As I am on a crafting/blogging roll, Thursday night I made a second attempt at the Avery Elle's June AEI♥U Challenge.   You can find my first attempt HERE


This time around I began with the adorable smaller tag from the Simply Tags: Everyday die designed by uber talented Nina Yang (yes she created the sketch above too).  I cut 4 tags out of the My Girl 6x6 paper pad by American Crafts...such a sweet collection with pretty summery colors.  I added some grey and white baker's twine to each tag.  Now this is when things got dicey.  I ended up playing around with these four tags a lot.  And I mean a lot.  Some cards come together quickly and easily and others just don't.  This one was hard fought.

Here's the great sketch by Nina Yang again:

I decided to emboss the white panel with a nifty honeycomb embossing folder which mimics the hexagons found on the multi-colored hexagon patterned paper.  I pulled out the yellow from the hexagon patterned paper and stamped the sentiment from Air Mail and then die cut it out. 


A little digression, if I may.  Mail and travel themes go for my jugular.  They slay me.  I can't resist them.  Seriously, can...not...resist.  So imagine how thrilled I was with Air Mail.  More thrilled than the camel on hump day.  Watch out as I have a We R Memory Keepers Envelope Punch Board coming my way and I have not even scratched the surface on this baby!  End of my little digression.


After placing the tags on the panel I figured what it needed was a central image.  I went through chipboard, pages of stickers, cabochons and diecuts until I found a lovely diecut from the Amy Tangerine/American Crafts' Yes, Please collection Bits (die cut cardstock shapes).  It was adorable, but not the right colors and a tad big for what I needed.  Still it was a jumping off point.  (Note to self: next Avery Elle order add Petals and Stems).


Here's my inspiration by Amy Tangerine/American Crafts from the Yes, Please collection:


I got out a pencil and drew a rose and some leaves in a similar fashion, painted it in with watered down Distress Markers and to get the right tone distressed the flower with Distress Inks.  Now I was getting somewhere!

I adhered everything down onto the white panel.  Then I added some aqua blue sequins (needed some sequins!) and some stickles to the flower and leaves just for something extra.  Last I adhered the white panel to a yellow card base.


Voila!  The tale of a challenging card.  I hope you enjoy it and thank you for staying with me during my rambling.

Happy creating,
Shay.

Supplies:
Stamp: Air Mail, Avery Elle
Ink: harvest gold, Papertrey Ink; antique linen and scattered straw, Tim Holtz Distress Ink by Ranger
Cardstock: stampers select white, Papertrey Ink; yellow, stash
Patterned Paper: My Girl 6x6 paper pad, American Crafts
Die: Simply Tags: Everyday die, Avery Elle
Other: Cuttlebug, Provo Craft; Honeycomb embossing folders, Lifestyle Crafts; circle nestabilities dies, Spellbinders; baker's twine, Whisker Graphics; pencil; worn lipstick, spiced marmalade and barn door, Tim Holtz Distress Markers, by Ranger; paint brush; water; Inkssentials ink blending tool, Ranger; aqua sequins, Studio Calico; star dust stickles, Ranger;dimensional adhesive

June 27, 2013

Avery Elle's June AEI♥U Challenge

Ever have some products parked in a shopping cart because you are eyeing them something awful, but the craft money is already spent?  This was me with Avery Elle for a few months before I vowed that I would buy something.  When they sweetened the offer for their first anniversary with an adorable free stamp set, Party Animal, I knew the time had come.  That stamp set was way too cute to pass up!  For your information, the offer is good until the end of this month, June 2013 {wink}.  Let me also assure you that their customer service is excellent! 

Avery Elle has a monthly AEI♥U Challenge that I am finally going to enter using this great card sketch:

I took a chance and went with purple.  I decided to mix the purple with a lot of white and touches of grey and silver.  Here is what I created:


I used a mix of stamps and dies from Avery Elle and just had fun playing around.  I love the Chevron Border die and used the little diamond pieces from inside the die designed by JJ Bolton (for more examples on how to use this die and others check out JJ Bolton's blog).  I plan on experimenting with this awesome die some more!  Another fun stamp set with matching dies are the Simply Tags: Everyday stamp set and dies designed by Nina Yang (who also designed that cool sketch above).  I used the larger tag die which I embossed and stamped the sentiment in purple only to stamp over it with VersaMark and emboss with silver embossing powder.


For the subtle background behind the diamonds I stamped the ikat chevron (love!) from Ikat Additions in grey.  This stamp set is a doozy and under $5.00!

One last picture where you can see the silver of the embossed sentiment a little better:


So the moral of the story is that if you have been itching to buy some Avery Elle products I recommend doing so before July 1st or any time really as you won't be disappointed.

Thanks for taking the time to visit!

Happy creating,
Shay.

Supplies:
Stamps: Ikat Additions and Simply Tags: Everyday, Avery Elle
Ink: weather vane and lavender sachet, Jenni Bowlin for Ranger; VersaMark, Tsukineko
Cardstock: solar white, Neenah Paper
Patterned paper: Hero Arts
Dies: Simply Tags: Everyday ELLE-ments and Chevron Border ELLE-ments, Avery Elle
Other: Zig Zag embossing folders, Lifestyle Crafts; Cuttlebug, Provo Crafts; silver embossing powder, Ranger; jewels and pearl, Hero Arts; dimensional adhesive

June 25, 2013

Papertrey Ink's June 2013 Blog Hop Challenge | Touch of Gold


Welcome you oh-so-talented Papertrey Ink enthusiasts!  First, I have to say you rock.  No, I am not just saying it.  Every single one of you are a treasure!  Not only do you create gorgeous projects, but you also take the time to visit and leave sweet comments.  Thank you.  

I loved the challenge this month for Papertrey Ink's June 2013 Blog Hop:


Here are my takes on the challenge:

Card No. 1 | Embossing Powder


Card No. 2 | Gold Leafing Pen


Card No. 3 | Shimmer Cardstock


Card No. 4 | Washi


Card No. 5 | Glitter Tape


That's it from me.  I know I will be dazzled by what everyone else makes this round...I tell you I can't even imagine what marvels I will see!  Thank you so much for taking the time to visit.

Happy creating,
Shay.

Supplies:
Stamps: birthday style, mini blooms, wonderful words: hello, happiness in bloom and bountiful banners, Papertrey Ink
Ink: VersaMark, Tsukineko; soft stone and ocean tides, Papertrey Ink; evergreen bough and antique linen, Tim Holtz Distress Ink by Ranger; malted milk, Jenni Bowlin for Ranger; pale tomato, Hero Arts Shadow Ink
Cardstock: stamper's select white, kraft and gold shimmer, Papertrey Ink
Patterned Paper: road trip, Papertrey Ink
Other: headline alphabet die, double-ended banners die, wonderful words die collection, simply jane die collection, bountiful banners die, Papertrey Ink; Cuttlebug, Provo Craft; detail metallic gold and opaque white embossing powders, JudiKins; heat embossing gun; buttercup and sherbet Mister Huey's Color Mists, Studio Calico; pink balloon sprinklers, October Afternoon; gold washi; sewing machine, Brother; brown sugar glitter tape, American Crafts; bubblegum memory marker, American Crafts; gold leafing pen, Elmer's; Inkssentials ink blending tool, Ranger; doily; dimensional adhesive

June 10, 2013

Man Oh Man Monday No. 14 | Father's Day Edition No. 6

We continue on with Father's Day as it is less than a week away.  Have you gotten your card done or bought?  

I am putting a tiny spotlight on hybrid Father's Day cards today.  Hybrid simply means using something created on a computer (digital) and then printed to make something physical.  You can create the digital design/sentiment yourself, purchase other people's designs from various online stores or create something for yourself using purchased designs.  There are some truly amazing digital products and designers out there.  For recommendations, let me know because I can do a detailed list.

For the cards today I started with Shine, this digital journaling card product by Emily Merritt Designs:


This mix of journaling cards has it all: feminine, masculine and gender neutral for young and older alike for all sorts of occasions with bright happy colors.  Included are convenient pdf files for easy printing of the journaling cards. I printed out one of the pdf files. My printer makes everything look distressed (a positive spin on the lack of quality) so don't assume that your print quality will be as poor as mine.  I just go with it until I get it fixed.  If you like the distressed look I have found that using an eraser on the image...well...for lack of a better word...erases some of the ink.

I chose to make cards from the "you shine" and "you light up my life" journaling cards.  I am still on a sun ray/sun burst kick so these cards are inspired by that idea as well.

Card No. 1

For you shine I cut the sentiment using an oval die and decided to use my Studio Calico burst mask with Mister Huey's Calico Shine on white cardstock for a cool subtle tone on tone look.  I added "dad" using the Headline alphabet die and a couple of star wood veneers.  Simple, bold and interesting. 


Truly, in person the shine looks really cool.


Card No. 2


For You Light Up My Life I decided to add a cute light bulb from a Lawn Fawn stamp set made for Studio Calico's Spencer's Card Kit.  I pulled out some new mustard embossing powder to emboss the image.  I also did some sewing on this card as I had the sewing machine out still after this project.  I am still a bit shocked by how easy it was to sew on paper.  Maybe I am finally mature enough to sew!  I am only about 1 or 2 decades behind everyone else (as usual).   I used the Headline alphabet die once again and added a touch of shimmer and interest by adding stickles to the "pop".


Fun, colorful and easy.

I may or may not be around again for a bonus MOMM Father's Day Edition this week because I recently received some new stamps that are meant to be inked up!  If I don't, I hope you have a delightful Father's Day celebrating the fathers/father figures that have enriched your life!

Happy creating,
Shay.

P.S. I am submitting these cards to the Simon Says Stamp Challenge blog for Masculine/Father's Day.

P.S.S. You can find me on Paper Wings Productions' The Aviary tomorrow for Tutorial Tuesday.

Supplies:
Digital product: ShineEmily Merritt Designs
Stamp: from Spencer's Card Kit, Lawn Fawn for Studio Calico 
Ink: Versamark, Tsukineko; black soot, Tim Holtz Distress Ink by Ranger
Cardstock: solar white, Neenah Paper; stamper's select white, Papertrey Ink; white, Georgia Pacific
Patterned Paper: Snippets 6x6 paper pad, Studio Calico
Other: Mister Huey's 12x12 burst mask, Studio Calico; Mister Huey's Calico Shine, Studio Calico; sewing machine, Brother; oval nestabilities die, SpellbindersHeadline alphabet die, Papertrey Ink; Cuttlebug, Provo Craft; star dust stickles, Ranger; mustard Zap! embossing powder, American Crafts; star wood veneer, Studio Calico; Crop-A-Dile Corner Chomper, We R Memory Keepers; dimensional adhesive; embossing heat gun; Inkssentials ink blending tool, Ranger

May 25, 2013

Papertrey Ink's May 2013 Blog Hop | Bouquet Builder


Happy Saturday!  I am so happy to join in on this month's blog hop (wasn't sure if I would make it this time around...whew!).  To see the details and the *amazing* projects created for Papertrey Ink's Bouquet Builder May Blog Hop, go HERE

I went with an ombre card inspired by the following picture:

I was really drawn to the very verdant color scheme and this is the card I created:


I am going to leave it at that today.  If you have any questions, please don't hesitate to ask.  It is an honor to have you visit and to be among the uber-talented Papertrey Ink fans!

Happy creating,
Shay.

Supplies:
Stamp: Natural Beauties (limited edition), Papertrey Ink
Inks: limeade ice, Papertrey Ink; Versamark, Tsukineko; peeled paint and pine needles, Tim Holtz Distress Inks by Ranger
Cardstock: Vintage Cream, Papertrey Ink
Paper: watercolor paper, Strathmore
Other: Wonderful Words Die Collection (set of 4), Papertrey Ink; Cuttlebug, Provo Craft; Inkssentials ink blending tool, Ranger; Peeled Paint, Tim Holtz Distress Marker by Ranger; opaque white embossing powder, JudiKins; heat gun; 2 Way Glue Pen, Zig; dimensional adhesive; water; paint brush; Inkssentials Non Stick Sheet, Ranger

March 3, 2013

Moxie Fab World Tuesday Trigger: Pattern Play

Good evening!

Tonight I thought I would quickly share a card I created for this week's Tuesday Trigger over at Moxie Fab World:


I think my take is pretty literal...again.  I was inspired by the colors and design.  I searched through my embossing powders for colors similar to the Trigger.  Here is what my card ended up looking like:


Most of the stamping is embossed, with some accents added with Distress Markers, Copic colored gems and a tiny bit of cross stitch.  I hope you like it.

Have a magnificent Monday!  And thank you so much for taking the time to stop by.

Happy creating,
Shay.

Supplies:
Stamps: Delightful Doilies, Giga Guide Lines and Pretty Peonies, Papertrey Ink
Ink: VersaMark, Tsukineko; rich razzleberry, Stampin' Up!
Cardstock: rich razzleberry, Stampin' Up!; pale grey, stash; vellum
Patterned Paper: Census from Basics collection, Basic Grey
Other: old paper and milled lavender Tim Holtz Distress embossing powder, Ranger; powder Zing! embossing powder, American Crafts; Double-Ended Banners die, Papertrey Ink; Cuttlebug, Provo Craft; embroidery floss no. 415, DMC; rusty hinge, broken china and dusty concord, Tim Holtz Distress Markers by Ranger; blue violet (BV08), hydrangea blue (BV13), sepia (E37), Copic; gems, stash; Tiny Attacher, Tim Holtz

March 1, 2013

Paper Wings Productions' March Design Team Blog Hop


Hello there my friends,

I am so glad you could join me to celebrate the many splendid Winged Things for the Paper Wings Productions' March Blog Hop.  If you came from Carrie's blog you are in the right place.  If not, you will want to check out The Aviary to start at the beginning so you could win this:

All you need to do is:
  1. Be a follower of the Paper Wings Productions' blog, The Aviary;
  2. Visit each of the design team's blogs including our guest designer and leave them a little love; and
  3. Go back to The Aviary and leave a comment letting them know you completed the hop.
BONUS: For extra chances to win, just like the Paper Wings Productions' Facebook page and/or invite your friends to the hop. Then just come back and let us know ! Be sure to leave a separate comment for each of the additional entries.

The winner will be announced on Tuesday, March 5th on The Aviary.

You will also want to go through the blog hop to be inspired by the awesome design team's projects.  I have seen peeks and you will love them all!

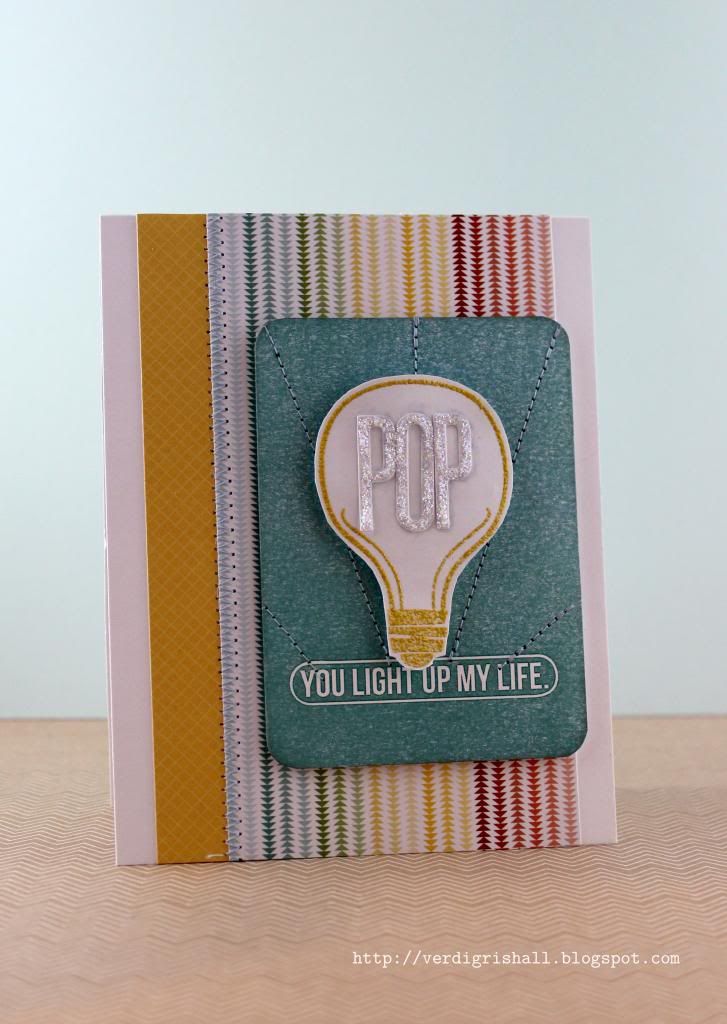
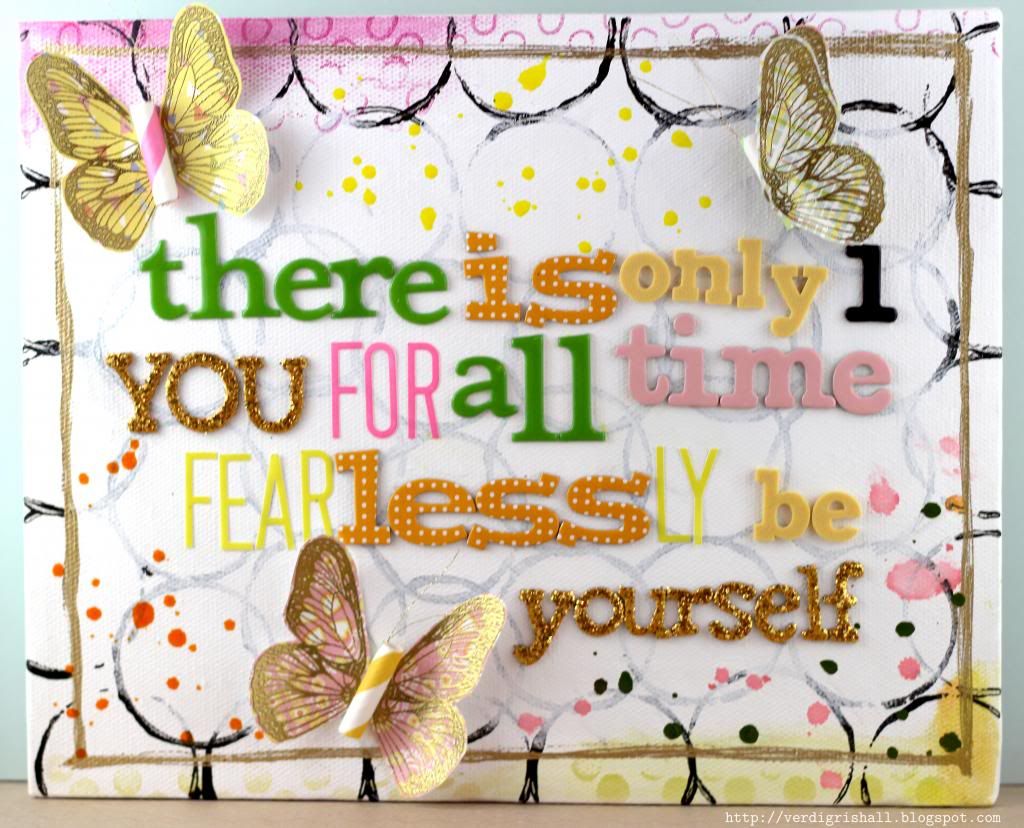
Now on to my little Winged Things project.  When I thought of the "Winged Things" theme I decided I wanted to make something using the Wings stamp set (or 
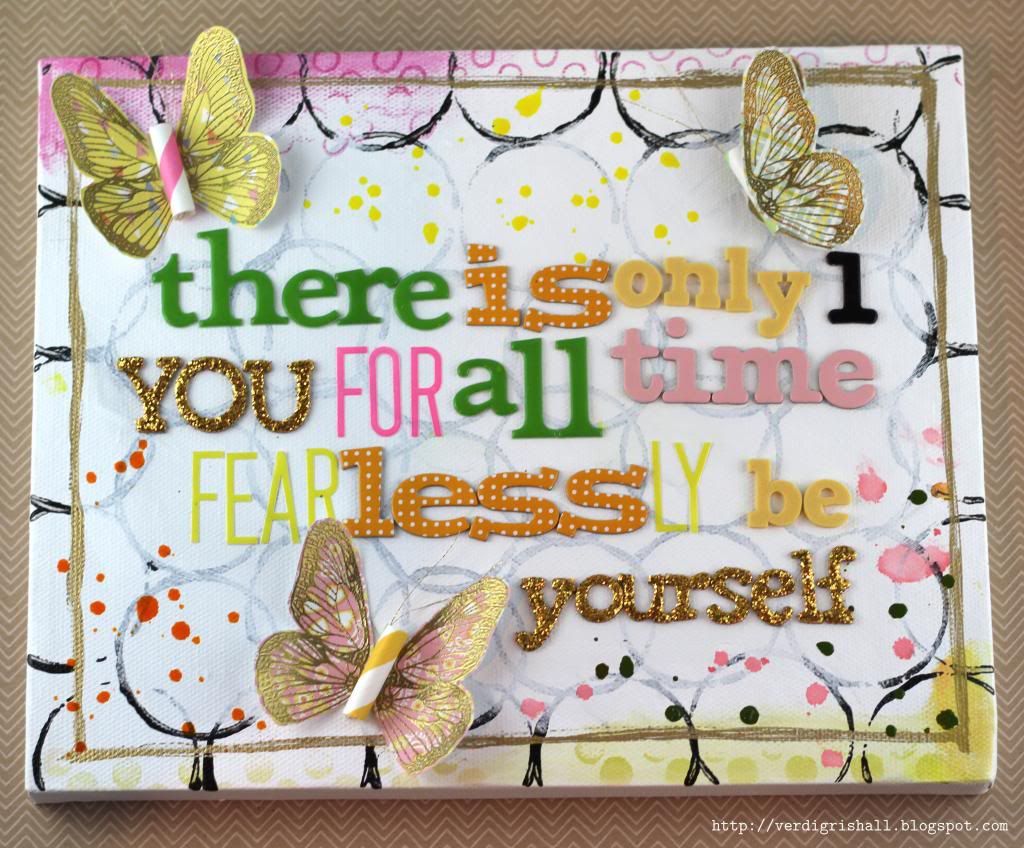
Butterfly Wings) that would be uplifting...which is something I very much need at the moment. So I picked out a 8x10 canvas to make a little piece to hang in my studio. This size is great as it isn't too large or too small.


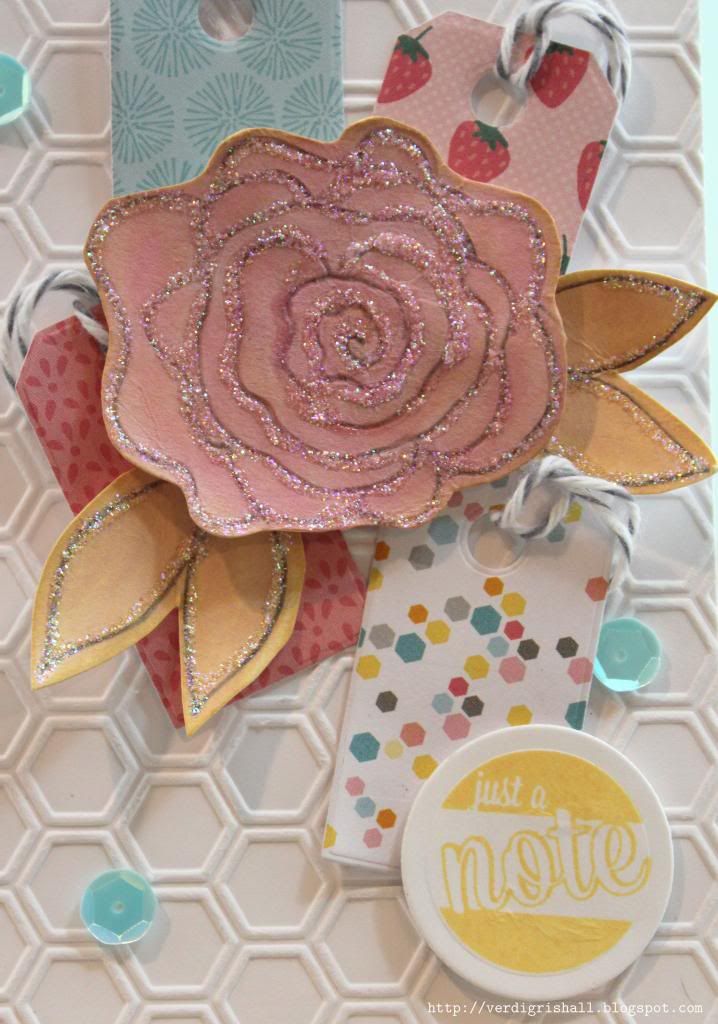
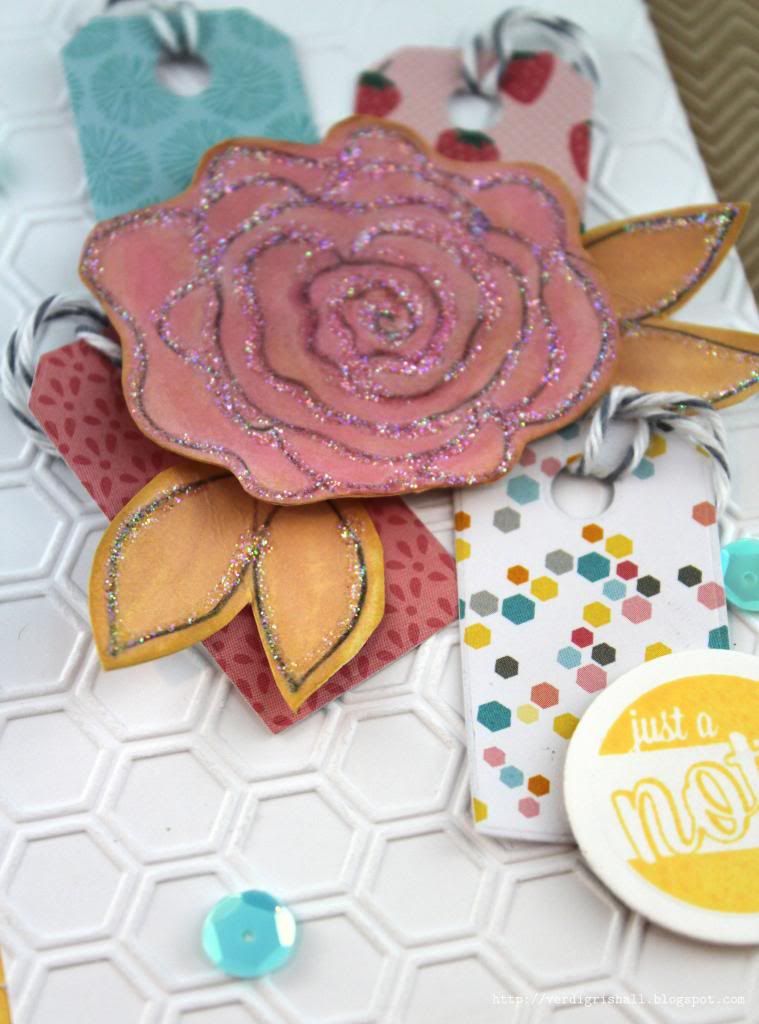
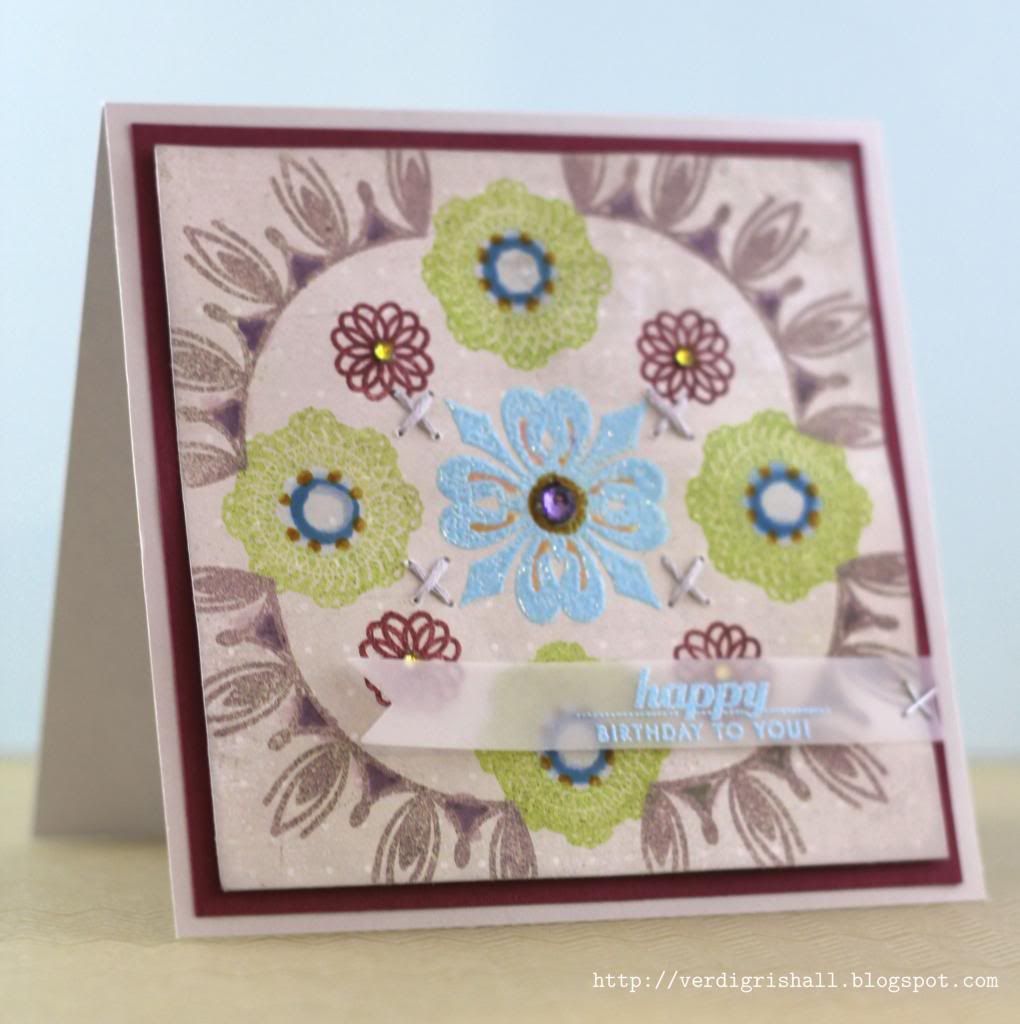
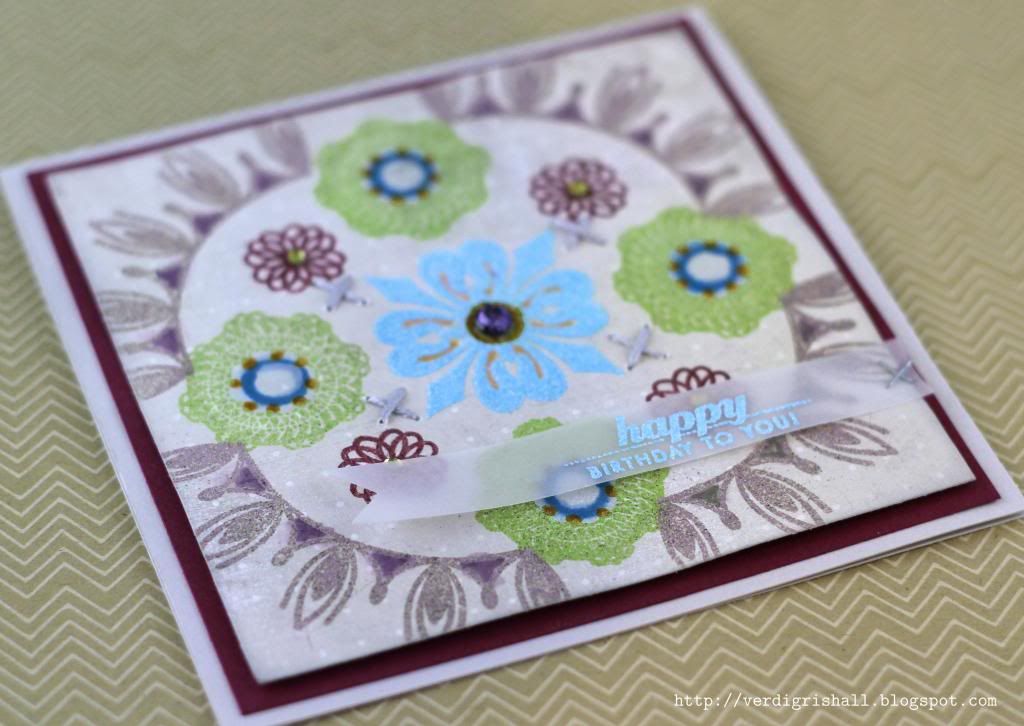
I recently received the Simon Says Stamp March 2013 Card Kit and I loved the happy designs and colors in the kit including the Daphne's Closet 6x6 papers by Lawn Fawn.  All of my colors came from those papers.


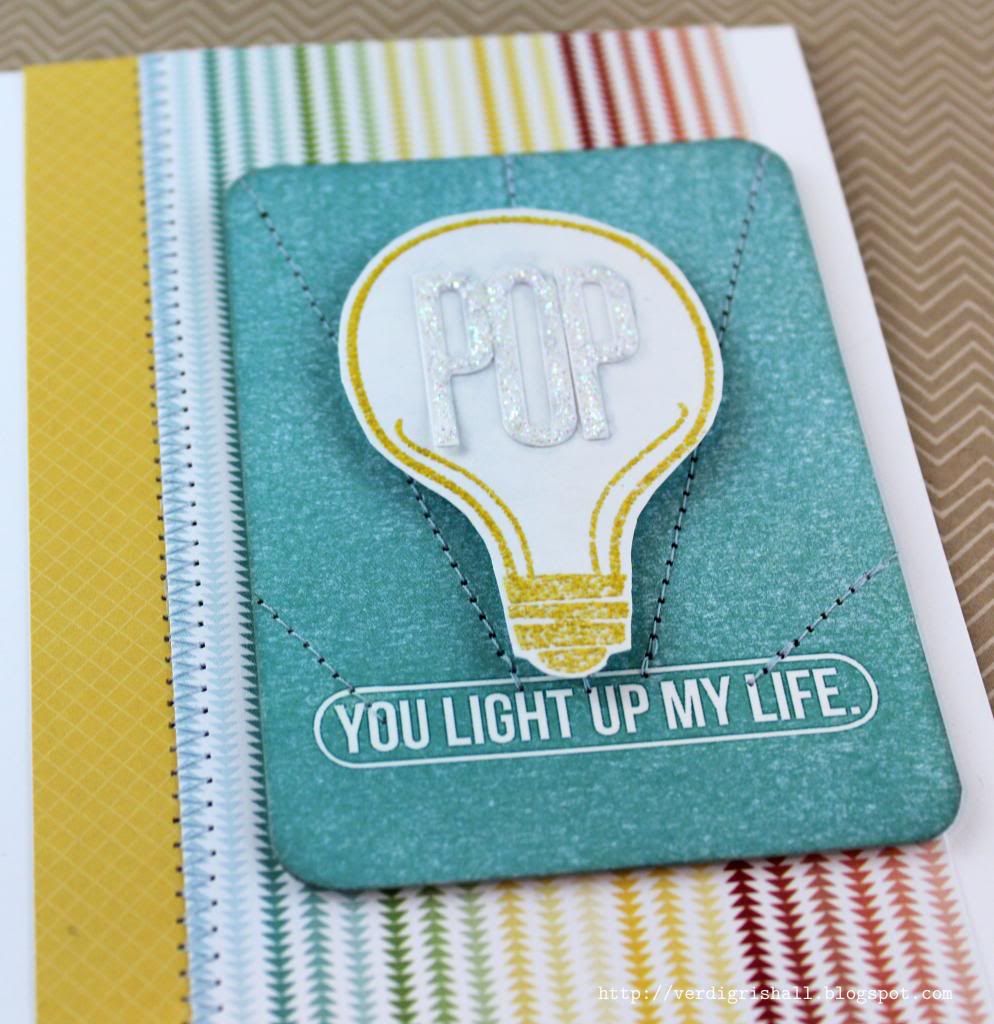
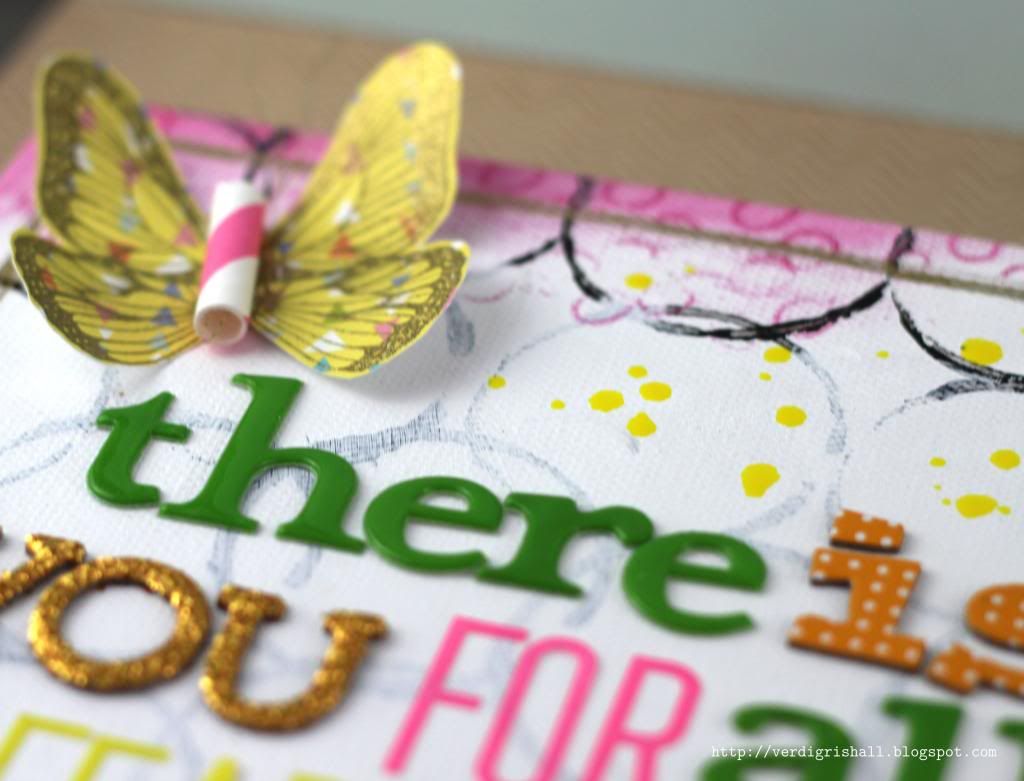
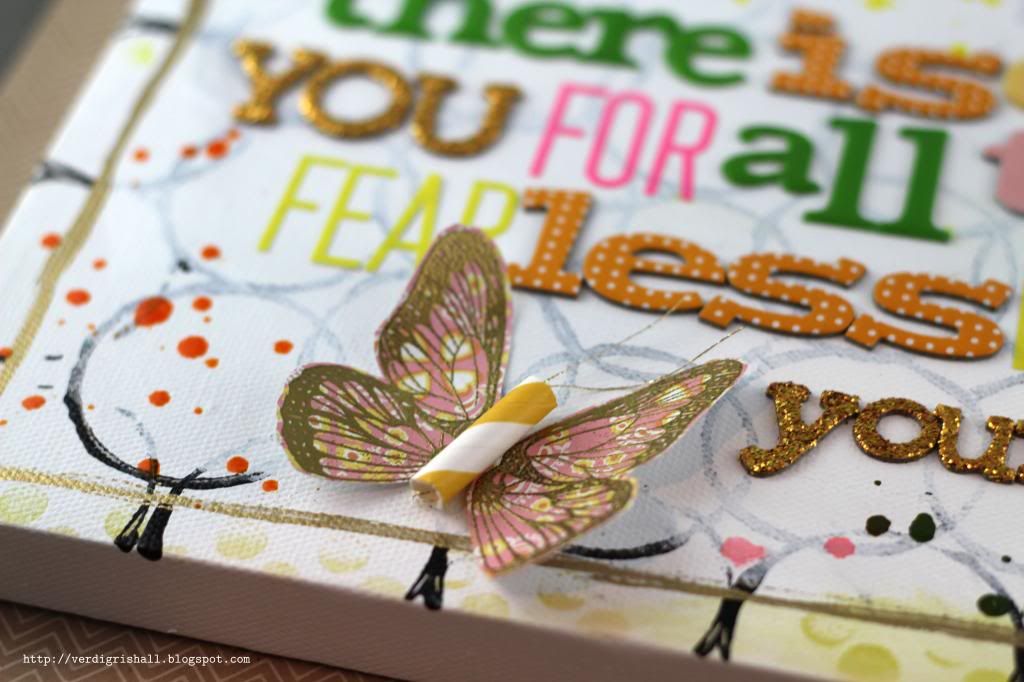
I stamped the set of butterfly wings on a different patterned paper and then gold embossed them.  I cut them out...luckily, they are an easy shape to cut.  I knew I wanted to make the body of the butterfly from the straws included in the kit and I made attenae with gold thread.  I rolled the edges of the wings to mold them and give them some dimension.


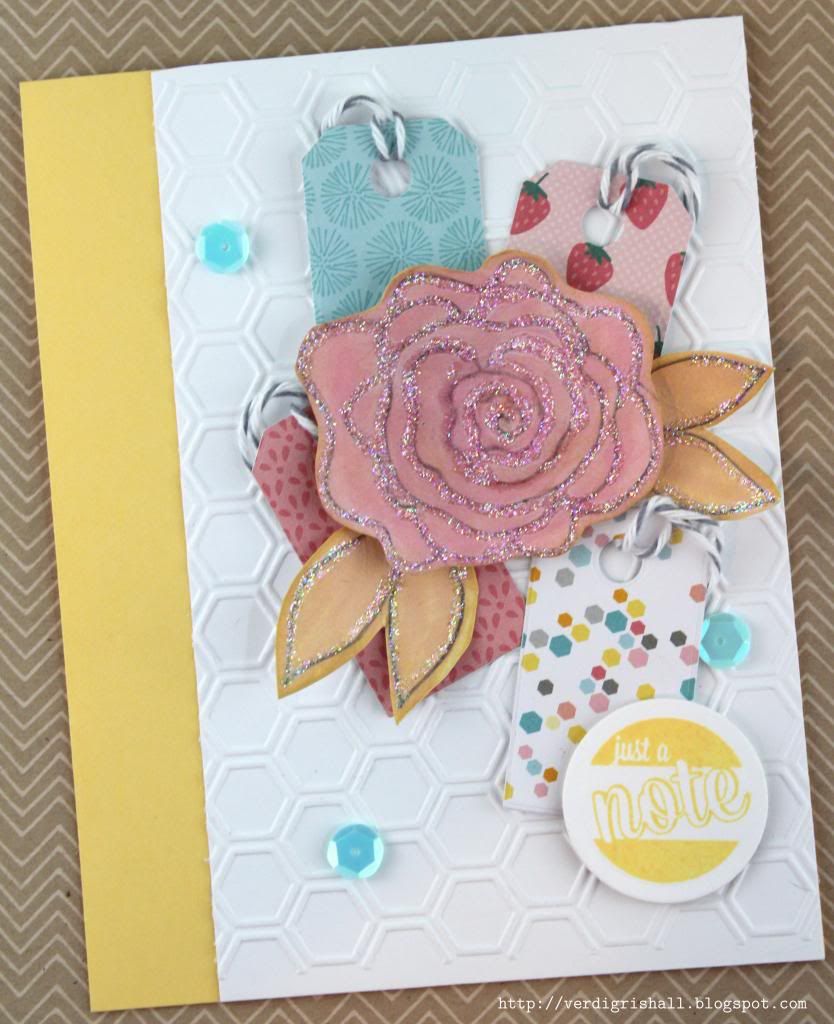
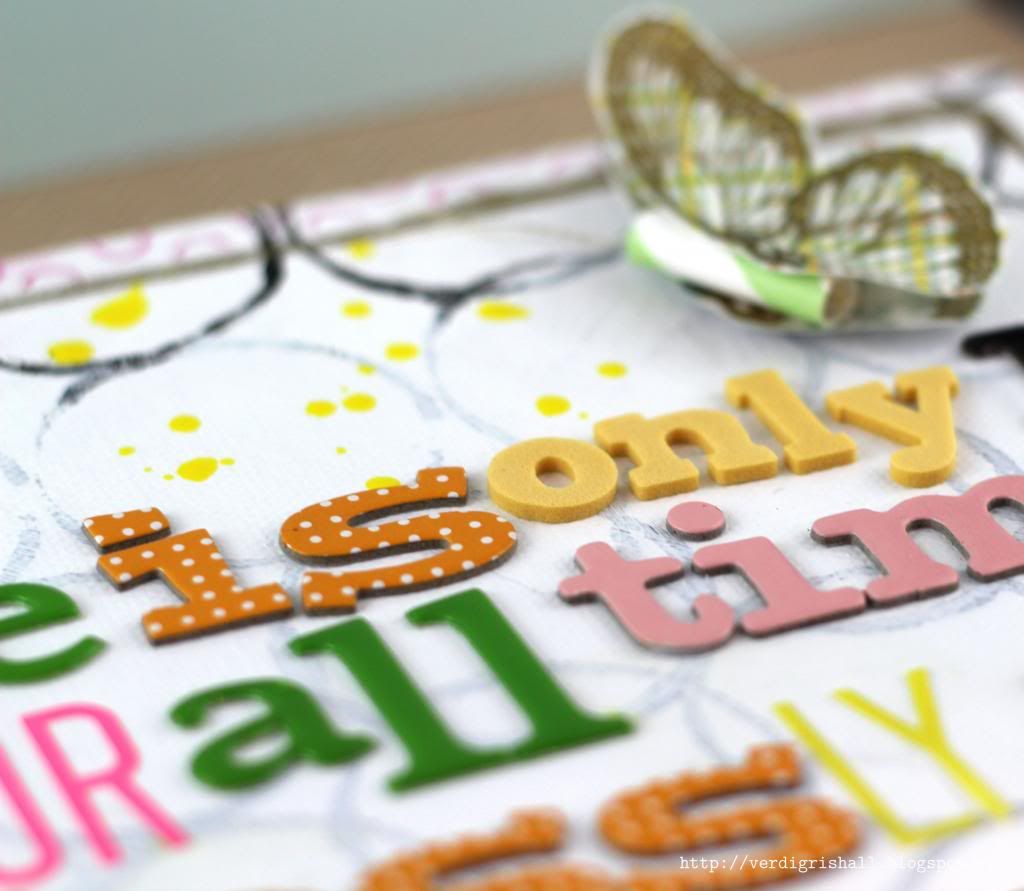
For the canvas I wanted something that the colors would pop off of.  I began by painting the canvas with gesso and then I used a toilet paper roll (who knew they could be so useful in the studio?!) to stamp black paint rings onto the canvas.  After the paint dried I added a light wash of gesso to the middle of the canvas just to soften the circles.  To the bottom edge I inked up the edge and then stamped the solid small circles from 
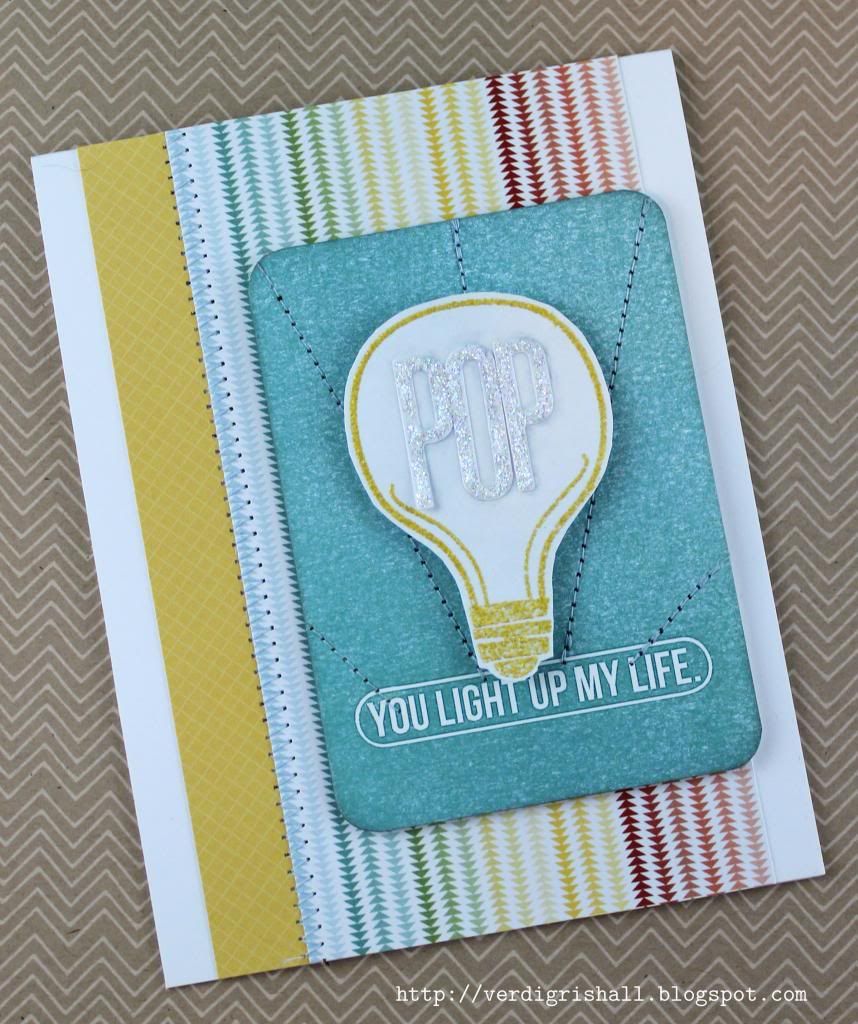
Single Dots Border in green.  To the top edge I inked up the edge and then stamped the outline small circles from Single Dots Border in fuschia.  For this application I was really happy with the haphazard stamping of clear stamps on canvas.  I added a frame with my gold leaf pen to pull in more gold (I can't get enough of it at the moment).


Next I went searching online for a quote I liked.  After finding a quote, I shopped my little Thickers collection for the right colors and different textures.  Of course the gold glitter Thickers came out...they seem to show up on everything I make right now.  I may have to start wearing them.  I also pulled out some neon letters from Heidi Swapp because I liked the color and shape.  I only altered the 1 by coloring black to make it stand out a bit more.  Just a note, the Thickers stick but move pretty easily.  I recommend that you adhere them permenantly with something like Glossy Accents, Diamond Glaze or even hot glue if you prefer.

 
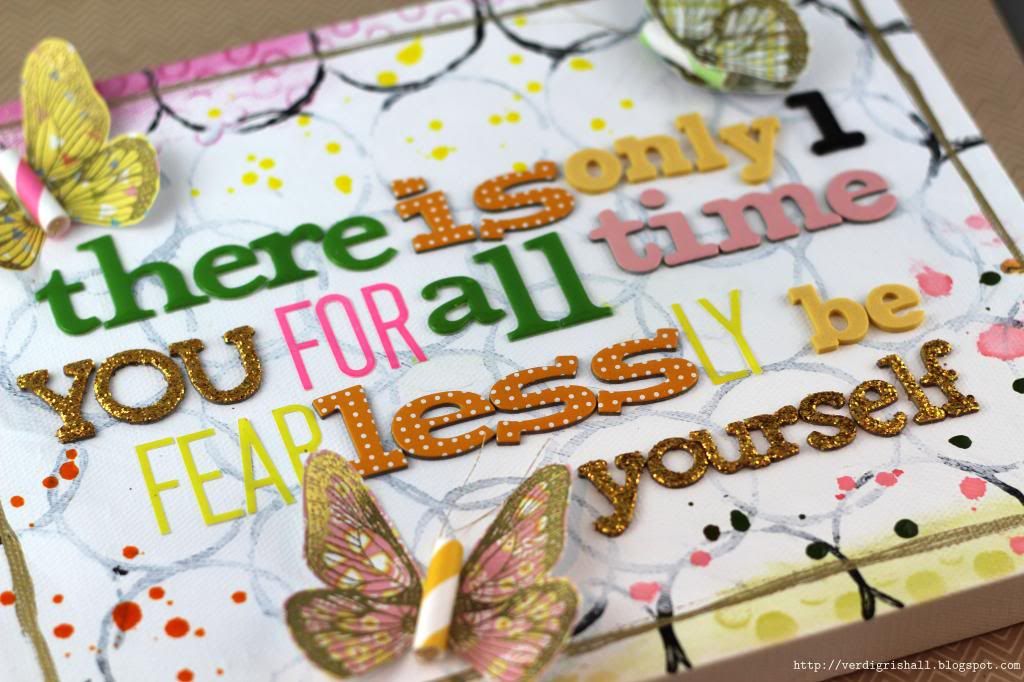
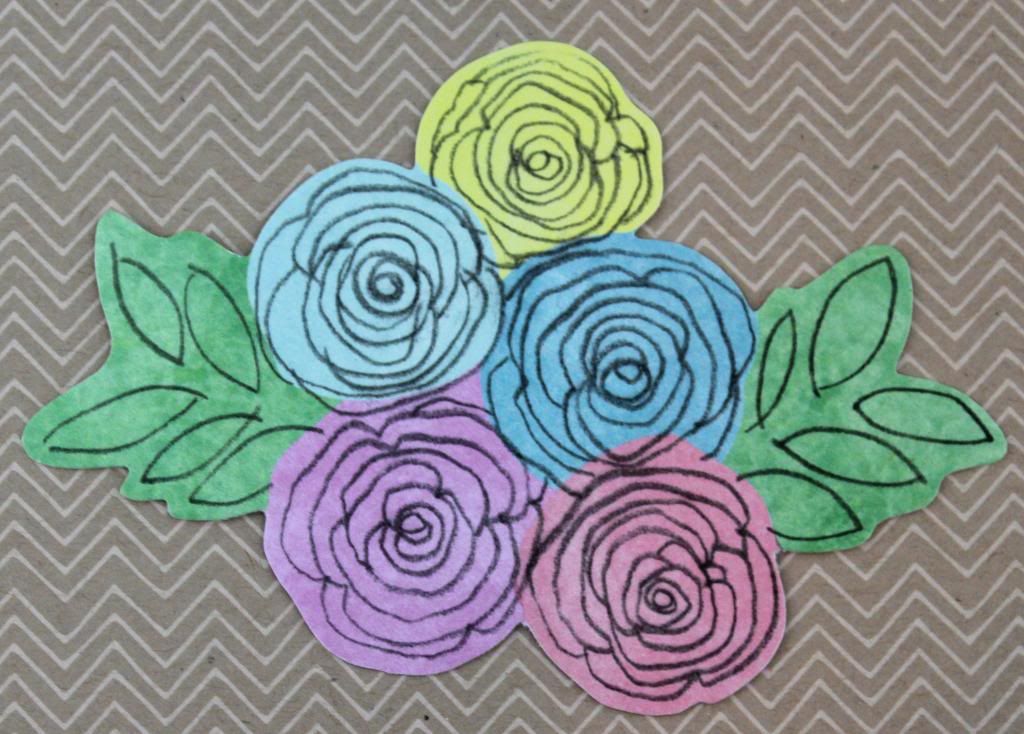
After spelling out my quote I placed my butterflies on the canvas to figure out the placement.  I originally made 6 butterflies, but only ended up using 3 for this project.  I adhered the butterflies in place with glue dots and/or dimensional adhesive.  Lastly I added drops of sprays for added pops of color.  Easy peasy.  Just change up the colors, design and quote to suit your taste and style.


I hope this has inspired you to make something that will uplift you or someone else!  And remember to head on over to The Aviary for your chance to win.

For more uplifting ideas for Winged Things or if you get lost along the way here is the full list for the blog hop:

Heather Lynn Novinger - http://heathernovinger.blogspot.com/Dana Tatar - http://datatar.blogspot.com/
Tara Chaussee - http://secretbeesstudio.blogspot.com/
Norma Gomez - http://lilhoneybeestudios.blogspot.com/
Amber Rasmussen - http://sew-ink.blogspot.com
Carrie Avery - http://www.carrieavery.com/
Shay - http://verdigrishall.blogspot.com/  <-----You are here
The Aviary -  http://paper-wings-productions.blogspot.com/

Thank you so much for visiting! 

Happy hopping,
Shay.

Supplies:

Stamps: Wings or Butterfly Wings and Single Dots Border, Paper Wings Productions
Ink: VersaMark, Tsukineko; limeade ice and raspberry fizz, Papertrey Ink
Kit: March 2013 Card Kit includes 6x6 paper from Daphne's Closet by Lawn Fawn and paper straws, Simon Says Stamp
Other: detail metallic gold embossing powder, JudiKins; gesso, Claudine Hellmuth Studio by Ranger; metallic sequin black acrylic paint, Folk Art by Plaid; gold decorative sewing thread, Coats; gold glitter sunrise, orange chipboard flat, yellow foam Eric, pink chipboard bliss, green puffy honey Thickers, American Crafts; day glow neon letters, Heidi Swapp; sherbert, buttercup and Doris Mister Huey's Color Mists, Studio Calico; pink balloon sprinklers, October Afternoon; gold leafing pen, Elmer's; black fine point permenant marker, Sharpie; canvas

February 25, 2013

Papertrey Ink's February 2013 Blog Hop: Marvelous Monograms


Dear Reader,

I am here tonight to share cards I made for Papertrey Ink's February 2013 Blog Hop: Marvelous Monograms.  Here was the challenge image to inspire our creations:


I pulled out a stack of Papertrey Ink stamp sets and set to work coming up with some cards.  I ended up with three, but I seriously could have made oodles more of them if I had started on this challenge earlier.   

Card No. 1:


I stamped the townhouse from Boards & Beams in harvest gold, limeade ice, aqua mist and ocean tides.  I then cut out one of the Half & Half dies from aqua mist cardstock.  I stamped the townhouse on aqua mist on the aqua mist panel and then embossed the "s" in white embossing powder.  I adhered the panel to the card using dimensional adhesive.  Last is a sprinkling of white sequins.


Card No. 2:


I stamped the twiggy wreath from Wreath From All Seasons with dark chocolate and over-stamped it with the berry wreath in raspberry fizz and stamped the "s" in charcoal on kraft cardstock.  On a piece of charcoal card base I adhered a strip of pink glitter fabric tape and over that I adhered the kraft panel with dimensional adhesive.


Card No. 3:


I stamped the feather from Happy Trails (love this stamp set!) in raspberry fizz, hawaiian shores and limeaid ice on a white card base.  I cut out the Mat Stack 2 die from raspberry fizz cardstock and embossed one of the frames from Mat Stack 2 Collection in gold.  I added an "s" from a gold glitter Thickers.  The Mat Stack is adhered with dimesional adhesive.  I added a frame using a gold leafing pen.


I hope you have enjoyed my takes on the Marvelous Monograms challenge.  Thank you so very much for visiting!

Happy creating,
Shay.

Supplies:
Stamps: Trajan: Monogram Edition, Board & Beams, Wreath For All Seasons, Happy Trails and Mat Stack 2 Collection, Papertrey Ink
Ink: Harvest Gold, Limeade Ice, Aqua Mist, Ocean Tides, Raspberry Fizz, Dark Chocolate and Hawaiian Shores, Papertrey Ink; VersaMark, Tsukineko; Charcoal Mid-Tone, Hero Arts Shadow Ink
Cardstock: Stamper's Select White, Aqua Mist, Kraft, Raspberry Fizz, Papertrey Ink; grey, Neenah Paper
Other: Half & Half Die Collection and Mat Stack 2 Die, Papertrey Ink; Cuttlebug, Provo Craft; opaque white and detail metallic gold embossing powders, JudiKins; white sequins; pink glitter fabric tape; gold glitter sunrise Thickers, American Crafts; gold leafing pen, Elmer's

LinkWithin

Related Posts with Thumbnails