Happy Friday!
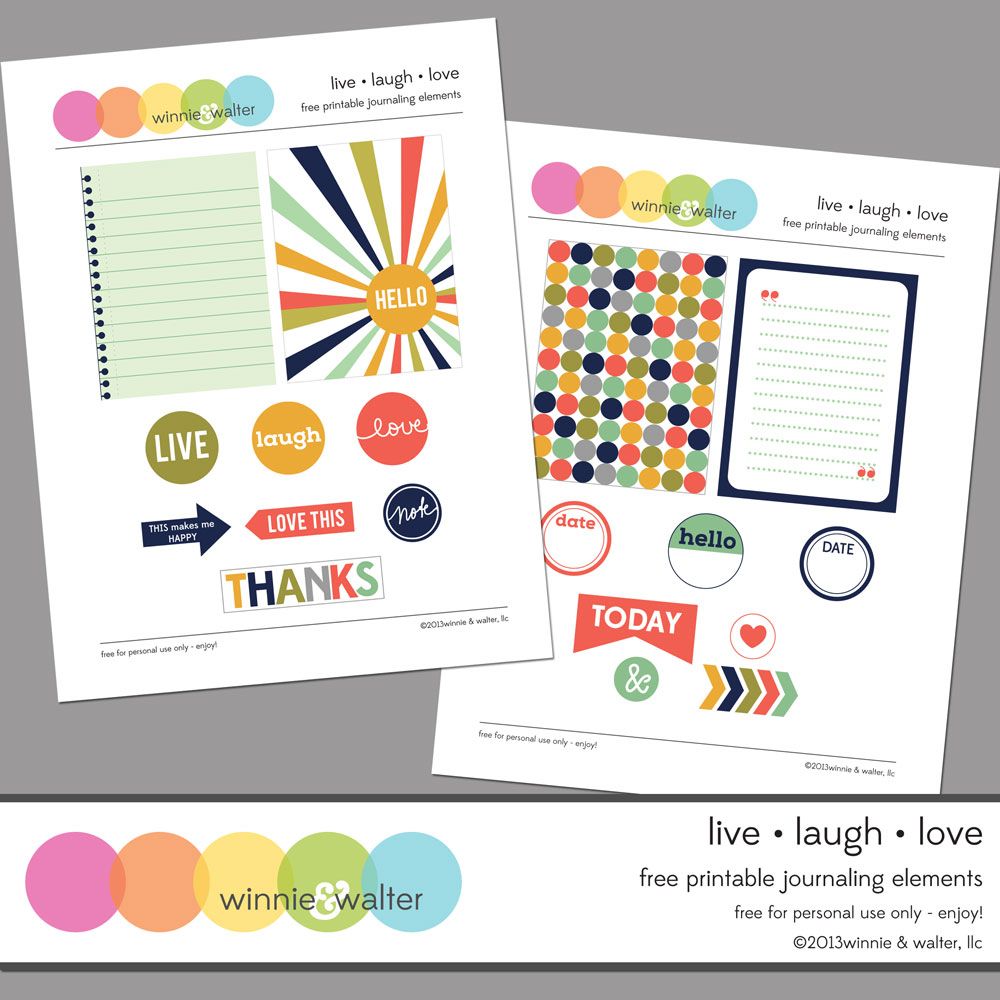
How would you like a gloriously free printable (for personal use) that can be used for Project Life, scrapbooking layouts, cards, gifts or whatever other crafty goodness you can dream up?
Today marks the debut of Winnie & Walter to the world even if it is a tiny debut! Winnie & Walter will be a small online boutique offering products designed by my talented friend Julie Mogford and I. We are offering up a free printable (for personal use) on our blogs along with a little inspiration on how we used it. This is to be the first of many printables in the future.
We have a whole lot of goodness coming soon so to keep in the loop about Winnie & Walter, please follow this blog and/or Julie's blog!
Now on to the free Live Laugh Love printable:
Like us on Facebook to receive the Live Laugh Love printable for FREE (personal use only)!
Tip: If you wish to adjust the colors of the printables I recommend using Photoshop or Photoshop Elements. In Photoshop Elements under Enhance pick Adjust Color and then Adjust Hue/Saturation. You can use the bars to adjust the hue, saturation and lightness as you desire. For more information you can check out this simple tutorial: http://www.twopeasinabucket.com/cg_display.asp?g=4&seed_id=22398
What to see what I created with the Live Laugh Love printable? Here are few cards for your viewing pleasure:
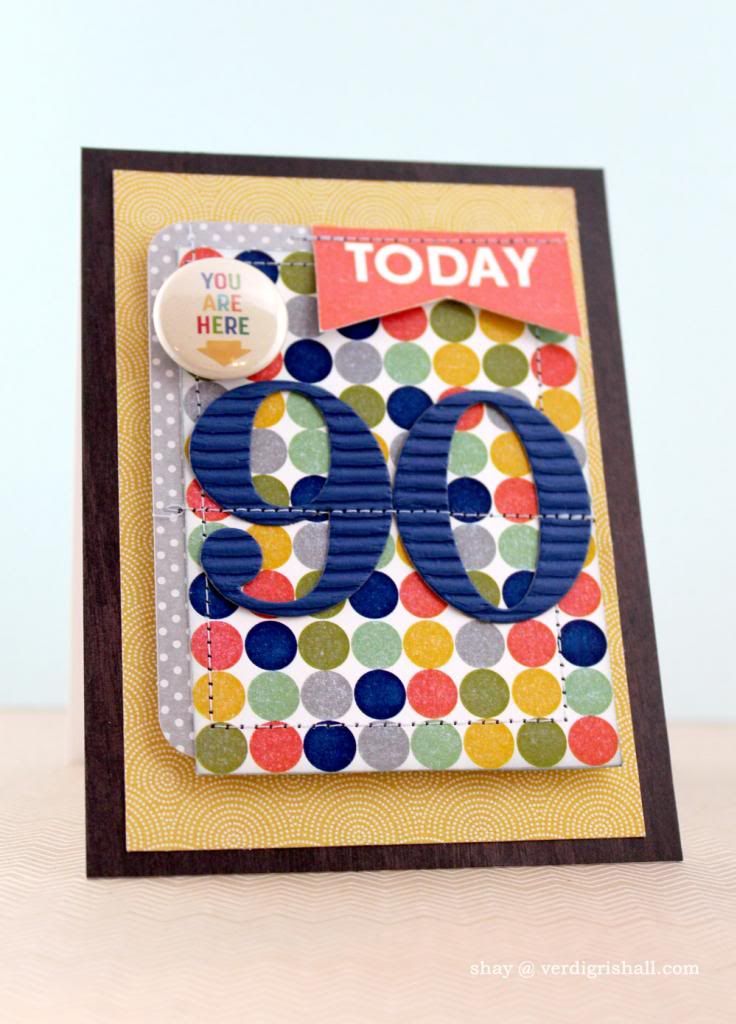
Card No. 1
Today is actually my grandfather's 90th birthday. For the occasion I made this card to celebrate such a momentous occasion. I used the dot journaling card and today banner from the Live Laugh Love printable with the Spencer's Card Kit, grey polka dot journaling card from the Clementine Core Kit and a 4x6 woodgrain journaling card by Studio Calico along with number dies from Papertrey Ink. I pulled out the sewing machine and went to town. The last element was a tin pin from October Afternoon.
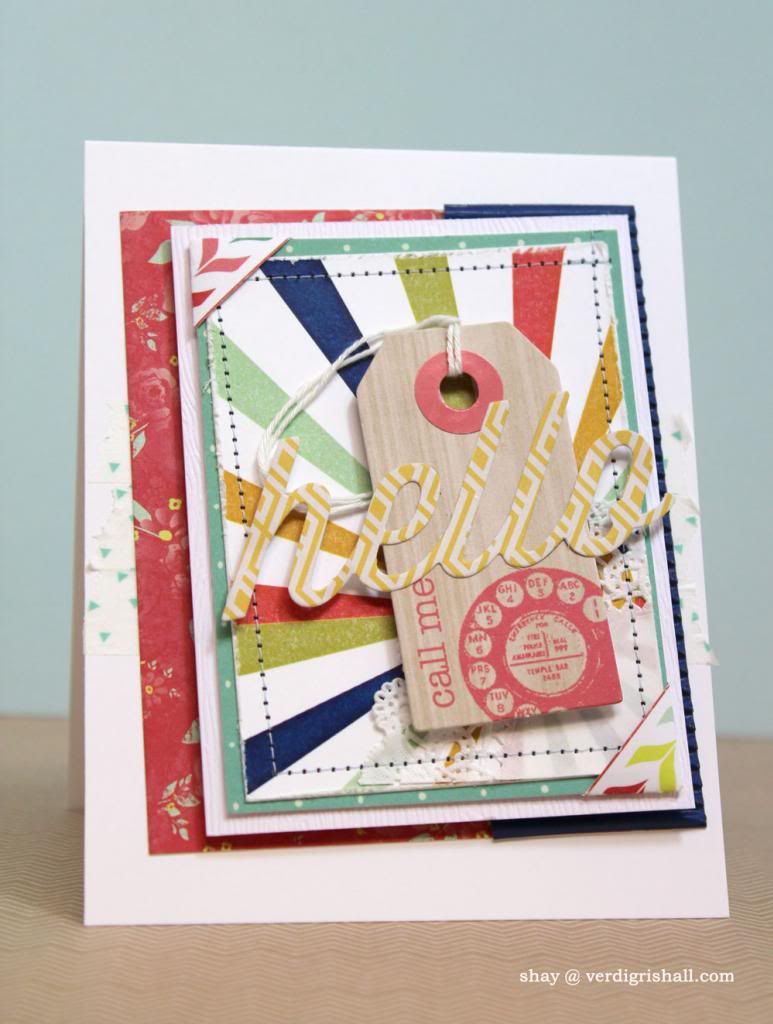
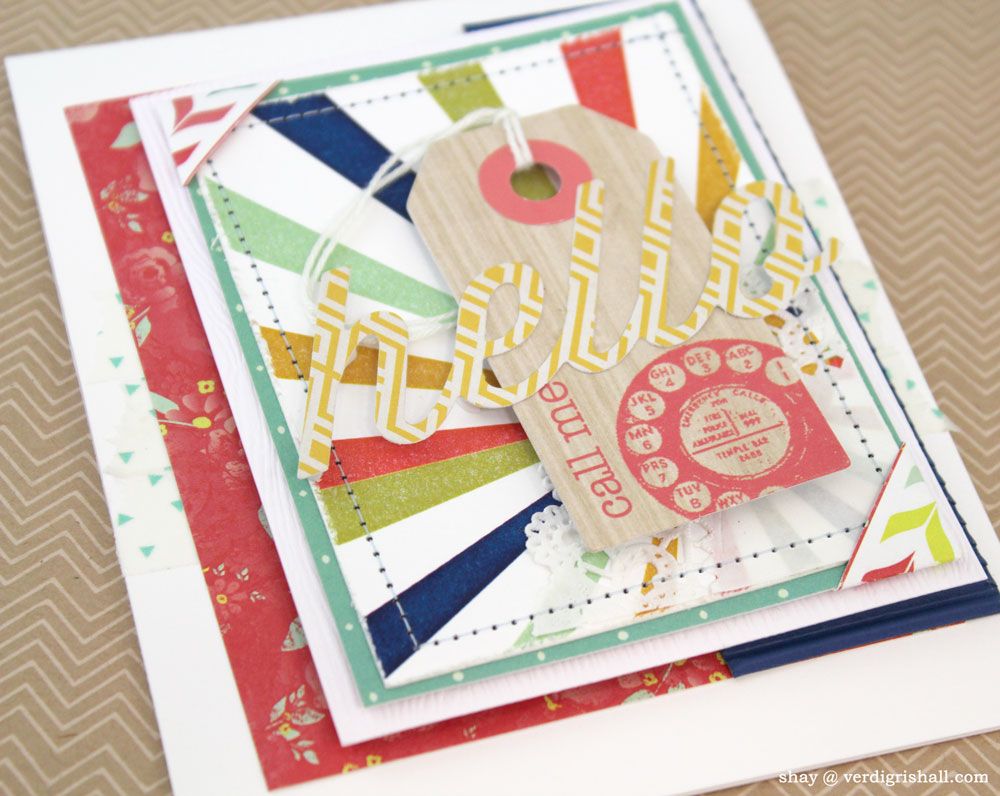
Card No. 2
This card features the burst journaling card from Live Laugh Love. It is a mix of things from Studio Calico (like the tag from Spencer's Card Kit and the journaling card under the burst journaling card) along with patterned paper from the 6x6 paper pad from the brand new Finnley collection by Glitz Design. I found this collection really fun to play with along with the printables. I also used the happy die from Papertrey Ink which I cut from the Soho Garden 6x6 paper pad.
Card No. 3
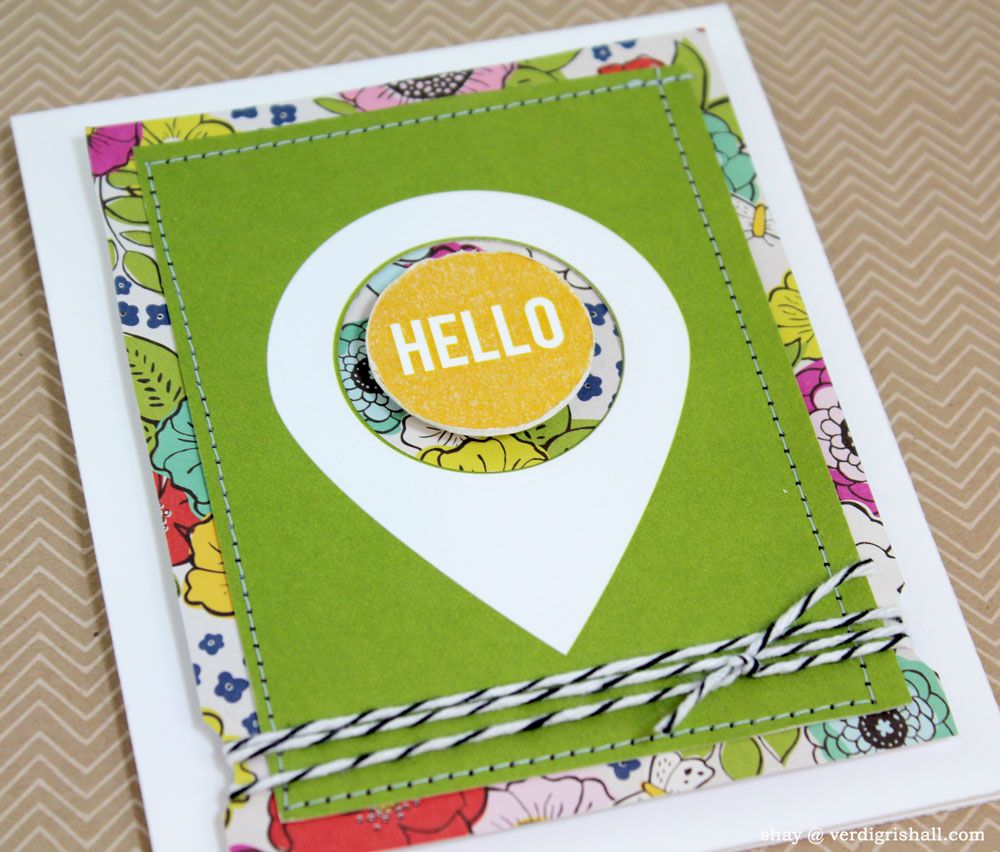
This card highlights the hello circle which I cut from the burst journaling card of the Live Laugh Love printable from Card No. 2 (I oh so cleverly covered up that section so you can't tell there is a hole where the hello circle should be). I added it to a geotag journaling card from Studio Calico and a fun and funky piece of patterned paper from the Soho Garden 6x6 paper pad. I notched the panel with a circle punch and added some ever useful black and white twine.
Card No. 4
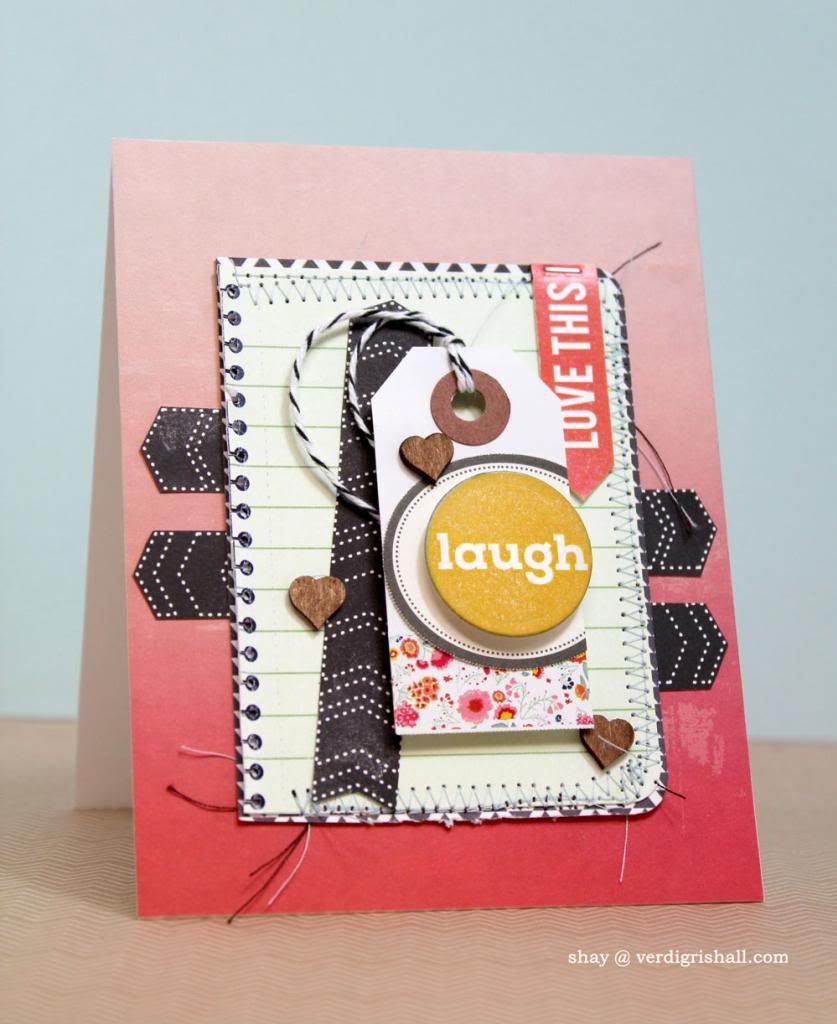
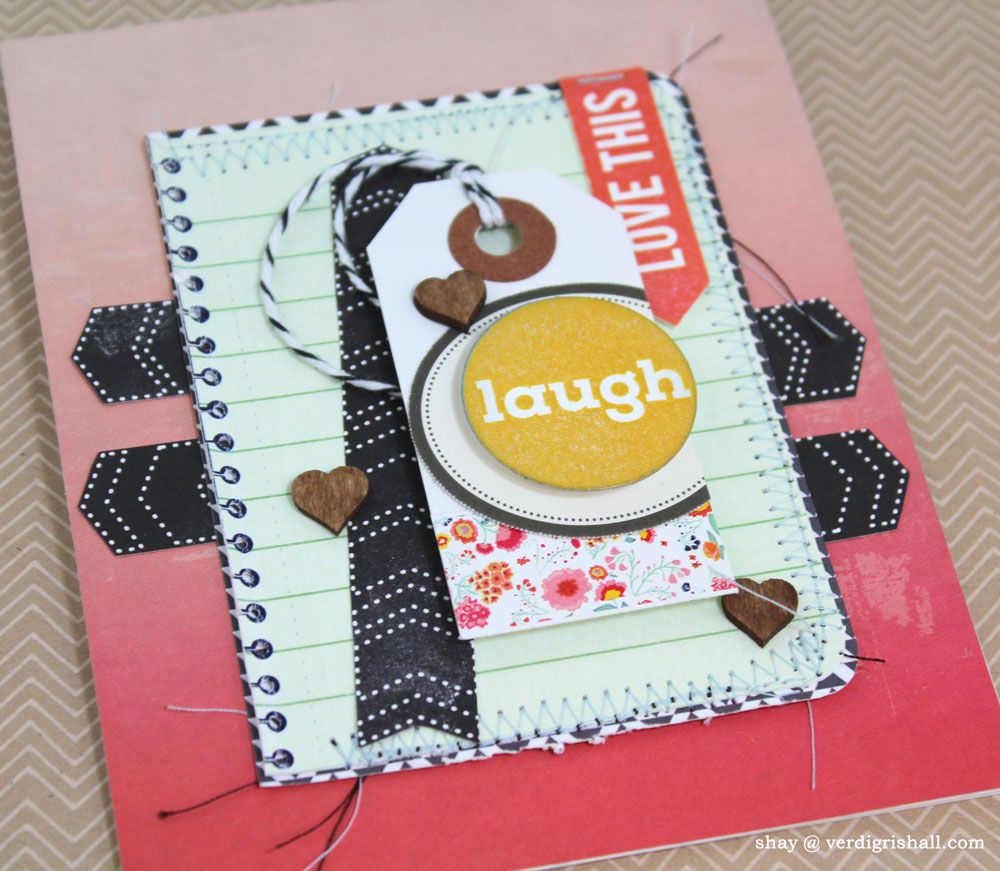
The notebook journaling card was the beginning piece of this card (I punched a hole through each of the navy circles and cut along the lines to give the notebook edge a bit more interest) which I built upon using other bits from the Live Laugh Love printable along with a journaling card from Studio Calico I cut up into arrows. I added a sticker from Dear Lizzy's Lucky Charm Accent & Phrase Sticker onto the tag along with a tag from Anna Griffin under the laugh printable. The patterned paper is again from the Finnley 6x6 paper pad. The last touch were wood veneer hearts by Studio Calico.
Card No. 5
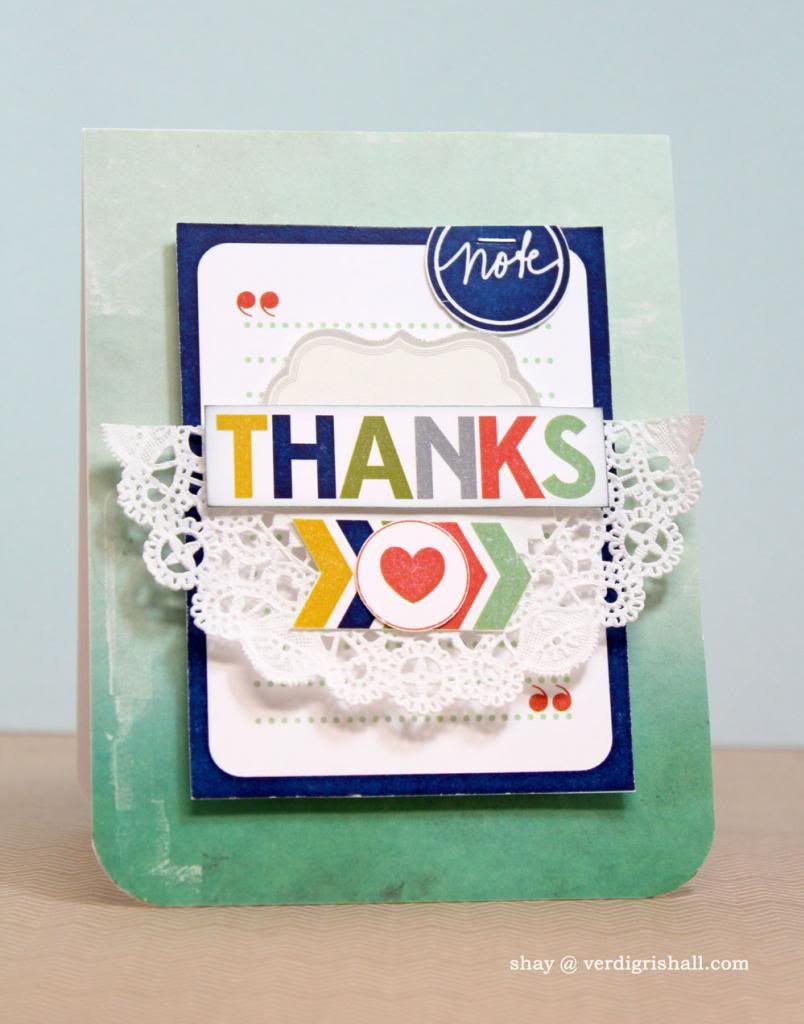
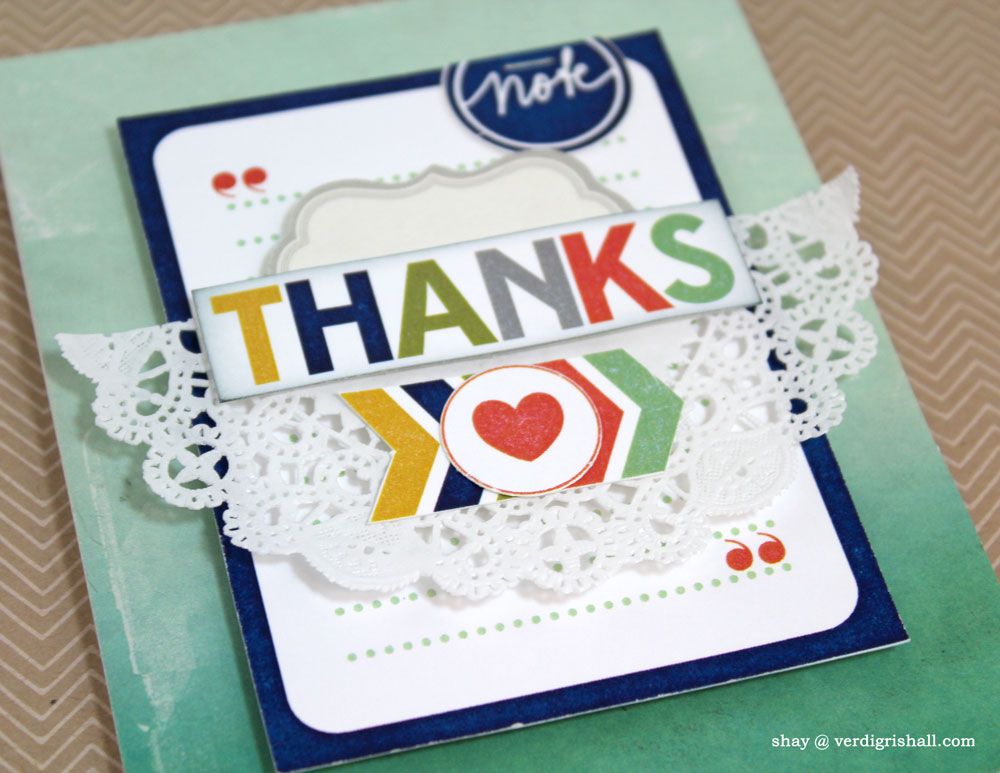
I tried to put quite a few of the elements from the Live Laugh Love printable on this one. The only elements not from the printable are the grey label from Anna Griffin, doily and the ombre patterned paper also from the Finnley 6x6 paper pad.
There you have my offerings to inspire you with the new and free Live Laugh Love printable. Make sure to download it and head on over to Julie's blog to see what she has done with the Live Laugh Love printable.
We would be over the moon to see how you used them so feel free to comment with a link!
Happy creating,
Shay.
Supplies:
live laugh love printable, Winnie & Walter
Spencer's Card Kit, Studio Calico
Cardstock: solar white, Neenah White; white woodgrain, Studio Calico; corrugated navy, stash
Patterned paper: Finnley 6x6 paper pad, Glitz Design; Soho Garden 6x6 paper pad, American Crafts
Dies: By the Numbers Die Collection and Wonderful Words: Hello die, Papertrey Ink; circle nestabilities, Spellbinders
Other: Cuttlebug, Provo Craft; journaling card from Clementine Project Life Core Kit, Becky Higgins; journaling cards, Studio Calico; sewing machine, Brother; tin pin from Boarding Pass collection, October Afternoon; accent & phrase stickers from Lucky Charm collection, Dear Lizzy/American Crafts; doily, Studio Calico; heart wood veneer, Studio Calico; labels, Anna Griffin; tiny attacher, Tim Holtz; white tag, Studio Calico; washi tape; black and white baker's twine, Whisker Graphics; 3/4" and 1" circle punches, Stampin' Up; Crop-A-Dile Chorner Chomper, We R Memory Keepers; dimensional adhesive
An eclectic, eccentric (often messy) house pieced together from paper, rubber stamps, a smidgen of glitter, grandiose dreams and a whole lot of glue.
Showing posts with label sewing. Show all posts
Showing posts with label sewing. Show all posts
August 23, 2013
Get Your Free On!
Labels:
birthday
,
cards
,
feminine
,
Finnley
,
free
,
gender neutral
,
Glitz Design
,
hello
,
julie mogford
,
live laugh love
,
male
,
Papertrey Ink
,
printables
,
sewing
,
Spencer's Card Kit
,
Studio Calico
,
thank you
,
Winnie & Walter
August 8, 2013
Man Oh Man Monday No. 21 | Celebrate Today

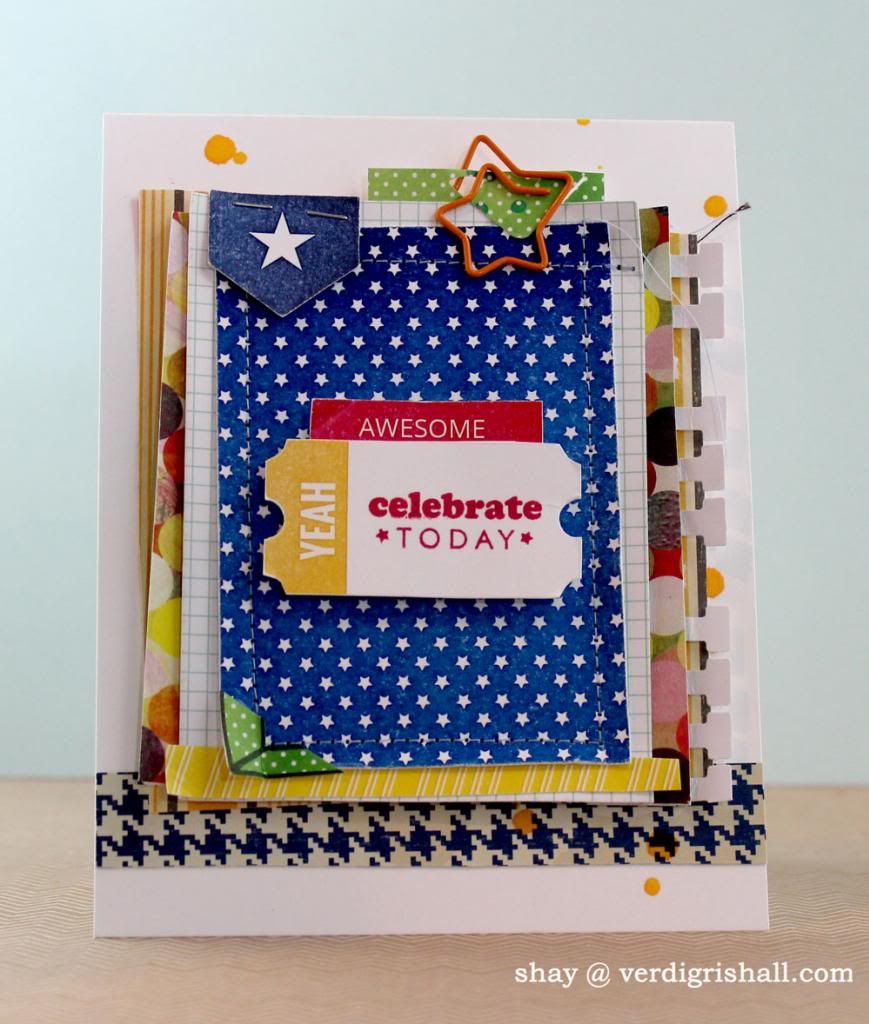
You may notice a trend of my using a journaling card (either hybrid or bought) as a jumping off point for my cards lately. Well, it continues...and continues.
I began with a star card from Emily Merritt Designs' Free. Another amazing digital kit of journaling cards that can be easily printed out for those who love hybrid or left as a digital element.
I further embellished the journaling card with printable elements from Studio Calico by Marcy Penner (aka Hello Forever). I am afraid these particular elements are no longer available although they may make them available for a special sale like they did on Cyber Monday last year. If you do like the elements I used, I recommend buying the Studio Calico printable files available right now from Marcy Penner (Geralyn Sy aka In a Creative Bubble and Natalia Buntar aka blinks of life also design wonderful printables), buying directly from Marcy Penner/Hello Forever or at Two Peas at a Bucket for limited edition printables designed by Marcy Penner/Hello Forever there along with other cool printables and cutting files.
Nearly all of the patterned paper used in this card are from a pile of "older" colorful papers I had cut up into 6x6 squares a while ago to facilitate their use in various projects.
Also in attendance is the sewing machine. Why it took me so long to get that bad boy out I am not sure. And why haven't I named him yet (the sewing machine has to be masculine because it is a Brother)? A question for another day.
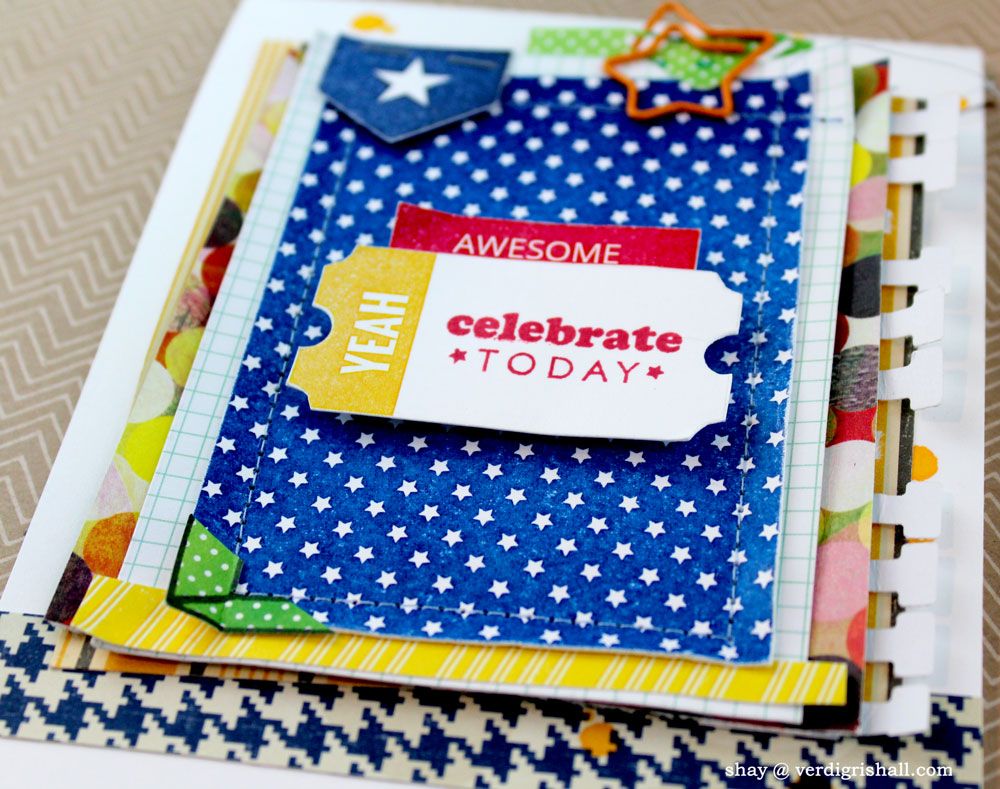
That yeah ticket is a printable that I stamped the sentiment onto. The photo corner is yet another idiosyncrasy of mine lately. I stamped the frame from Life Framer onto green and cut the corner off of it.
Hope you have enjoyed this week's MOMM!
Happy creating,
Shay.
Supplies:
Digital: Free, Emily Merritt Designs; May Printable by Marcy Penner (aka Hello Forever), Studio Calico
Stamps: 2012 Birthday Tags, Papertrey Ink; Life Framer, Paper Wings Productions
Ink: cough syrup, Jenni Bowlin for Ranger
Journaling card: Studio Calico
Cardstock: solar white, Neenah Paper
Patterned paper: woolworths from Hometown collection and no. 2 pencil from schoolhouse collection, October Afternoon; chicken pox from June Bug collection, Basic Grey; sketchbook 6x6 paper pad, Amy Tangerine/American Crafts; shoreline 6x6 paper pad, American Crafts
Other: notebook border punch, Fiskars; photo corner punch, EK Success; sewing machine, Brother; star paper clip, Amy Tangerine/American Crafts for Studio Calico; sherbet Mister Huey's Color Mist, Studio Calico; Tiny Attacher, Tim Holtz; dimensional foam adhesive
Labels:
Emily Merritt Designs
,
Hello Forever
,
hybrid
,
journaling cards
,
life framer
,
Man Oh Man Monday
,
Man Oh Man Monday No. 21
,
Marcy Penner
,
MOMM
,
Paper Wings Productions
,
Papertrey Ink
,
sewing
,
stamping
,
Studio Calico
July 8, 2013
Man Oh Man Monday No 18 | Dude You Are Amazing

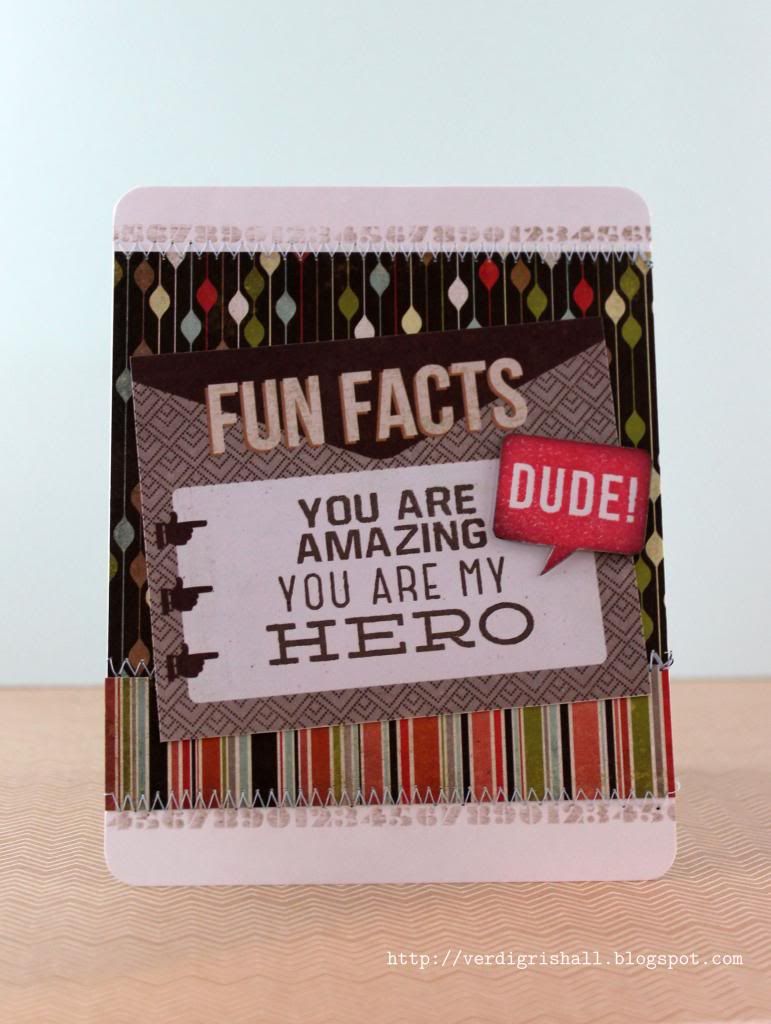
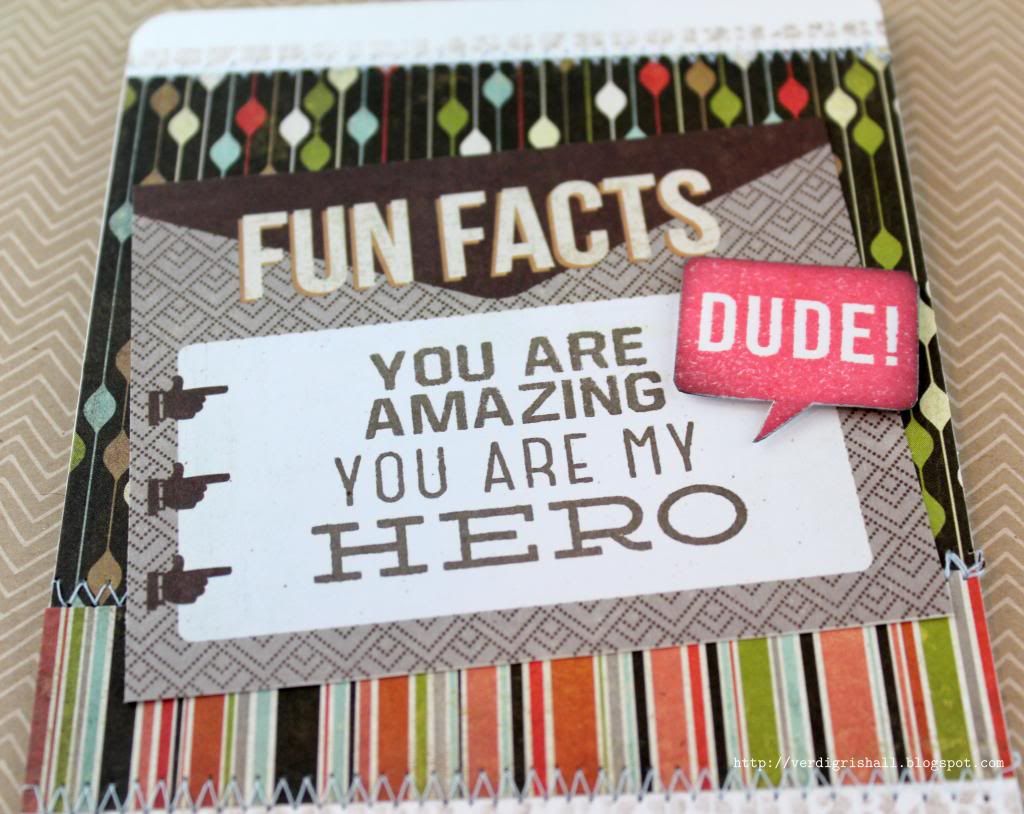
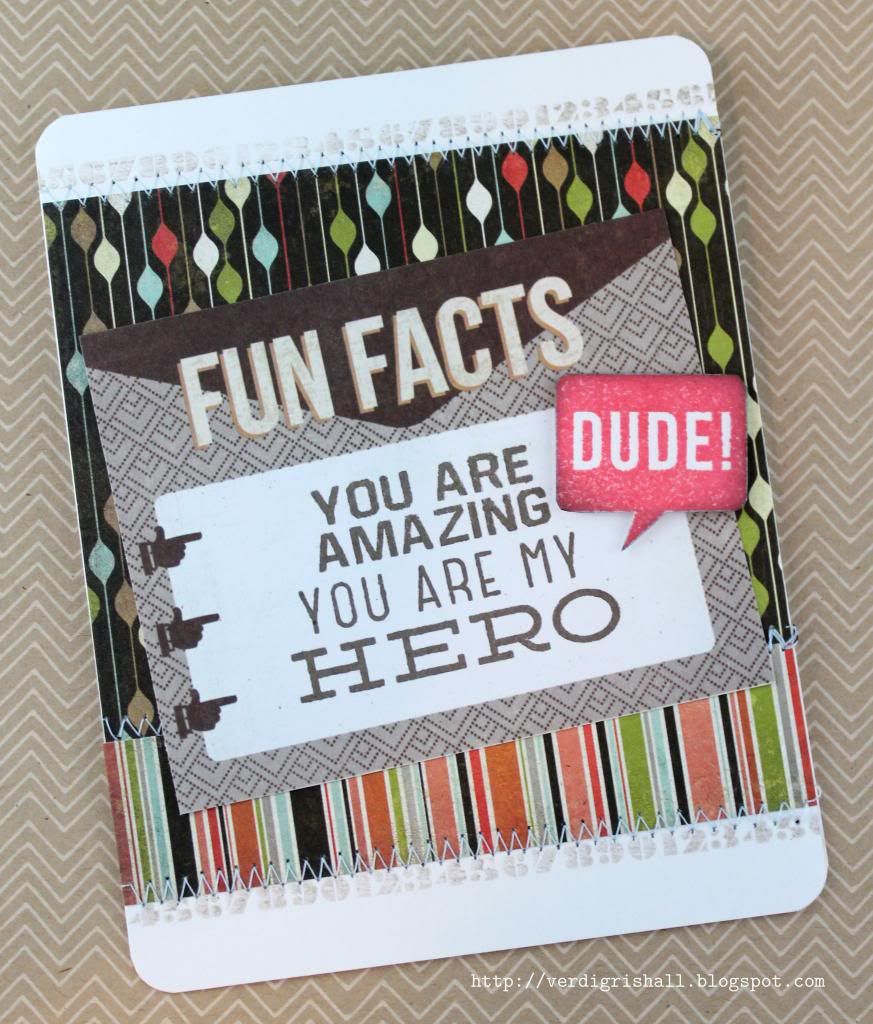
Tonight I decided to again pull out the June Simon Says Stamp! Card Kit: Something Awesome featuring the Dude stamp set by Kelly Purkey. Such a fun kit and I love the stamp set.
This card is all about the Dude stamp set and Basic Grey's Hipster 6x6 papers and snippets from the kit. I did do a little sewing as well.
Now let's get to the card:
Of course I used a little dimensional adhesive on the card to pop up the dude speech bubble.
And the last peek of the card:
That's all from me for now. Have a glorious week!
Happy creating,
Shay.
Supplies:
Card kit: June Simon Says Stamp! Kit: Something Awesome, Simon Says Stamp
Ink: pale tomato and cup o'joe, Hero Arts Mid-Tone Shadow Ink
Cardstock: Georgia-Pacific
Other: sewing machine, Brother; Inkssentials Ink Blending Tool, Ranger; Crop-A-Dile Corner Chomper, We R Memory Keepers; dimensional adhesive
June 7, 2013
Paper Wings Productions' June Design Team Blog Hop
WELCOME to the “Summer Fun” Paper Wing Production's Design Team Blog Hop & Giveaway! If you've arrived here from The Aviary, then you're in the right place. If you’re just stopping by for a visit, I’d love for you to check out our hop...you will not be disappointed! I am honored to be the first stop for this blog hop!
This month we’re sharing some “summer fun” themed projects. So sit back, grab yourself something cold to drink or better yet some ice cream or frozen yogurt and enjoy a little Paper Wings Productions summer inspiration! Oh and let’s not forget about the blog candy!! This month we’re giving away a gift certificate to the Paper Wings Production’s online store AND there will be some blog candy along the way!!
For a chance to win, all you need to do is:
- be a follower of the Paper Wings Productions blog, The Aviary.
- visit each of the participating designer's blogs and leave them some love. Then go back to The Aviary and leave a comment letting them you completed the hop.
- to increase your chances of winning, like the Paper Wings Productions Facebook page and/or invite your friends to the hop.
- then just come back and let us know! Be sure to leave a separate comment for each of the additional entries.
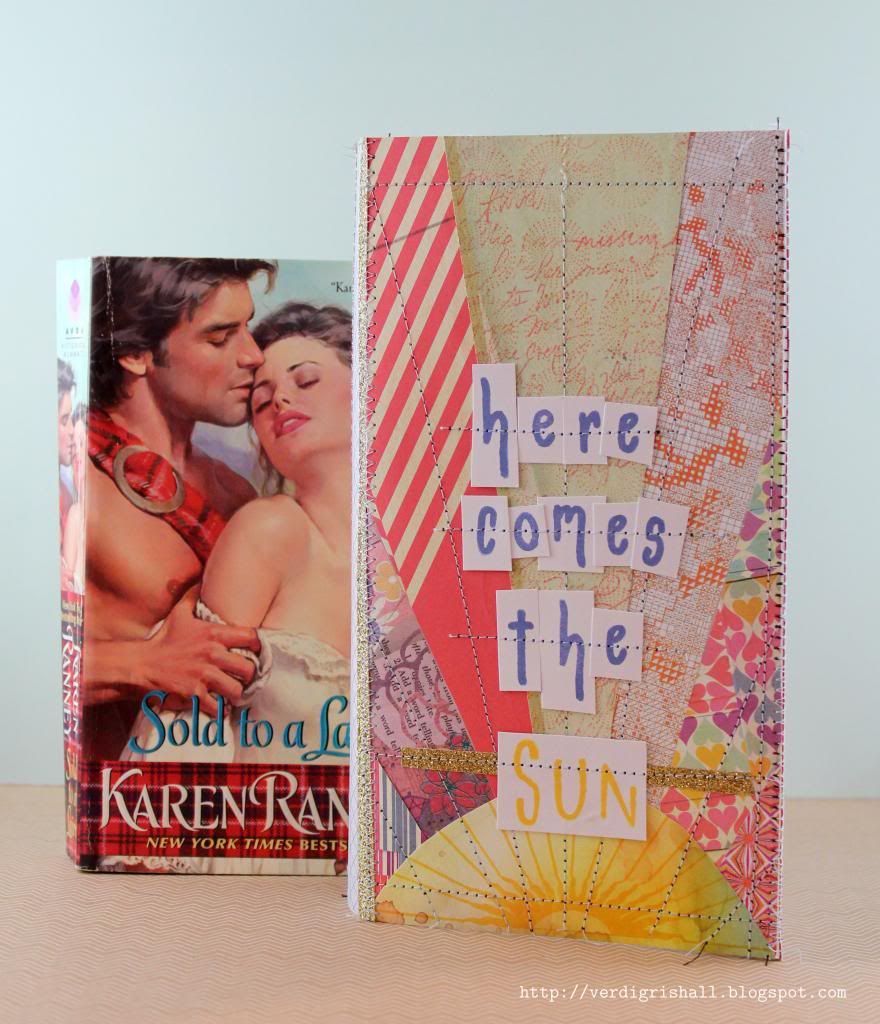
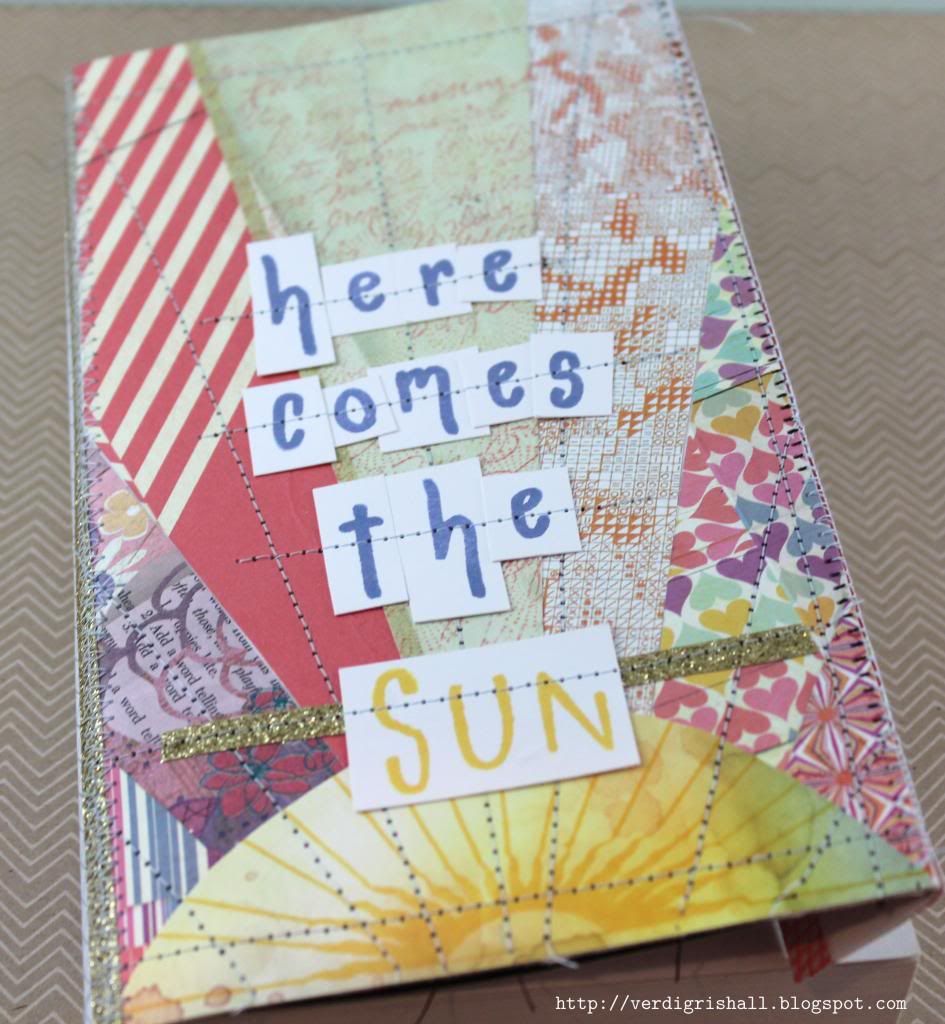
When I was brainstorming ideas for Summer Fun, I hit upon one of my favorite ways to spend hours upon hours: reading. I thought why not create a book cover to disguise those steamy paperbacks that are so much fun to read? I know there are ebooks, but sometimes a good old fashioned book is just the thing poolside, on the beach, in a car, on the plane or sitting in the cool air conditioning.
I started with Claudine Hellmuth's 8.5" x 11" sticky-back canvas thinking I would do some image transferring. In the end though I used the sticky-back canvas like a big fabric sticker.
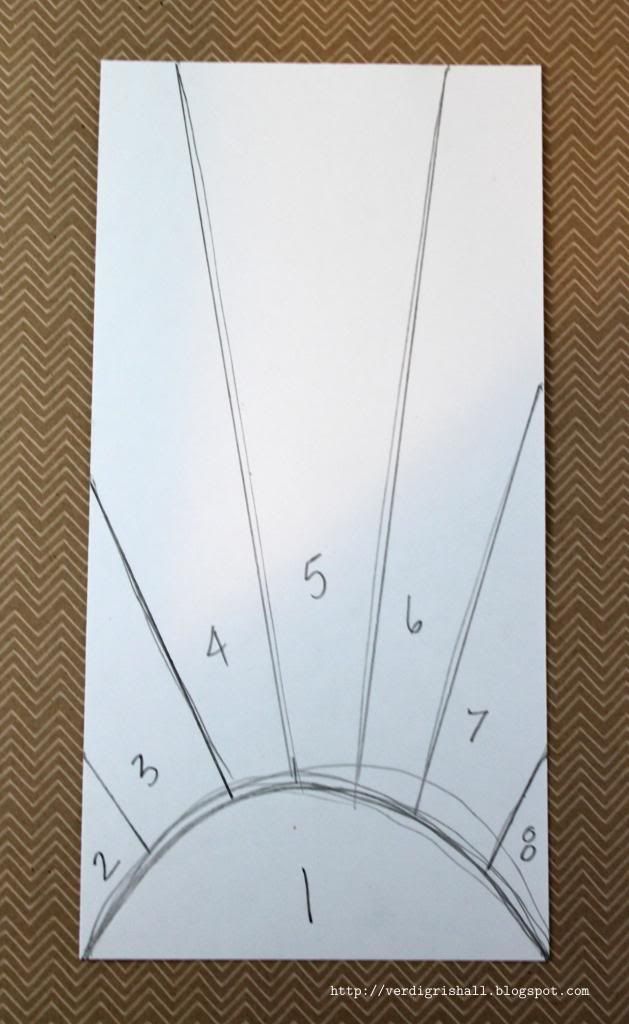
I freehand drew a sun ray pattern on a cardstock panel which measured 8.5 inches high by 4.25 inches wide (in the end the project ended up being 8 inches high as I didn't need as much height). I numbered each of the parts and then cut them out (I cut each shape out twice as I made two panels for the front and back). I used those pieces as patterns to trace onto pieces of patterned paper from the Basic Grey|Sassafras Soleil collection.
I stamped the sun from Earth and Sky or Sunrise and a line from Window using yellow ink onto the half circle shape. The largest center ray piece I stamped over with the Backgrounds or Circles background and Writing Backgrounds or Writing stamps. I adhered (using some liquid glue) each sun and its ray to a piece of cardstock measuring 8.5 x 4.25 inches using the numbers from the pattern pieces as guides. Don't worry if things aren't perfect because you are looking for a handmade mismatched look anyway.
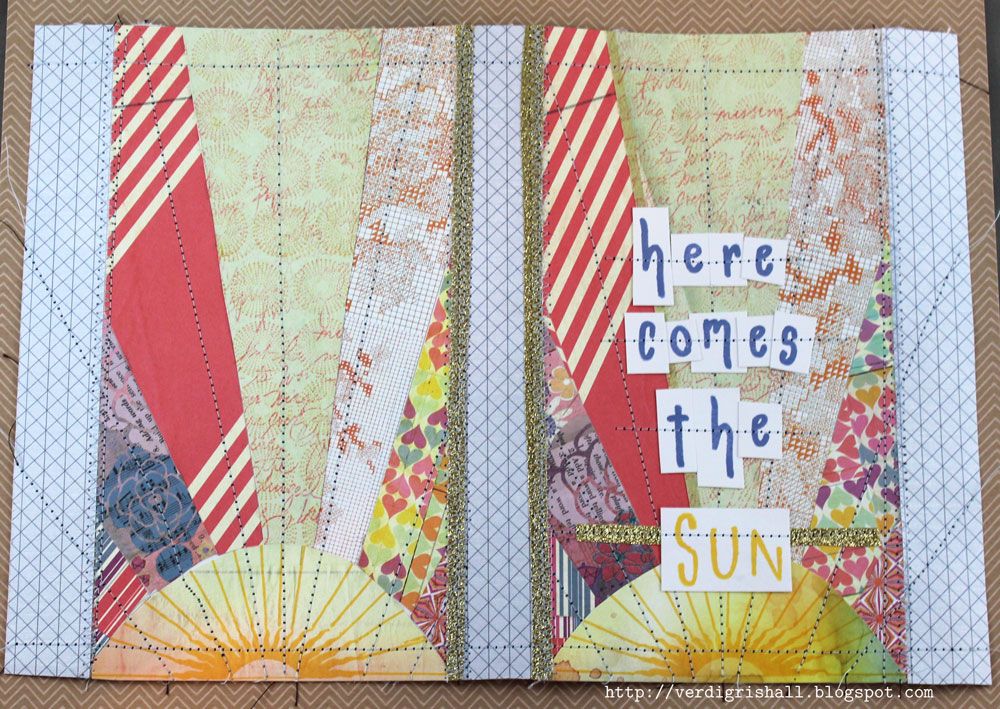
On the piece of sticky back canvas, I measured 0.5 inches on each of the right and left sides to be folded over as flaps to fold into the book to keep the book cover over the book. I actually cut two one inch wide strips from patterned paper for these sections. I measured for center and decided to create an inch wide spine that I then cut out from patterned paper. Removing the backing to the sticky-back canvas and with the sticky side up, I placed the center strip at 5 inches (it will then take up the place of 5 inches to 6 inches on the canvas). The panel I wanted as the front cover I placed on the right side butting up next to the center/spine 1 inch strip of patterned paper. I placed a one inch strip to the right side of the front panel. Next I placed the back panel to the left of the center strip and finished off by adding the last one inch strip to the left of the back panel. I lined up the panels to the bottom of the sticky-back canvas as any cutting I would be doing would be to the top of the canvas. Happy with the placement, I used a bone folder to burnish the paper onto the canvas. I cut any overhang of paper from the canvas and added some strips of brown sugar glitter tape on the spine for more interest.
Then I actually got out the sewing machine. This should garner a response of shock and awe as the sewing machine and I have a very peppered past. Anyone aware of my sewing abilities knows I have a much better relationship with the seam ripper. I want to assure you that I was very pleasantly surprised by how easy it was to sew on this project. If I can do it, ANYONE can do it! I went to town sewing all over the canvas. Have fun trying different color thread, different stitches, free style stitching as this is the perfect type of project to play with the sewing machine or if you are able and willing hand stitching.
Next I stamped "here comes the" from Funky Lower Case Alphabet with blue/purple ink on white cardstock. I cut out each letter as little blocks not worrying about size or straight lines. Then I stamped "sun" using Funky Alphabet (the uppercase version) in yellow ink and cut out the entire word as one block. I used a little liquid glue to adhere each letter to the front panel. I placed a strip of brown sugar glitter tape down under the sun block. I then sewed across each word.
At this point you can add more stamping, sewing, painting, doodling, embellishments or not. When you are happy with it, I recommend for more durability painting on a few layers of modge podge or soft gel medium to seal the piece.
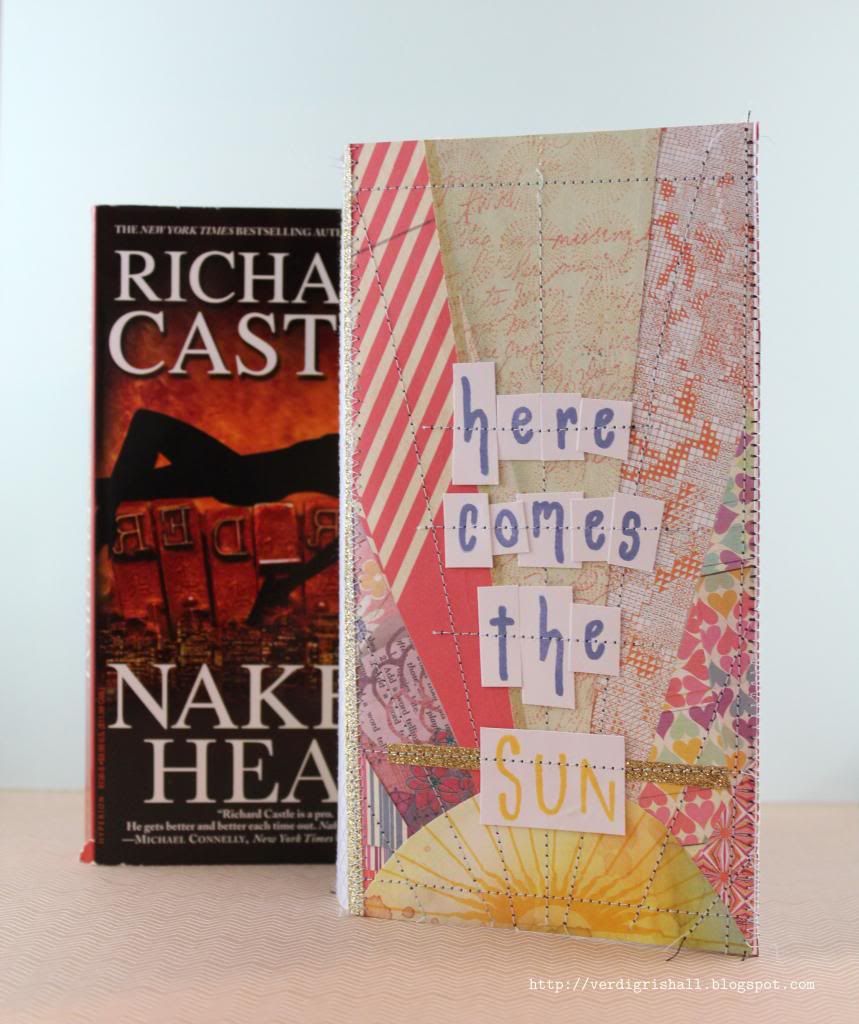
This book cover will fit those odd long paperbacks or a paperback of around 350 pages. I think that if you used a 12x12 inch piece of sticky-back canvas or used more than one 8.5 x 11 inch sheet you could make a wider book cover for thicker books or even one that fit trade paperbacks and/or hardcover books. This would be fun to make again and the possibilities are endless on how you could decorate it!
Now you can hide that guilty pleasure of a book (Fabio-like men hidden from prying eyes) behind your artsy book cover or give one to a friend with a book or books and/or gift card as a considerate gift. If you try out this idea, please let know because I would *love* to see it!
Now, make sure you check out each and every stop on the hop starting with the very talented lady that makes all things Paper Wings Productions possible, Carrie Avery.
***Here is the complete line up just in case you get lost along the way***
It has been an absolute delight to have you visit me today and I hope this helps kick start an amazingly creative and fun summer!
Happy creating,
Shay.
Supplies:
Stamps:
Cardstock: stamper's select white, Papertrey Ink
Patterned Paper: 6x6 Soleil paper pad, summer daisy and mermaid from Soleil collection, Basic Grey
Other: sticky-back canvas, Claudine Hellmuth Studio by Ranger; sewing machine; brown sugar glitter tape, American Crafts; Quick-Dry Adhesive, Scotch
Labels:
Basic Grey
,
blog hop
,
Claudine Hellmuth sticky back canvas
,
mixed media
,
Paper Wings Productions
,
Sassafras
,
sewing
,
Soleil
,
stamping
February 14, 2013
Papertrey Ink's 6th Anniversary: Boutique Accessory Challenge
Dear Reader,
Today on Nichole Heady's blog is a different challenge in honor of Papertrey Ink's 6th Anniversary: a boutique accessory challenge to make something to adorn your person. This is certainly a challenge for me...in fact I considered sitting this one out. Still we don't grow unless we push ourselves, right? So I pushed myself. Actually the hardest part of my project was locating a needle after recently going through a large reorganization of my studio.
I have one piece of felt from Papertrey Ink in true black so that is where I began. I cut out of it with the middle sized die from delightful doilies die collection. A little aside: this was my first time using the felt and like others have mentioned before it cut like a dream. I found a cool black and gold mesh fabric in my stash that I cut a couple of hearts out of. I attached the layers by sewing on buttons for a punch of color. I added a hair tie to the back of each piece.
I decided to decorate a tag to place the hair ties upon for presentation or gifting. I used aqua, red and black inks to stamp images from Delightful Doilies. The tag ended up too busy so I added a layer of vellum that I attached with a piece of ribbon and tiny attacher. Before I attached the vellum I added an edge of gold with a gold leafing pen.
It is pretty elementary, but I am happy I attempted this challenge. I hope your day was a delightful one!
Thank you so much for visiting.
Happy creating,
Shay
Supplies:
Stamps: Delightful Doilies, Papertrey Ink
Ink: speckled egg, chili powder and fountain pen, Jenni Bowlin for Ranger
Paper: vellum; manila tag
Other: delightful doilies die collection, Papertrey Ink; true black felt, Papertrey Ink; aqua mist twill tape, Papertrey Ink; holiday mix vintage button mix, Papertrey Ink; black emboidery floss (no. 310), DMC; gold leafing pen, Elmer's; TIm Holtz Tiny Attacher
Today on Nichole Heady's blog is a different challenge in honor of Papertrey Ink's 6th Anniversary: a boutique accessory challenge to make something to adorn your person. This is certainly a challenge for me...in fact I considered sitting this one out. Still we don't grow unless we push ourselves, right? So I pushed myself. Actually the hardest part of my project was locating a needle after recently going through a large reorganization of my studio.
I decided to decorate a tag to place the hair ties upon for presentation or gifting. I used aqua, red and black inks to stamp images from Delightful Doilies. The tag ended up too busy so I added a layer of vellum that I attached with a piece of ribbon and tiny attacher. Before I attached the vellum I added an edge of gold with a gold leafing pen.
It is pretty elementary, but I am happy I attempted this challenge. I hope your day was a delightful one!
Thank you so much for visiting.
Happy creating,
Shay
Supplies:
Stamps: Delightful Doilies, Papertrey Ink
Ink: speckled egg, chili powder and fountain pen, Jenni Bowlin for Ranger
Paper: vellum; manila tag
Other: delightful doilies die collection, Papertrey Ink; true black felt, Papertrey Ink; aqua mist twill tape, Papertrey Ink; holiday mix vintage button mix, Papertrey Ink; black emboidery floss (no. 310), DMC; gold leafing pen, Elmer's; TIm Holtz Tiny Attacher
Labels:
challenge
,
felt
,
hair accessory
,
handmade
,
Nichole Heady
,
Papertrey Ink
,
sewing
,
tag
Subscribe to:
Posts
(
Atom
)
