Happy Friday!
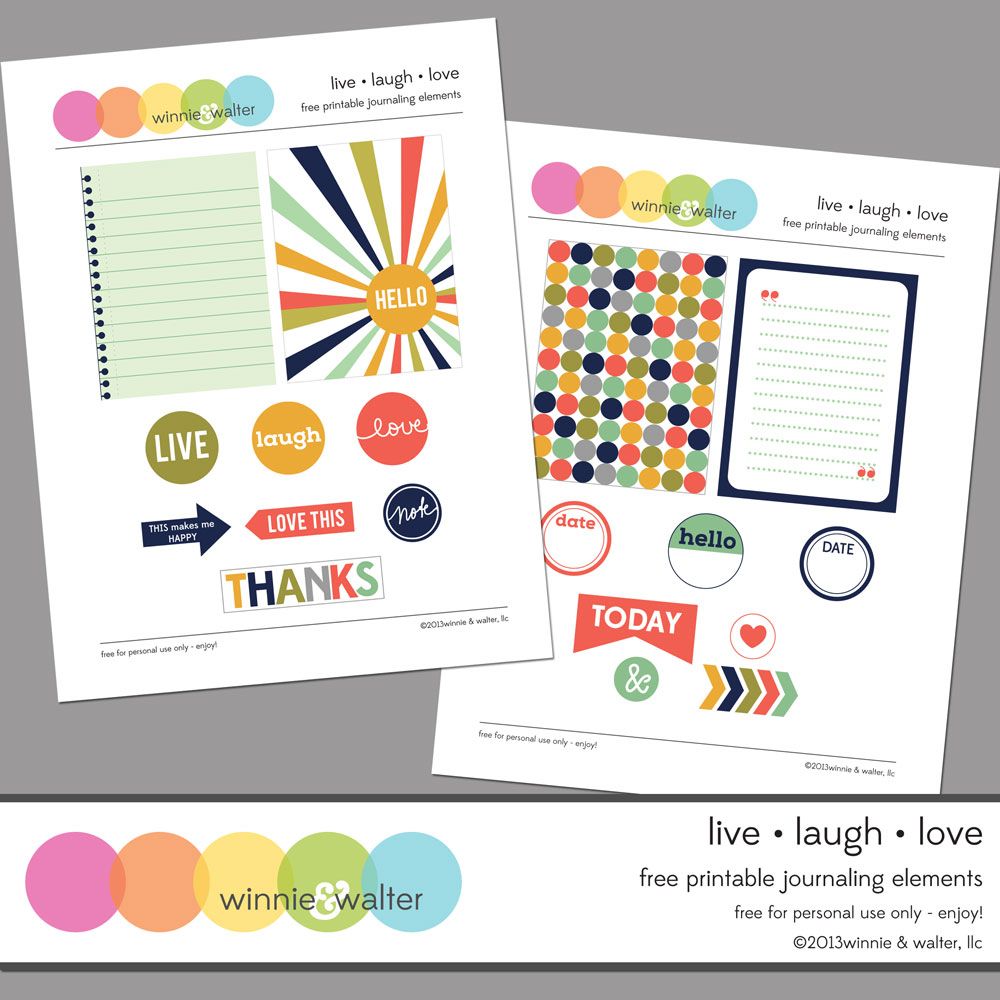
How would you like a gloriously free printable (for personal use) that can be used for Project Life, scrapbooking layouts, cards, gifts or whatever other crafty goodness you can dream up?
Today marks the debut of Winnie & Walter to the world even if it is a tiny debut! Winnie & Walter will be a small online boutique offering products designed by my talented friend Julie Mogford and I. We are offering up a free printable (for personal use) on our blogs along with a little inspiration on how we used it. This is to be the first of many printables in the future.
We have a whole lot of goodness coming soon so to keep in the loop about Winnie & Walter, please follow this blog and/or Julie's blog!
Now on to the free Live Laugh Love printable:
Like us on Facebook to receive the Live Laugh Love printable for FREE (personal use only)!
Tip: If you wish to adjust the colors of the printables I recommend using Photoshop or Photoshop Elements. In Photoshop Elements under Enhance pick Adjust Color and then Adjust Hue/Saturation. You can use the bars to adjust the hue, saturation and lightness as you desire. For more information you can check out this simple tutorial: http://www.twopeasinabucket.com/cg_display.asp?g=4&seed_id=22398
What to see what I created with the Live Laugh Love printable? Here are few cards for your viewing pleasure:
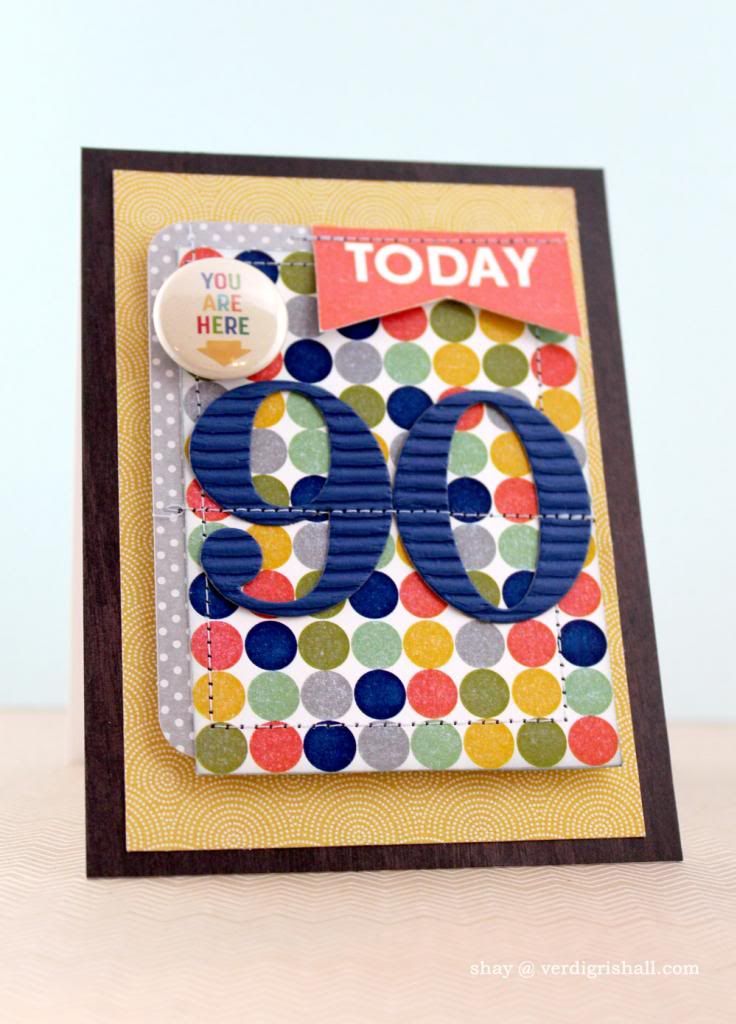
Card No. 1
Today is actually my grandfather's 90th birthday. For the occasion I made this card to celebrate such a momentous occasion. I used the dot journaling card and today banner from the Live Laugh Love printable with the Spencer's Card Kit, grey polka dot journaling card from the Clementine Core Kit and a 4x6 woodgrain journaling card by Studio Calico along with number dies from Papertrey Ink. I pulled out the sewing machine and went to town. The last element was a tin pin from October Afternoon.
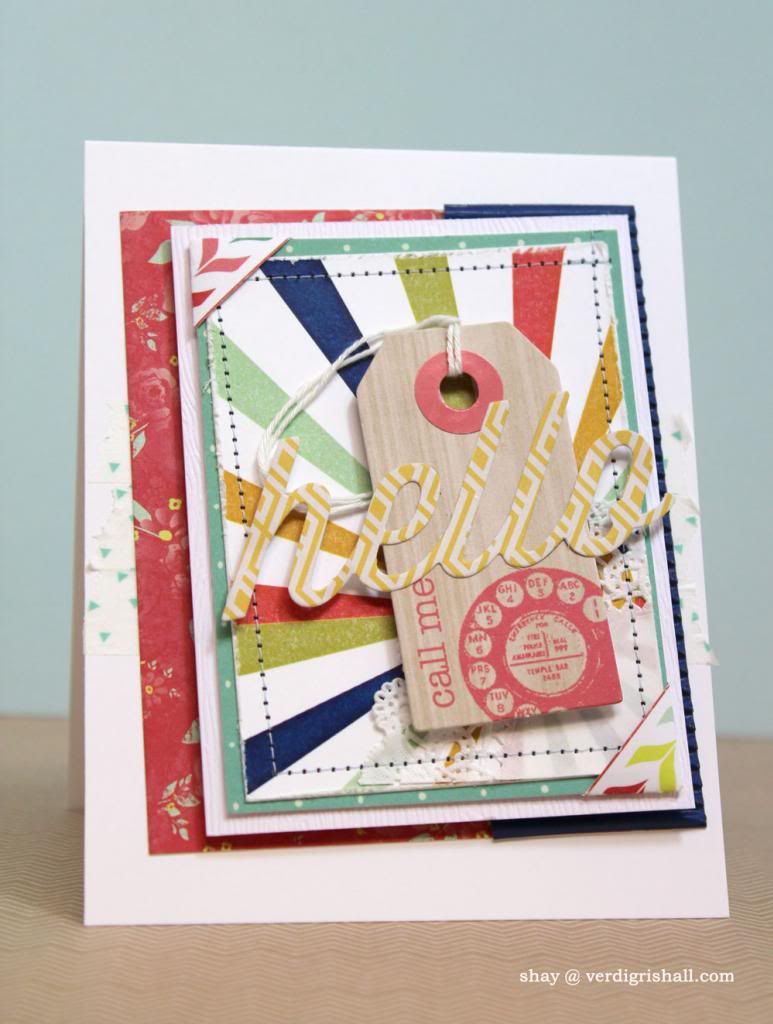
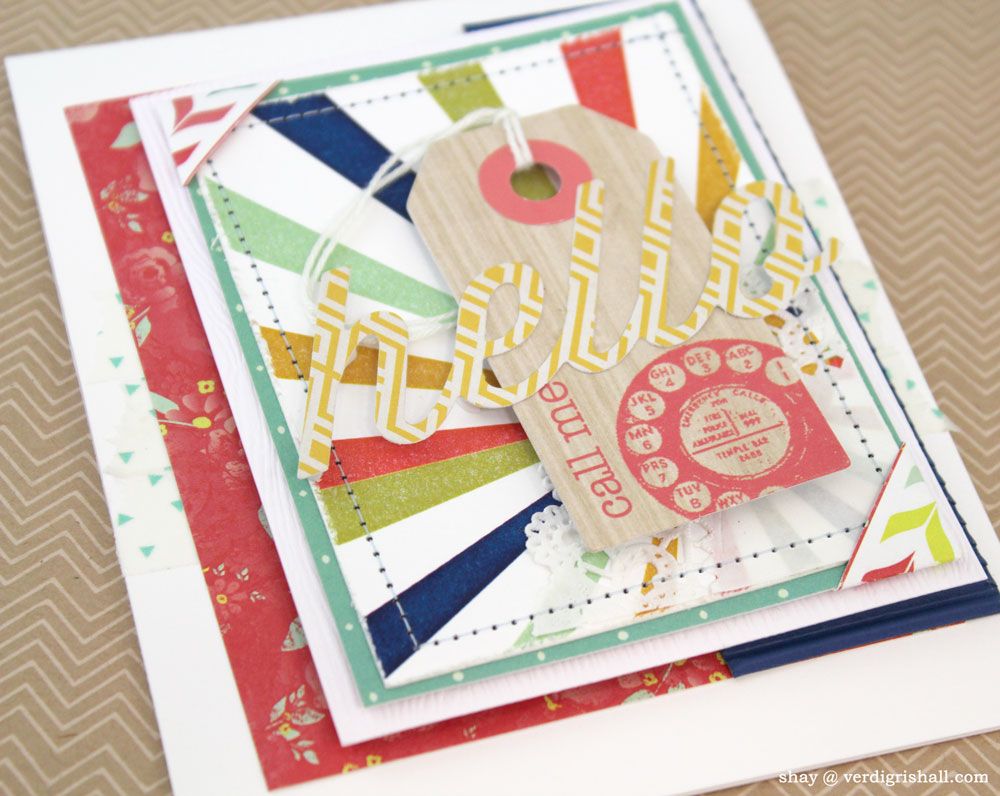
Card No. 2
This card features the burst journaling card from Live Laugh Love. It is a mix of things from Studio Calico (like the tag from Spencer's Card Kit and the journaling card under the burst journaling card) along with patterned paper from the 6x6 paper pad from the brand new Finnley collection by Glitz Design. I found this collection really fun to play with along with the printables. I also used the happy die from Papertrey Ink which I cut from the Soho Garden 6x6 paper pad.
Card No. 3
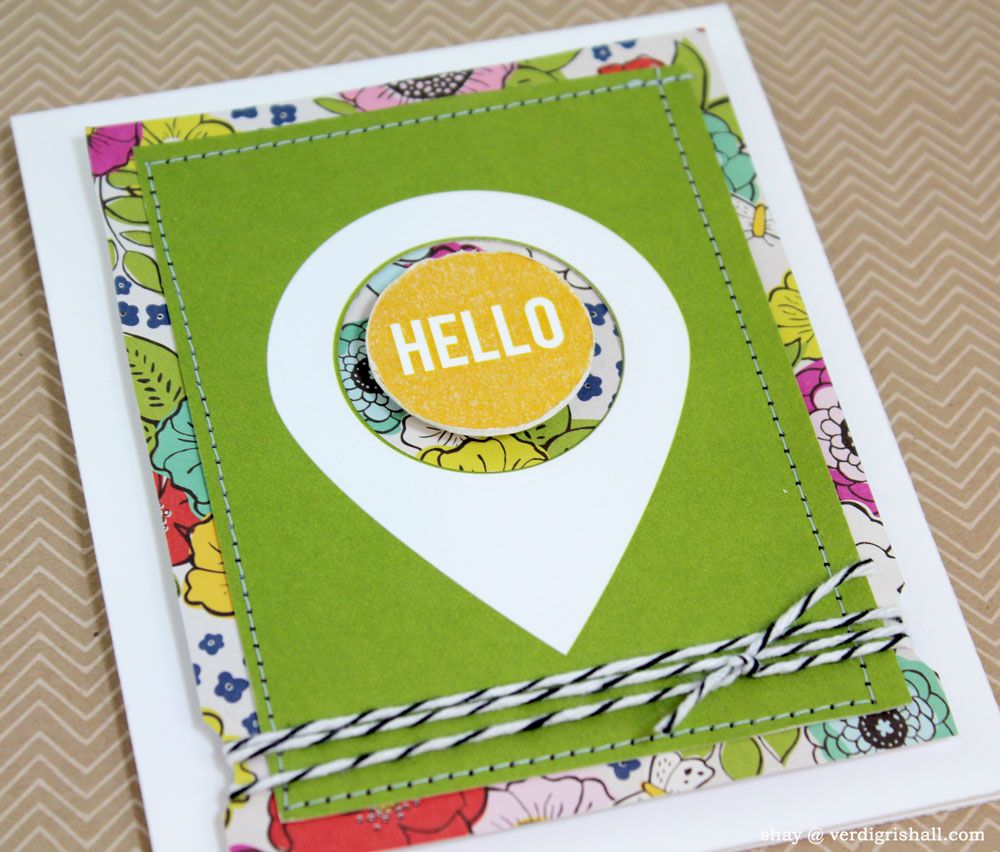
This card highlights the hello circle which I cut from the burst journaling card of the Live Laugh Love printable from Card No. 2 (I oh so cleverly covered up that section so you can't tell there is a hole where the hello circle should be). I added it to a geotag journaling card from Studio Calico and a fun and funky piece of patterned paper from the Soho Garden 6x6 paper pad. I notched the panel with a circle punch and added some ever useful black and white twine.
Card No. 4
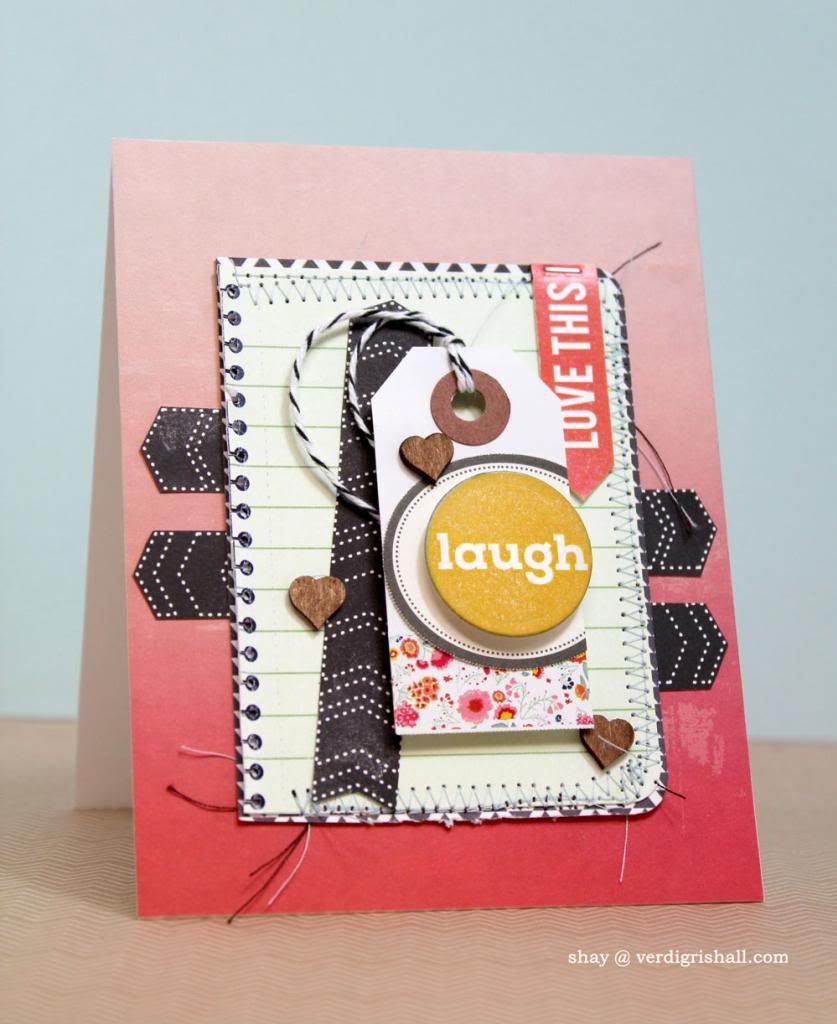
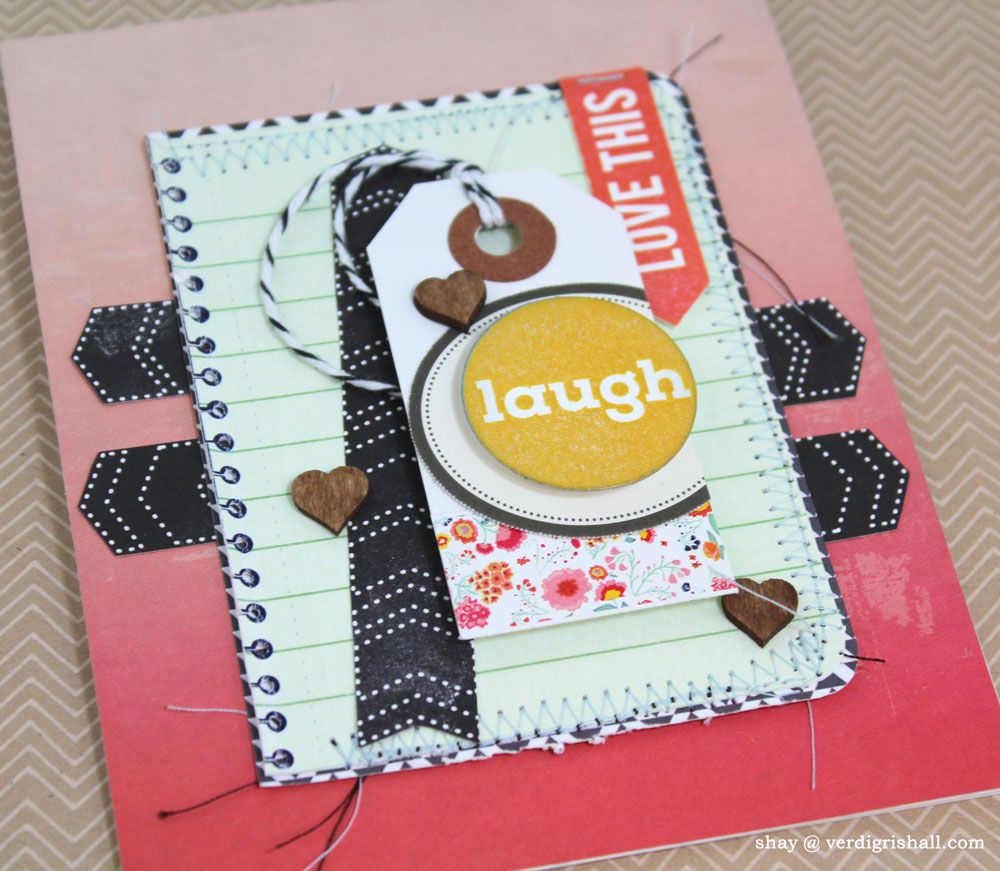
The notebook journaling card was the beginning piece of this card (I punched a hole through each of the navy circles and cut along the lines to give the notebook edge a bit more interest) which I built upon using other bits from the Live Laugh Love printable along with a journaling card from Studio Calico I cut up into arrows. I added a sticker from Dear Lizzy's Lucky Charm Accent & Phrase Sticker onto the tag along with a tag from Anna Griffin under the laugh printable. The patterned paper is again from the Finnley 6x6 paper pad. The last touch were wood veneer hearts by Studio Calico.
Card No. 5
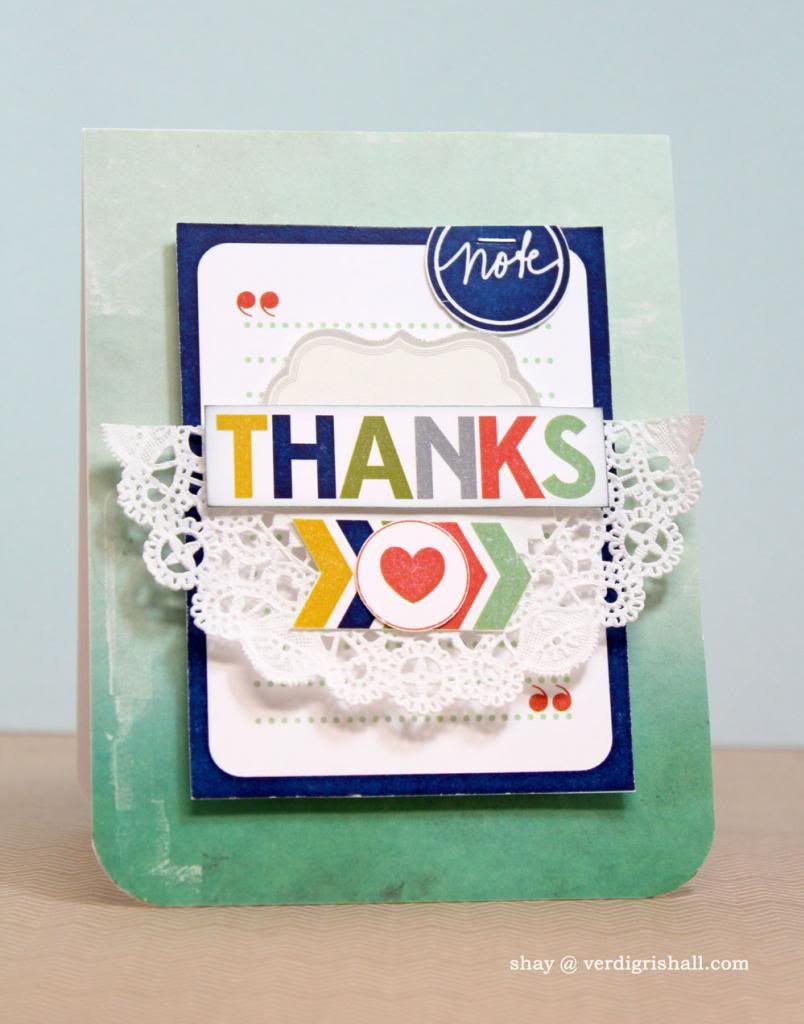
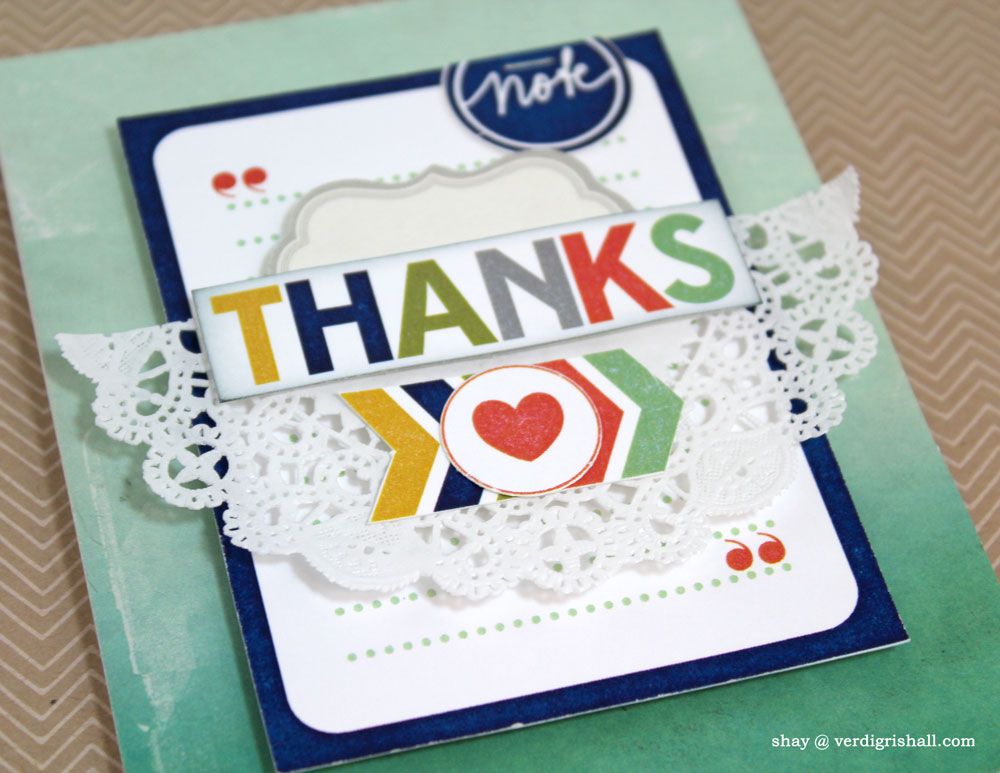
I tried to put quite a few of the elements from the Live Laugh Love printable on this one. The only elements not from the printable are the grey label from Anna Griffin, doily and the ombre patterned paper also from the Finnley 6x6 paper pad.
There you have my offerings to inspire you with the new and free Live Laugh Love printable. Make sure to download it and head on over to Julie's blog to see what she has done with the Live Laugh Love printable.
We would be over the moon to see how you used them so feel free to comment with a link!
Happy creating,
Shay.
Supplies:
live laugh love printable, Winnie & Walter
Spencer's Card Kit, Studio Calico
Cardstock: solar white, Neenah White; white woodgrain, Studio Calico; corrugated navy, stash
Patterned paper: Finnley 6x6 paper pad, Glitz Design; Soho Garden 6x6 paper pad, American Crafts
Dies: By the Numbers Die Collection and Wonderful Words: Hello die, Papertrey Ink; circle nestabilities, Spellbinders
Other: Cuttlebug, Provo Craft; journaling card from Clementine Project Life Core Kit, Becky Higgins; journaling cards, Studio Calico; sewing machine, Brother; tin pin from Boarding Pass collection, October Afternoon; accent & phrase stickers from Lucky Charm collection, Dear Lizzy/American Crafts; doily, Studio Calico; heart wood veneer, Studio Calico; labels, Anna Griffin; tiny attacher, Tim Holtz; white tag, Studio Calico; washi tape; black and white baker's twine, Whisker Graphics; 3/4" and 1" circle punches, Stampin' Up; Crop-A-Dile Chorner Chomper, We R Memory Keepers; dimensional adhesive
An eclectic, eccentric (often messy) house pieced together from paper, rubber stamps, a smidgen of glitter, grandiose dreams and a whole lot of glue.
Showing posts with label thank you. Show all posts
Showing posts with label thank you. Show all posts
August 23, 2013
Get Your Free On!
Labels:
birthday
,
cards
,
feminine
,
Finnley
,
free
,
gender neutral
,
Glitz Design
,
hello
,
julie mogford
,
live laugh love
,
male
,
Papertrey Ink
,
printables
,
sewing
,
Spencer's Card Kit
,
Studio Calico
,
thank you
,
Winnie & Walter
June 27, 2013
Avery Elle's June AEI♥U Challenge
Ever have some products parked in a shopping cart because you are eyeing them something awful, but the craft money is already spent? This was me with Avery Elle for a few months before I vowed that I would buy something. When they sweetened the offer for their first anniversary with an adorable free stamp set, Party Animal, I knew the time had come. That stamp set was way too cute to pass up! For your information, the offer is good until the end of this month, June 2013 {wink}. Let me also assure you that their customer service is excellent!
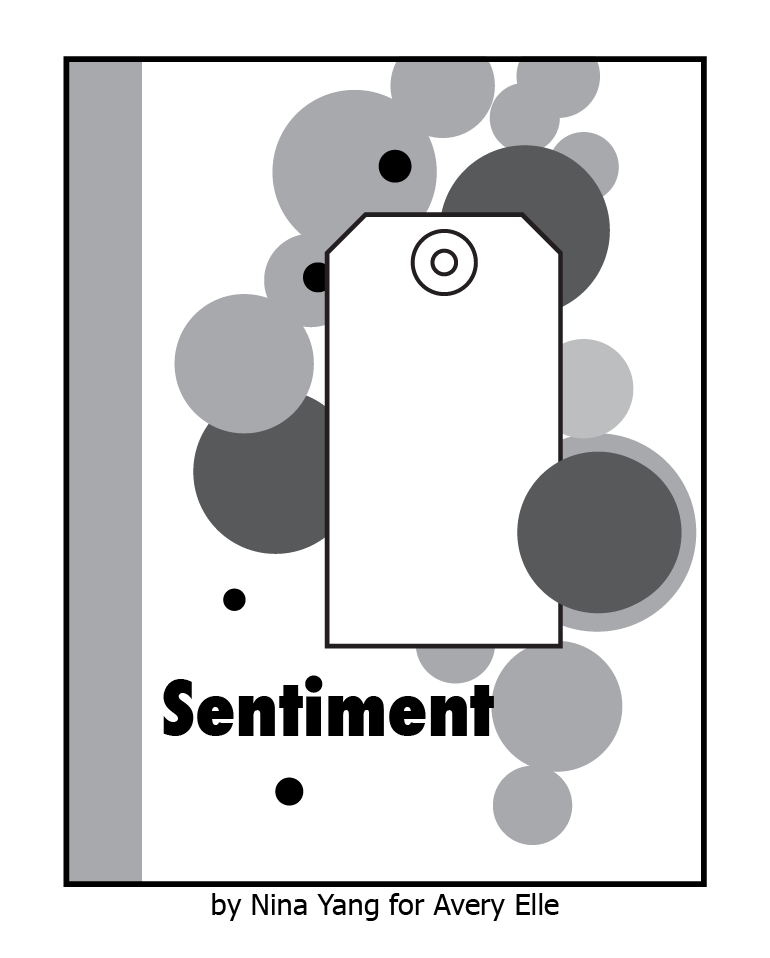
Avery Elle has a monthly AEI♥U Challenge that I am finally going to enter using this great card sketch:
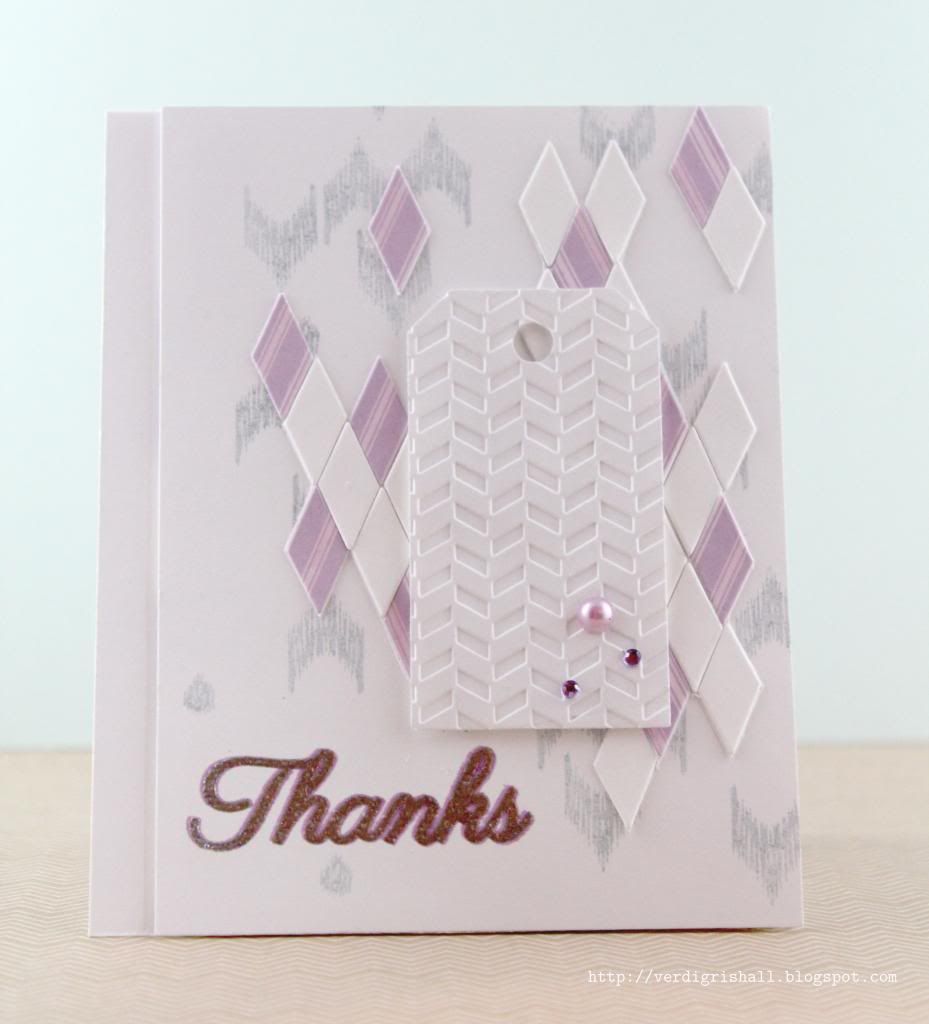
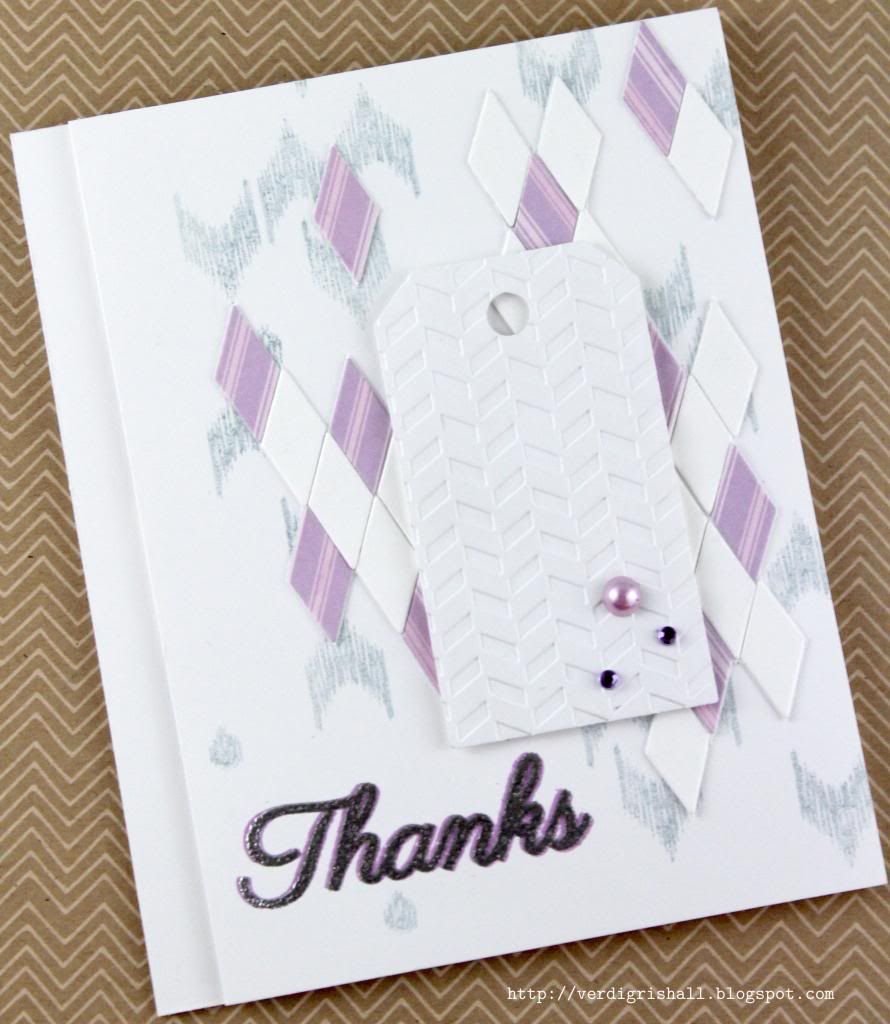
I took a chance and went with purple. I decided to mix the purple with a lot of white and touches of grey and silver. Here is what I created:
I used a mix of stamps and dies from Avery Elle and just had fun playing around. I love the Chevron Border die and used the little diamond pieces from inside the die designed by JJ Bolton (for more examples on how to use this die and others check out JJ Bolton's blog). I plan on experimenting with this awesome die some more! Another fun stamp set with matching dies are the Simply Tags: Everyday stamp set and dies designed by Nina Yang (who also designed that cool sketch above). I used the larger tag die which I embossed and stamped the sentiment in purple only to stamp over it with VersaMark and emboss with silver embossing powder.
For the subtle background behind the diamonds I stamped the ikat chevron (love!) from Ikat Additions in grey. This stamp set is a doozy and under $5.00!
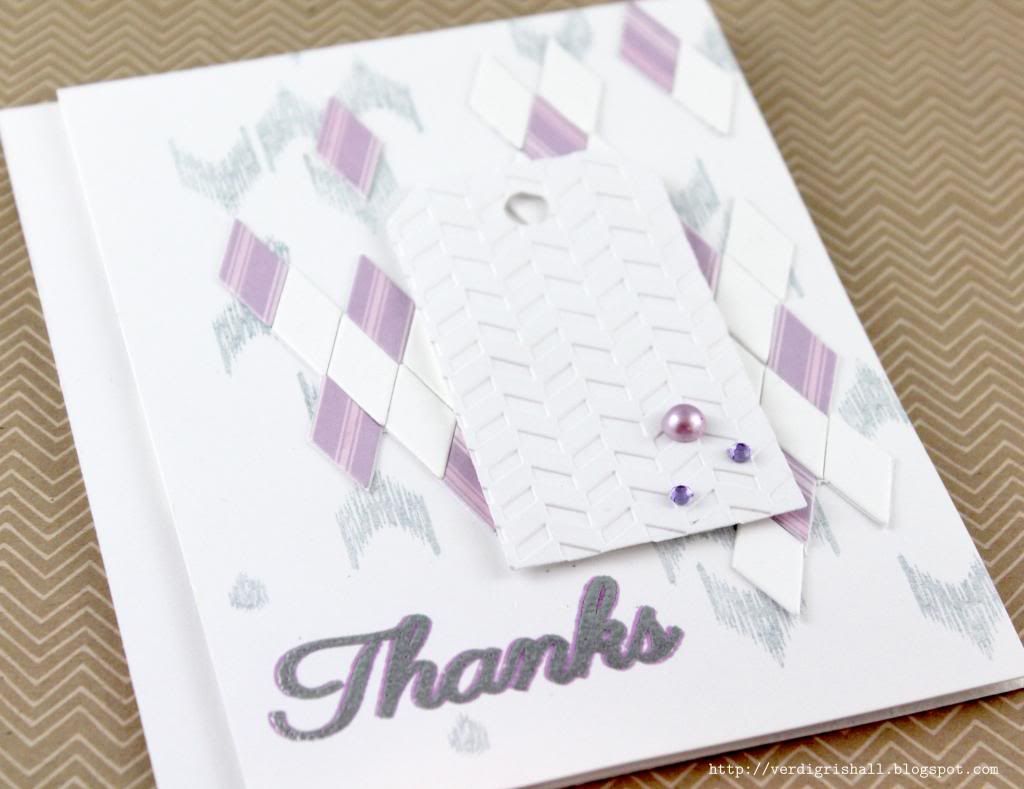
One last picture where you can see the silver of the embossed sentiment a little better:
So the moral of the story is that if you have been itching to buy some Avery Elle products I recommend doing so before July 1st or any time really as you won't be disappointed.
Thanks for taking the time to visit!
Happy creating,
Shay.
Supplies:
Stamps: Ikat Additions and Simply Tags: Everyday, Avery Elle
Ink: weather vane and lavender sachet, Jenni Bowlin for Ranger; VersaMark, Tsukineko
Cardstock: solar white, Neenah Paper
Patterned paper: Hero Arts
Dies: Simply Tags: Everyday ELLE-ments and Chevron Border ELLE-ments, Avery Elle
Other: Zig Zag embossing folders, Lifestyle Crafts; Cuttlebug, Provo Crafts; silver embossing powder, Ranger; jewels and pearl, Hero Arts; dimensional adhesive
Avery Elle has a monthly AEI♥U Challenge that I am finally going to enter using this great card sketch:
I took a chance and went with purple. I decided to mix the purple with a lot of white and touches of grey and silver. Here is what I created:
I used a mix of stamps and dies from Avery Elle and just had fun playing around. I love the Chevron Border die and used the little diamond pieces from inside the die designed by JJ Bolton (for more examples on how to use this die and others check out JJ Bolton's blog). I plan on experimenting with this awesome die some more! Another fun stamp set with matching dies are the Simply Tags: Everyday stamp set and dies designed by Nina Yang (who also designed that cool sketch above). I used the larger tag die which I embossed and stamped the sentiment in purple only to stamp over it with VersaMark and emboss with silver embossing powder.
One last picture where you can see the silver of the embossed sentiment a little better:
So the moral of the story is that if you have been itching to buy some Avery Elle products I recommend doing so before July 1st or any time really as you won't be disappointed.
Thanks for taking the time to visit!
Happy creating,
Shay.
Supplies:
Stamps: Ikat Additions and Simply Tags: Everyday, Avery Elle
Ink: weather vane and lavender sachet, Jenni Bowlin for Ranger; VersaMark, Tsukineko
Cardstock: solar white, Neenah Paper
Patterned paper: Hero Arts
Dies: Simply Tags: Everyday ELLE-ments and Chevron Border ELLE-ments, Avery Elle
Other: Zig Zag embossing folders, Lifestyle Crafts; Cuttlebug, Provo Crafts; silver embossing powder, Ranger; jewels and pearl, Hero Arts; dimensional adhesive
Labels:
AEI♥U Challenge
,
Avery Elle
,
card
,
challenge
,
embossing
,
Ikat Additions
,
JJ Bolton
,
Nina Yang
,
Simply Tags: Everyday
,
stamping
,
thank you
February 24, 2013
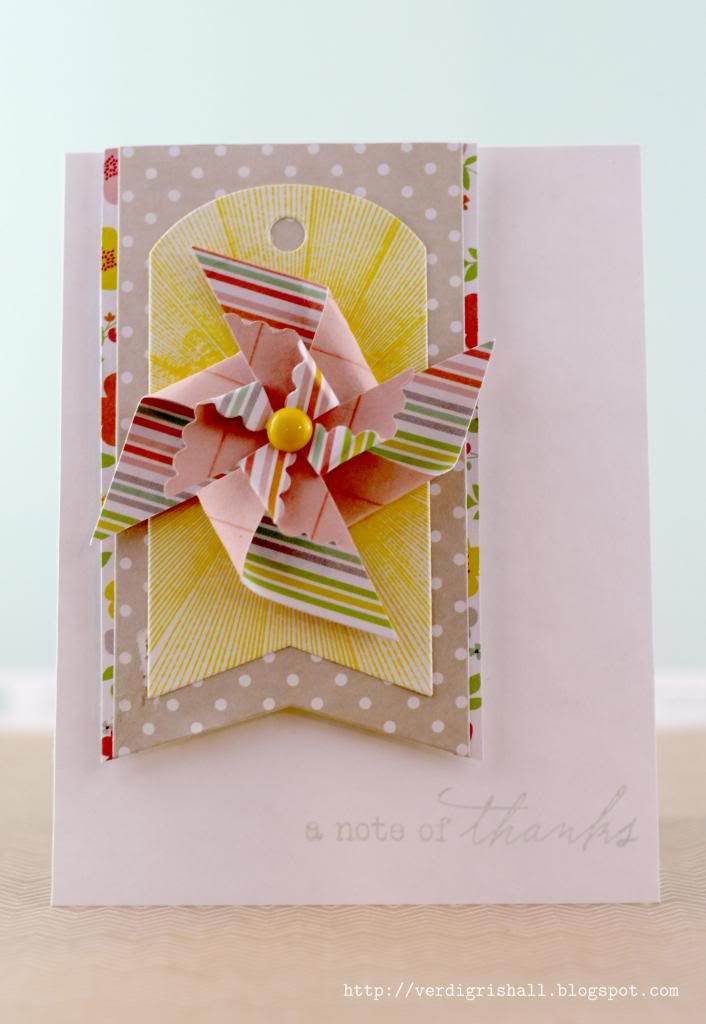
Papertrey Ink's Make It Monday #104: Handmade Pinwheels
Dear Reader,
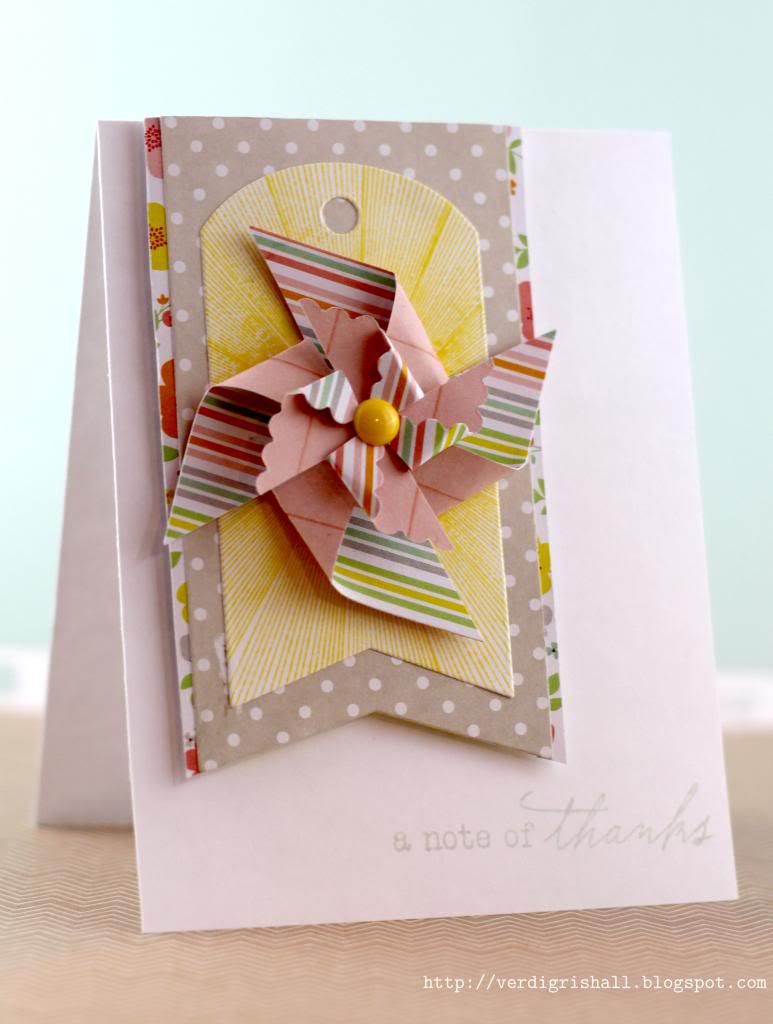
I found myself taking some time off blogging this week and was enjoying being the observer of beautiful art, creating and crafting that happens all over the world. I did make a card during my siesta. This week's Make It Monday #104: Handmade Pinwheels caught my attention. Does anyone else remember the show "Pinwheel"...as in "pinwheel, pinwheel spinning around look at my pinwheel and see what I found?" Good times. Anyway, Ashley Cannon Newell did a video showing a couple of options for making pinwheels that are super easy, but so fun and capture the happiness from childhood.
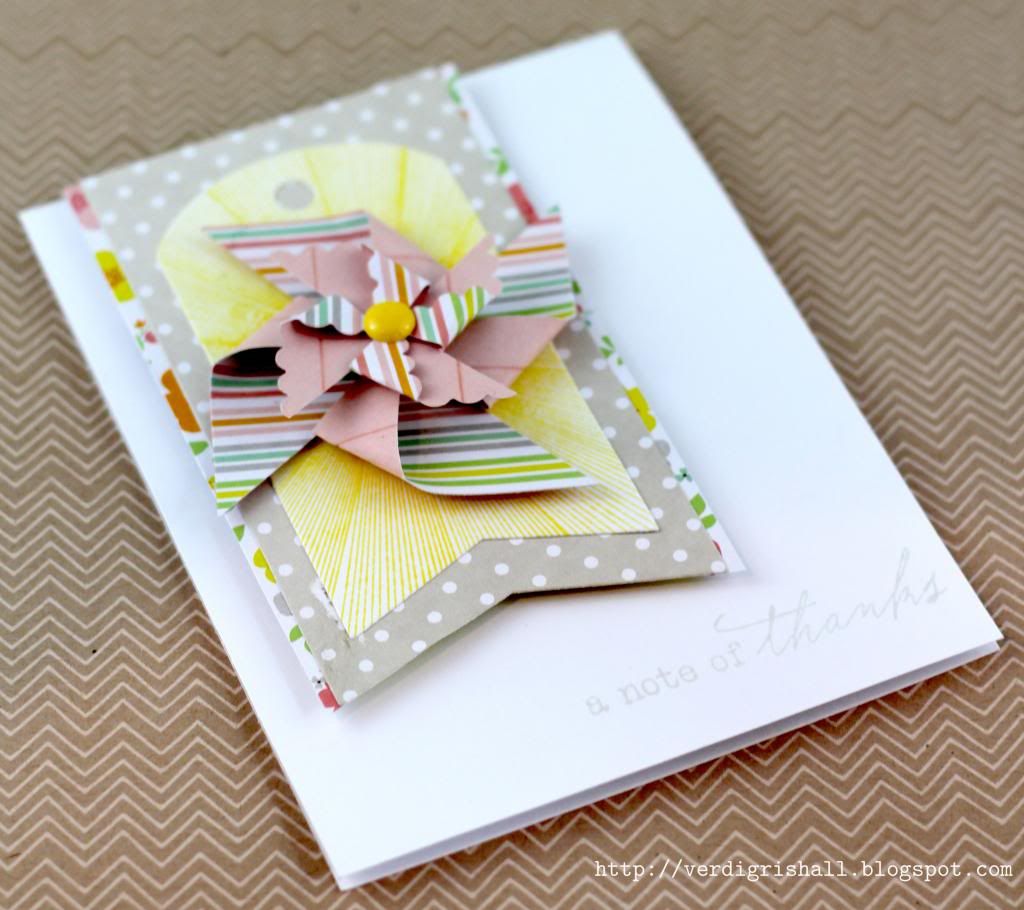
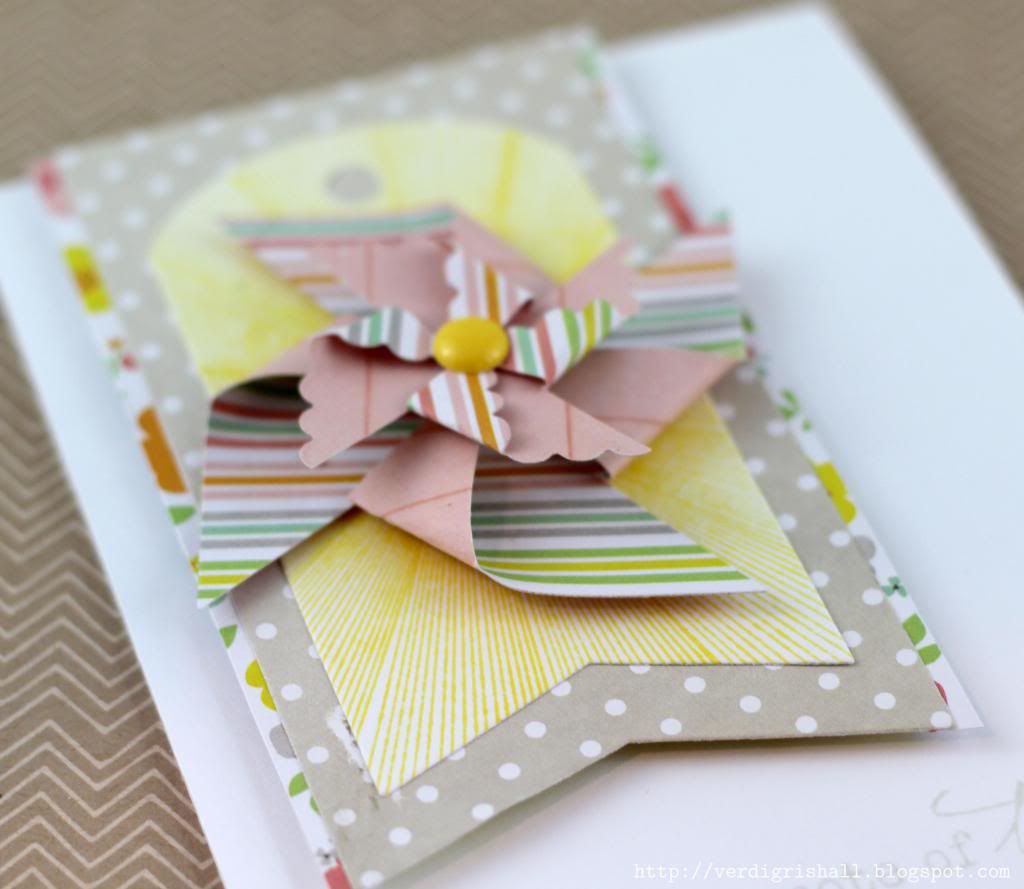
I went with cutting a larger square and a smaller scalloped square to create a double layer pinwheel. All the patterned paper for this card come from Dear Lizzy's Neapolitan collection. This may be a slightly older collection, but it is gorgeous and perfect for spring and summer which can be mixed up with other Dear Lizzy collections or numerous collections and products.
I stamped the lined ray from Hello Sunshine in yellow on piece of white cardstock cut from Tag Sale #5 Die...this is an endlessly useful shape and paired with the Wine Bottle Tag Die makes an instant statement. I added a little border of the floral design (from a strip found on the sea breeze paper) to each side of the Wine Bottle Tag Die. I adhered my pinwheels to the tag and then adhered it all to a piece of white cardstock. I stamped the sentiment in soft stone ink. Last touch was a yellow enamel dot to the center of the smaller pinwheel.
There you have it...a pretty pinwheel card.
I hope you have a delightful Sunday and enjoy the Oscars!
Happy creating,
Shay.
A Note of Thanks card
Supplies:
Stamps: Hello Sunshine and Happy Trails, Papertrey Ink
Ink: lemon drops, Jenni Bowlin for Ranger; soft stone, Papertrey Ink
Cardstock: white, Georgia Pacific
Patterened Paper: Sea Breeze and Cheerful Notes from Neapolitan collection, Dear Lizzy/American Crafts
Other: square and scallop square Nestabilities, Spellbinders; Tag Sale #5 Die and Wine Bottle Tag Die, Papertrey Ink; Cuttlebug, Provo Craft; The Sweetest Thing Honey "Love" Enamel Dots, My Mind's Eye
Labels:
American Crafts
,
Ashley Cannon Newell
,
card
,
challenge
,
Dear Lizzy
,
Make It Monday
,
Papertrey Ink
,
spring
,
summer
,
thank you
February 17, 2013
Moxie Fab World's Tuesday Trigger: I've a Notion
Dear Reader,
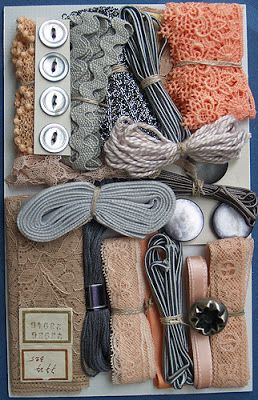
It was one of those days when a 20 minute chore blossomed into a 2 hour project. I don't mean the card I am going to share with you presently...I was able to fit working on it today in fits and starts. It began with an image from Moxie Fab World for it's Tuesday Trigger: I've a Notion:
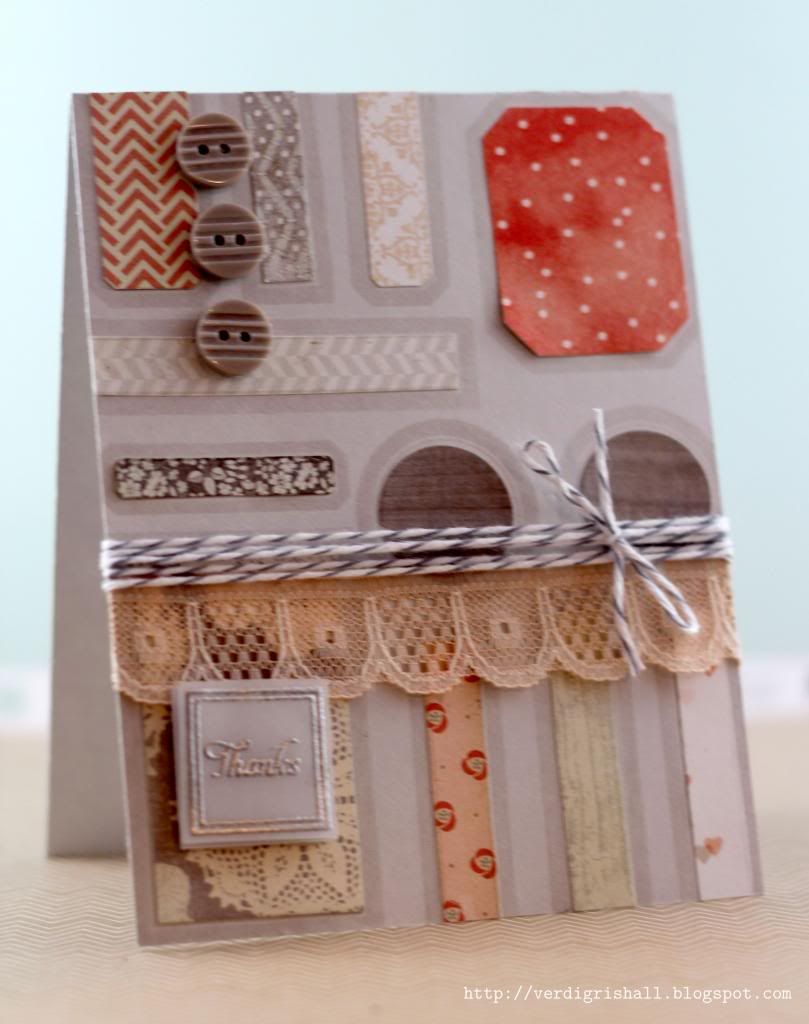
I am digging the peach/melon/orange and grey color scheme and I love the notions. I thought why not make a card with the colors and the design of this picture? It may be pretty literal, but I had fun.
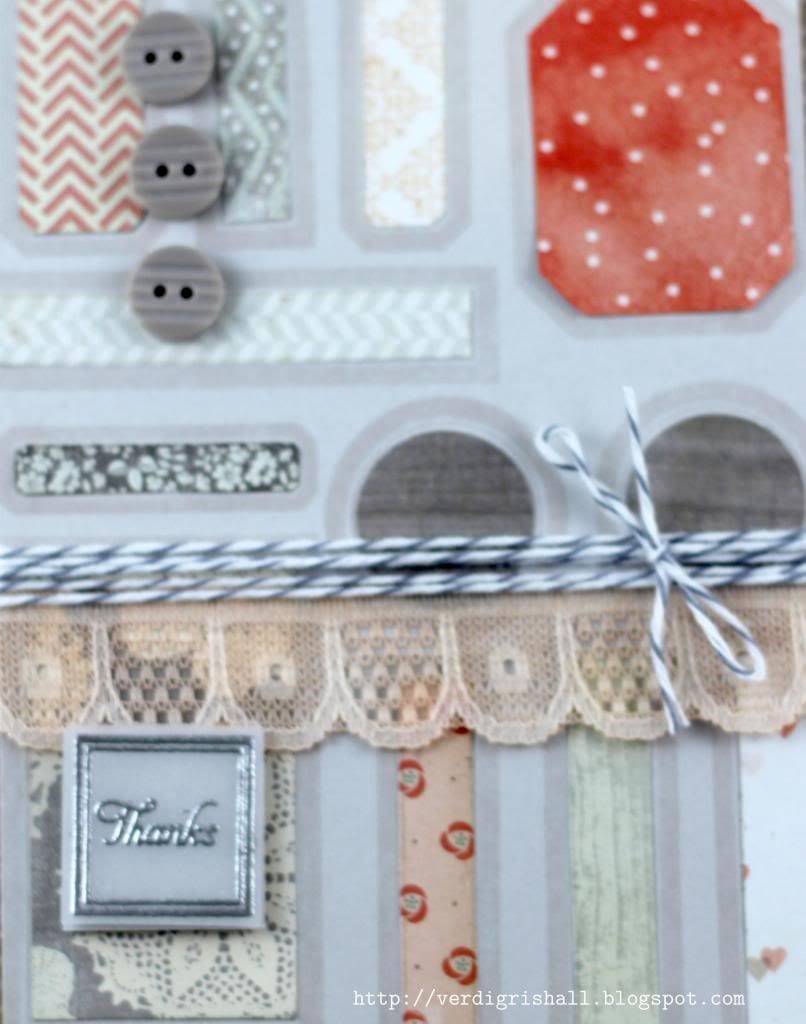
I got out my Label Basics stamp set from Papertrey Ink again as this card HERE sparked the basis of this card only this time around I was very specific about where I placed the shapes and also paper pieced. I searched my collection of 6x6 paper pads for various patterned papers that worked for the color scheme and sort of followed the picture for placement. I added a piece of lace dyed with very watered down Mister Huey's for a peach color, baker's twine, three grey buttons and a little silver embossed vellum square for the sentiment.
I hope you enjoyed tonight's card! Have a great beginning to your week.
Happy Creating,
Shay.
I've a Notion Card
Supplies:
Stamps: Label Basics, Borders and Corners Square and Tiny Tags, Papertrey Ink
Ink: soft stone, Papertrey Ink; VersaMark, Tsukineko
Cardstock: grey, stash
Paper: vellum
Patterned Paper: Plumeria 6x6 paper pad, Basic Grey; Tangerine and Honey the sweetest thing 6x6 paper pads, Love Me 6x6 paper pad and Nostalgia 6x6 paper pad, My Mind's Eye; Paper Heart 6x6 paper pad, Crate Paper; Now & Then 6x6 paper pad, Teresa Collins; and Hello Friend 6" Glitz Paper Pack, Glitz Design
Other: buttons from Sasaparilla collection, October Afternoon; Lucille Mister Huey's Color Mists, Studio Calico; grey and white baker's twine, Divine Twine by Whisper Graphics; silver embossing powder, Ranger; circle nestabilities dies, Spellbinders; Cuttlebug, Provo Craft; dimensional adhesive
Labels:
card
,
challenge
,
embossing
,
moxie fab world challenge
,
paper piecing
,
thank you
,
tuesday trigger
February 13, 2013
Papertrey Ink's 6th Anniversary: Watercolor Challenge
Dear Reader,
How are you this Tuesday night/Wednesday morning? I happily spent a few hours playing with ways to watercolor thanks to the watercolor challenge on Nichole Heady's blog for Papertrey Ink.
My first card uses emboss resist which I have always loved and watercoloring using Tim Holtz Distress Markers, water and a paint brush:
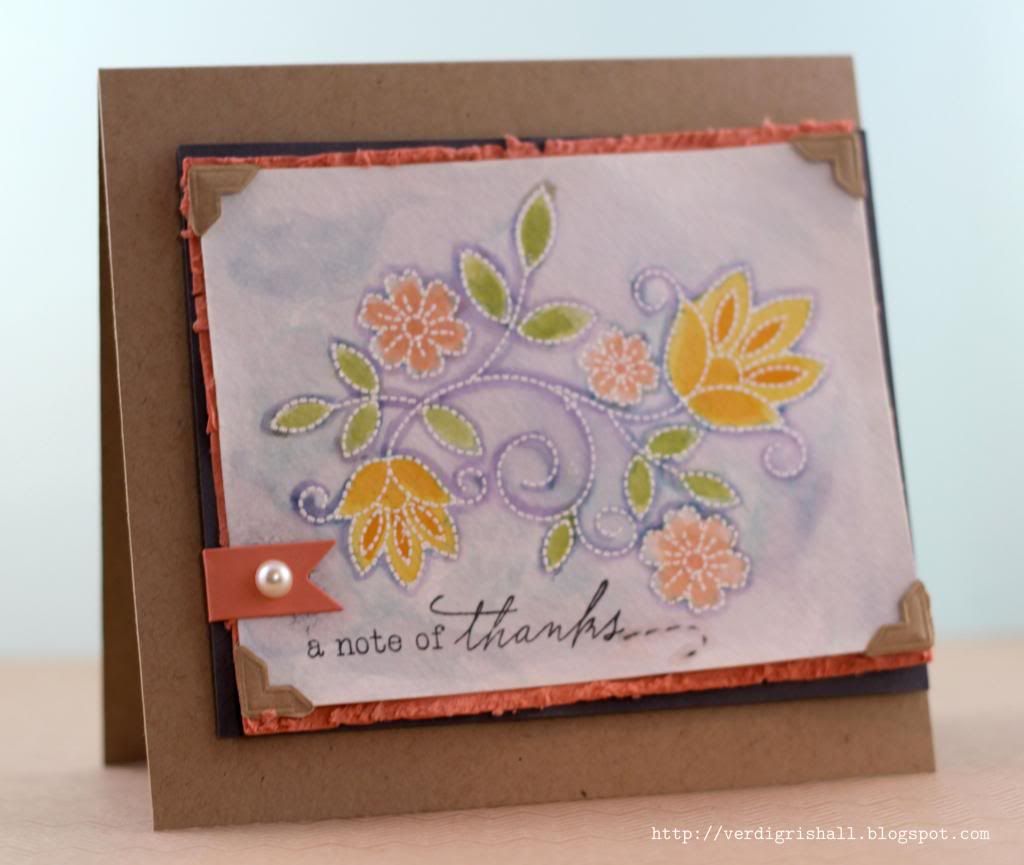
I cut a panel from watercolor paper and embossed the largest image from Stitches & Swirls. As I mentioned I used Distress Markers, water and paint brushes to paint in the image. I scribbled onto my crafting mat and then picked up the color using my brush, adding water as needed. When I finished painting in the image, I was worried that it read as being outdated so I tried to be more edgy or trendy with the rest of the card. I stamped that lovely sentiment from Happy Trails. I added a little stitched tail after the sentiment with a black soot Distress Marker. You notice the little melon berry banner with the pearl? That was used to cover up a mess up on my part. I added the kraft photo corners for interest. I adhered the watercolor panel to a distressed piece of melon berry cardstock and then to a piece of smokey shadow cardstock at a slight angle. Everything was then placed on a kraft card base using dimensional adhesive. I am pretty happy with the finished card and I adore melon berry, smokey shadow and kraft together...how about you?
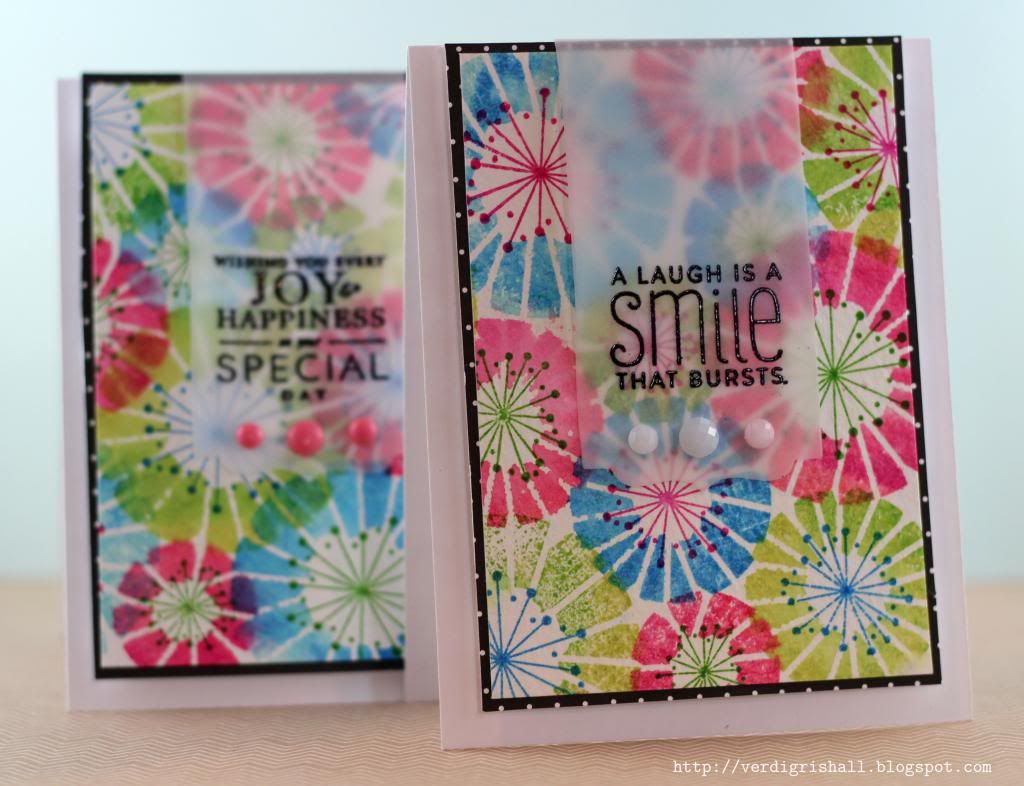
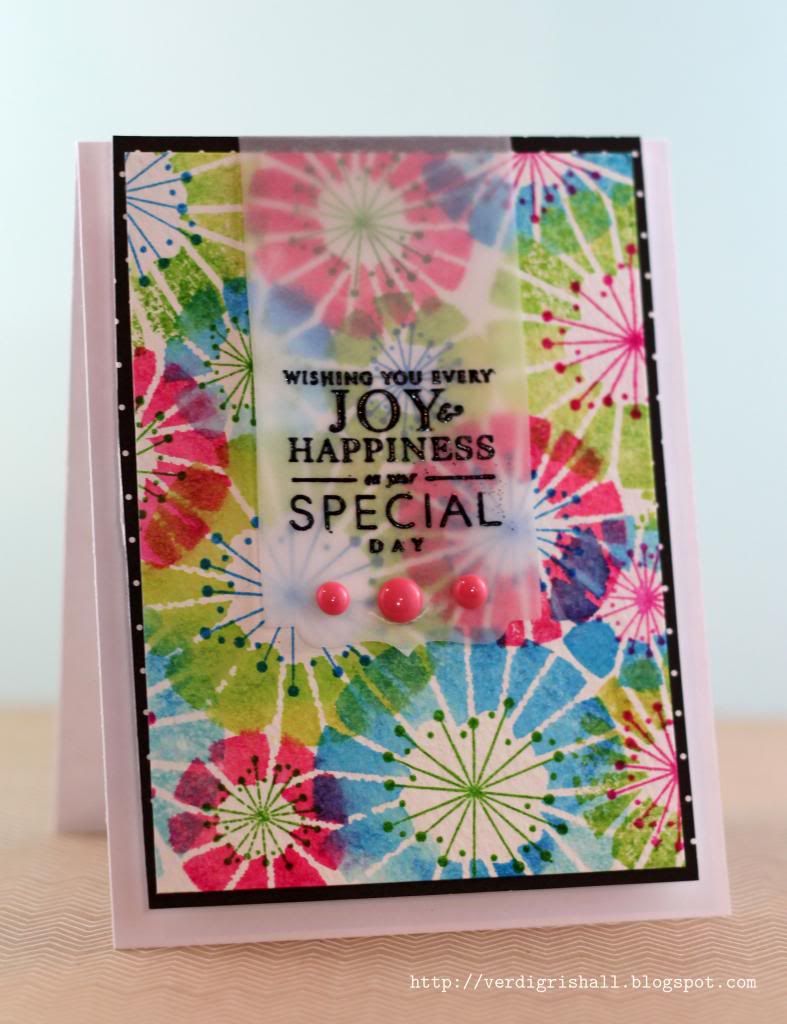
For my next two cards I wanted to do a different watercolor technique in really bold colors and images. I pulled out the Funky Florals stamp set and Tim Holtz Distress Inks and went to town:
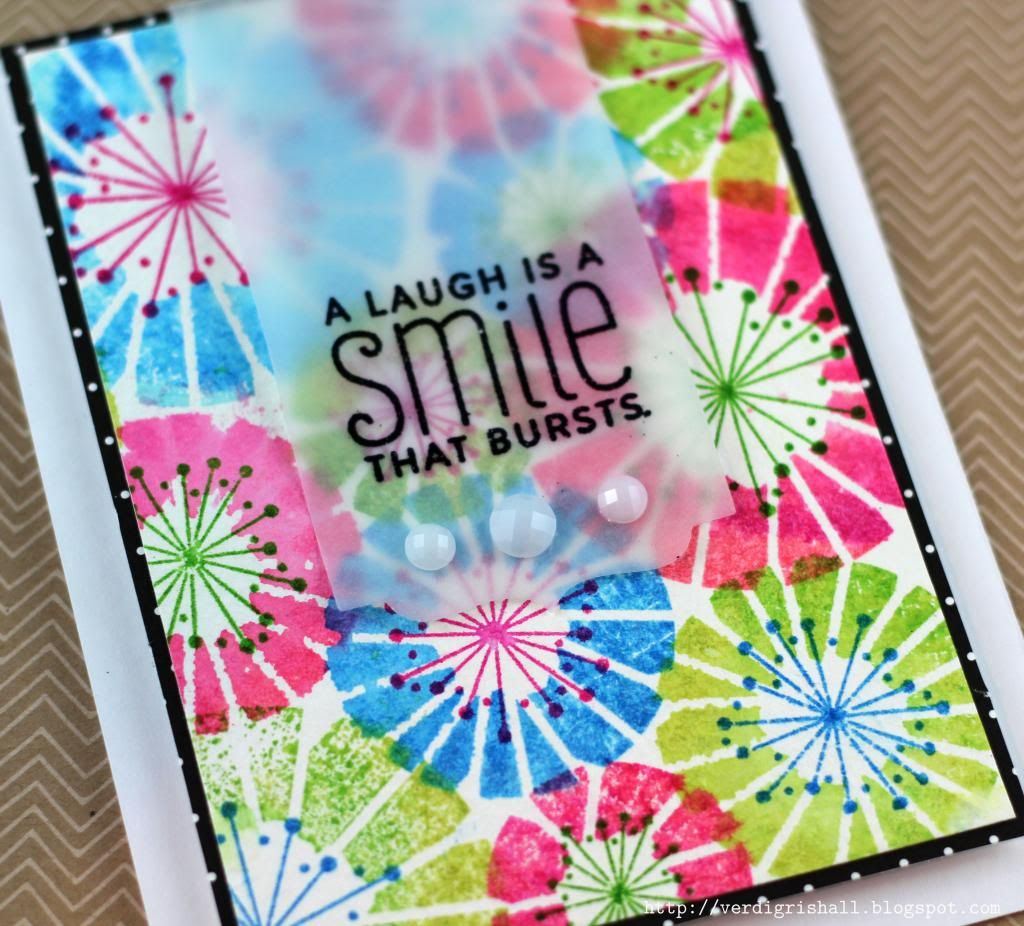
Each time I stamped a flower I first inked up the image in the lighter hue and then added a little of the darker hue (for instance first worn lipstick and second picked raspberry) Next I lightly spritzed water on the stamp before stamping it on a piece of watercolor paper. I covered the whole piece with flowers in 3 sizes and 3 colors. Then I stamped in the burst centers. The watercolor panel was large enough to cut in half once I finished to make two cards. I adhered each watercolor panel to a piece of black bitty dot patterned paper. I cut out one of the half & half die collection using vellum twice which I embossed with black embossing powder using a sentiment from Funky Florals and Half & Half. I added enamel dots and gems to the vellum and adhered it to the watercolor panel which I then adhered to a white card base.
There you have it. I had a blast (people still say that right?) playing with watercolor techniques and need to remember to revisit it to try even more.
Thank you so much for joining me and I hope you have a bright and happy day!
Happy creating,
Shay.
a note of thanks card
Supplies:
Stamps: Stitches & Swirls and Happy Trails, Papertrey Ink
Ink: VersaMark, Tsukineko; basic gray, Stampin' Up!
Cardstock: melon berry, smokey shadow & kraft, Papertrey Ink
Paper: cold press watercolor 400 series, Strathmore
Other: double-ended banner die, Papertrey Ink; Cuttlebug, Provo Craft; Tim Holtz Distress Markers, Ranger; opaque white embossing powder, JudiKins; dimensional adhesive; kraft photo corners; pearl; paint brush, water
bold and funky cards
Stamps: Funky Florals and Half & Half, Papertrey Ink
Ink: worn lipstick, picked raspberry, shabby shutters, mowed lawn, tumbled glass, salty ocean, Tim Holtz Distress Ink by Ranger; VersaMark, Tsukineko
Cardstock: white, Georgia Pacific
Paper: cold press watercolor 400 series, Strathmore; vellum
Patterned paper: black from 2008 Bitty Dot Basics Patterned Paper 8x8, Papertrey Ink
Other: half & half die collection, Papertrey Ink; Cuttlebug, Provo Craft; detail black embossing powder, JudiKins; Lost & Found 3 Ruby enamel dots, My Mind's Eye; opaque gems, Studio Calico; dimensional adhesive, spray bottle, water
How are you this Tuesday night/Wednesday morning? I happily spent a few hours playing with ways to watercolor thanks to the watercolor challenge on Nichole Heady's blog for Papertrey Ink.
My first card uses emboss resist which I have always loved and watercoloring using Tim Holtz Distress Markers, water and a paint brush:
I cut a panel from watercolor paper and embossed the largest image from Stitches & Swirls. As I mentioned I used Distress Markers, water and paint brushes to paint in the image. I scribbled onto my crafting mat and then picked up the color using my brush, adding water as needed. When I finished painting in the image, I was worried that it read as being outdated so I tried to be more edgy or trendy with the rest of the card. I stamped that lovely sentiment from Happy Trails. I added a little stitched tail after the sentiment with a black soot Distress Marker. You notice the little melon berry banner with the pearl? That was used to cover up a mess up on my part. I added the kraft photo corners for interest. I adhered the watercolor panel to a distressed piece of melon berry cardstock and then to a piece of smokey shadow cardstock at a slight angle. Everything was then placed on a kraft card base using dimensional adhesive. I am pretty happy with the finished card and I adore melon berry, smokey shadow and kraft together...how about you?
For my next two cards I wanted to do a different watercolor technique in really bold colors and images. I pulled out the Funky Florals stamp set and Tim Holtz Distress Inks and went to town:
There you have it. I had a blast (people still say that right?) playing with watercolor techniques and need to remember to revisit it to try even more.
Thank you so much for joining me and I hope you have a bright and happy day!
Happy creating,
Shay.
a note of thanks card
Supplies:
Stamps: Stitches & Swirls and Happy Trails, Papertrey Ink
Ink: VersaMark, Tsukineko; basic gray, Stampin' Up!
Cardstock: melon berry, smokey shadow & kraft, Papertrey Ink
Paper: cold press watercolor 400 series, Strathmore
Other: double-ended banner die, Papertrey Ink; Cuttlebug, Provo Craft; Tim Holtz Distress Markers, Ranger; opaque white embossing powder, JudiKins; dimensional adhesive; kraft photo corners; pearl; paint brush, water
bold and funky cards
Stamps: Funky Florals and Half & Half, Papertrey Ink
Ink: worn lipstick, picked raspberry, shabby shutters, mowed lawn, tumbled glass, salty ocean, Tim Holtz Distress Ink by Ranger; VersaMark, Tsukineko
Cardstock: white, Georgia Pacific
Paper: cold press watercolor 400 series, Strathmore; vellum
Patterned paper: black from 2008 Bitty Dot Basics Patterned Paper 8x8, Papertrey Ink
Other: half & half die collection, Papertrey Ink; Cuttlebug, Provo Craft; detail black embossing powder, JudiKins; Lost & Found 3 Ruby enamel dots, My Mind's Eye; opaque gems, Studio Calico; dimensional adhesive, spray bottle, water
Labels:
birthday
,
cards
,
embossing
,
everyday
,
just because
,
Nichole Heady
,
Papertrey Ink
,
thank you
,
watercolor
February 5, 2013
Papertrey Ink's 6th Anniversary: Design Team Inspiration
Dear Reader,
I have a soft spot in my heart for Papertrey Ink. I stumbled upon the company sometime in 2008 I believe and have been a fan ever since. I love how cleverly designed and thoughtfully crafted their products are. I have spoken of them so often I receive gift certificates from them for birthdays (thank you to my sister for this year's birthday gift which is just in time for their anniversary release) and Valentine's Day (no flowers, chocolate or diamonds for me...give me craft supplies thank you very much!) . From February 5th - February 15th they are celebrating 6 years.
Their first day of festivities focused upon the their design team. I also find their design team to be well...stellar. I think I have mentioned Betsy Veldman at least once as well as Maile Belles, but each member really puts a lot of heart and talent into their creations month after month. For more information about today's celebrations check HERE.
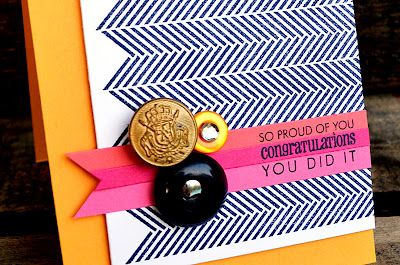
I decided to pick this project from Jessica Witty as my inspiration:
I love the pops of color against the strong black and white graphic design with a touch of ombre, gold and typography for a trendy and classy card.
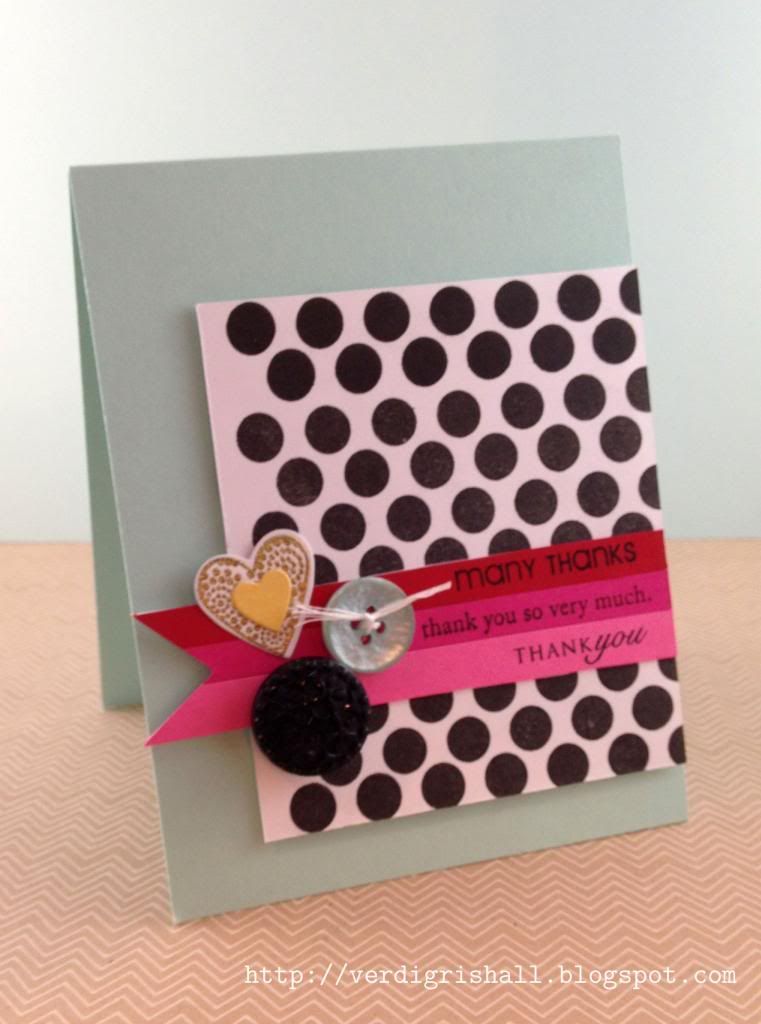
If imitation is the sincerest form of flattery then I hope Jessica Witty is very flattered by this card:
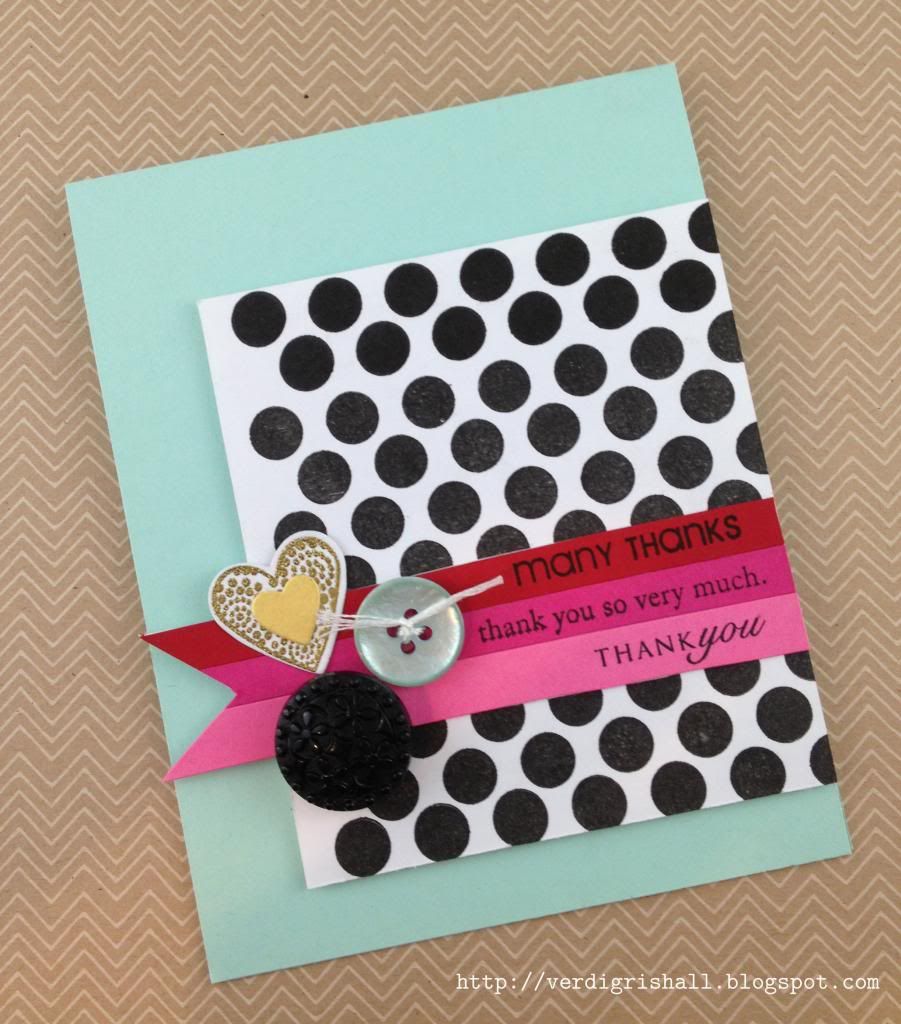
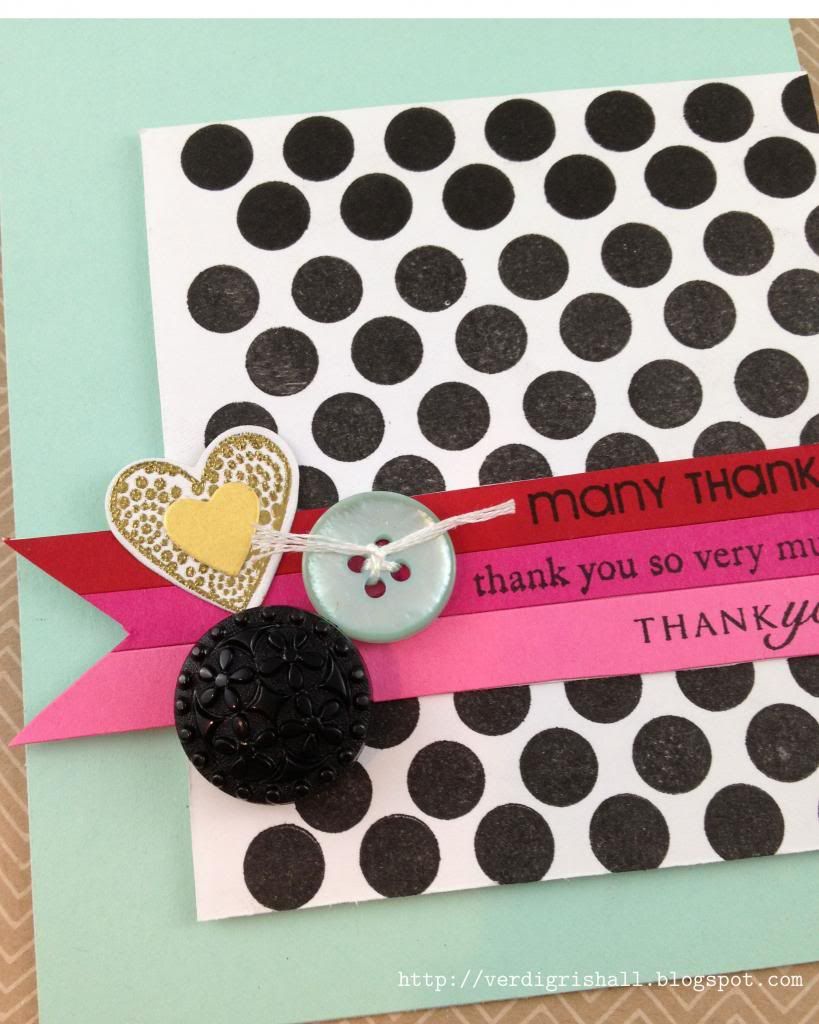
There is very little I altered from her card because it is perfect as is. I changed up the colors to fit this time of year, added gold hearts instead of a button for the recipient who loves hearts, changed out the sentiments for a thank you card and used Polka Dot Basics II instead of the Backgrounds Basics: Herringbone simply because I don't have the herringbone stamp. Still, I really like this card because it reminds me so much of Jessica Witty's.
Another view of the card:
Many thanks to Jessica Witty for her inspiring card and for the whole Papertrey Ink's Design Team!
Happy creating,
Shay.
Many Thanks Card
Supplies:
Stamps: Polka Dot Basics II, Heart Prints, Fillable Frames #1, Mat Stack 1 Collection and Round & Round (limited edition), Papertrey Ink
Ink: Versamark and onyx black VersaFine, Tsukineko
Cardstock: aqua mist, hibiscus burst, raspberry fizz and pure poppy, Papertrey Ink; white, Georgia Pacific; gold cardstock, stash
Other: detail metallic gold embossing powder, JudiKins; aqua mist button, Papertrey Ink; black button, Bizzy Buttons; white embroidery floss, DMC; Heart Prints Die Collection, Papertrey Ink; Cuttlebug, Provo Craft; dimensional adhesive, Stampin' Up!
I have a soft spot in my heart for Papertrey Ink. I stumbled upon the company sometime in 2008 I believe and have been a fan ever since. I love how cleverly designed and thoughtfully crafted their products are. I have spoken of them so often I receive gift certificates from them for birthdays (thank you to my sister for this year's birthday gift which is just in time for their anniversary release) and Valentine's Day (no flowers, chocolate or diamonds for me...give me craft supplies thank you very much!) . From February 5th - February 15th they are celebrating 6 years.
Their first day of festivities focused upon the their design team. I also find their design team to be well...stellar. I think I have mentioned Betsy Veldman at least once as well as Maile Belles, but each member really puts a lot of heart and talent into their creations month after month. For more information about today's celebrations check HERE.
I decided to pick this project from Jessica Witty as my inspiration:
I love the pops of color against the strong black and white graphic design with a touch of ombre, gold and typography for a trendy and classy card.
If imitation is the sincerest form of flattery then I hope Jessica Witty is very flattered by this card:
Another view of the card:
And a close up:
Many thanks to Jessica Witty for her inspiring card and for the whole Papertrey Ink's Design Team!
Happy creating,
Shay.
Many Thanks Card
Supplies:
Stamps: Polka Dot Basics II, Heart Prints, Fillable Frames #1, Mat Stack 1 Collection and Round & Round (limited edition), Papertrey Ink
Ink: Versamark and onyx black VersaFine, Tsukineko
Cardstock: aqua mist, hibiscus burst, raspberry fizz and pure poppy, Papertrey Ink; white, Georgia Pacific; gold cardstock, stash
Other: detail metallic gold embossing powder, JudiKins; aqua mist button, Papertrey Ink; black button, Bizzy Buttons; white embroidery floss, DMC; Heart Prints Die Collection, Papertrey Ink; Cuttlebug, Provo Craft; dimensional adhesive, Stampin' Up!
Labels:
card
,
inspiration
,
Jessica Witty
,
Papertrey Ink
,
thank you
Subscribe to:
Posts
(
Atom
)
